Automate the Boring Stuff with Slackbot (ver. 2)
Takanori Suzuki
PyCon JP 2022 / 2022 Oct 15
退屈なことは Slackbot にやらせよう (ver. 2)
Takanori Suzuki
PyCon JP 2022 / 2022 Oct 15
Agenda / アジェンダ 📋
Background and Motivation for Slackbot
How to create simple bot
How to create interactive bot
How to extend bot using libs and APIs
Photos 📷 Tweets 🐦 👍
#pyconjp / #pyconjp_1 / @takanory
Slide 💻
今日はPyCon JP 2022で13:00からTrack 1で「Automate the Boring Stuff with Slackbot(ver.2) 」で発表します。退屈なことをbotにやらせたい人はぜひ聞きに来てくださいー。発表資料はこちら https://t.co/bUrVXtqR5I #pyconjp #pyconjp_1
— Takanori Suzuki (@takanory) October 15, 2022
Why ver. 2 in the title? ✌️
なぜタイトルに ver. 2 が入ってるの?
Back to 2019 / 2019年に遡る ⏪
Title: “Automate the Boring Stuff with Slackbot”
Talk in 🇵🇭 🇹🇭 🇲🇾 🇯🇵 🇹🇼 🇸🇬 🇮🇩
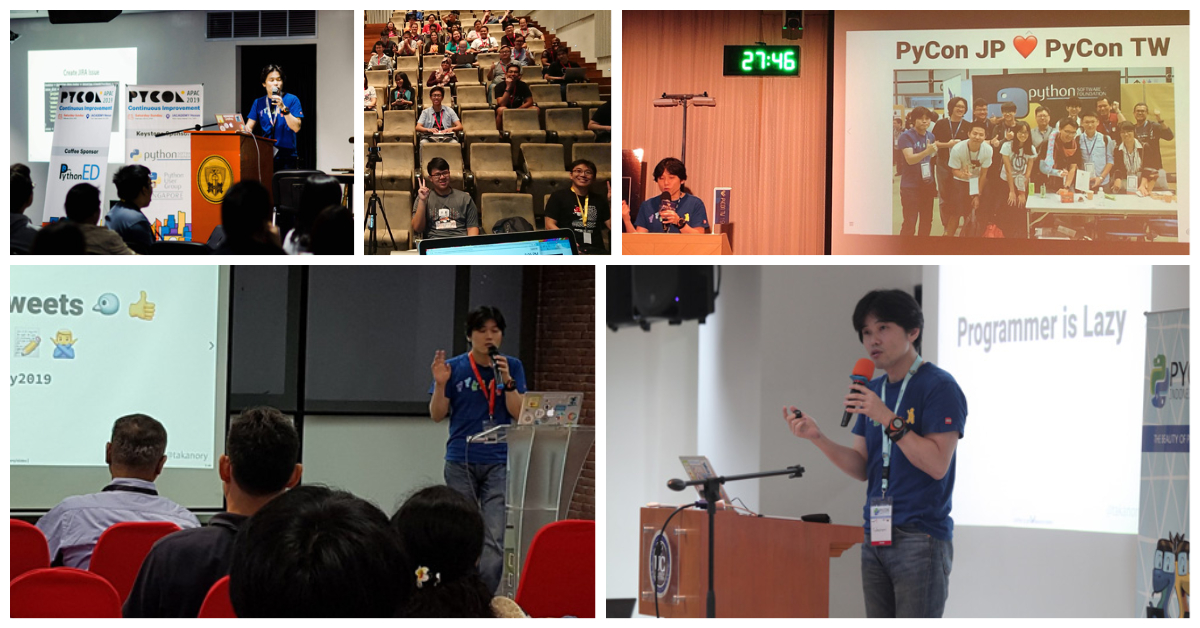
And the 2022 / そして2022年 ⏩
Updated with latest information 🆕
In-person event after COVID-19 in Japan 🇯🇵
Thanks to PyCon JP staff and volunteers!! 👏
Who am I? / お前誰よ 👤
Takanori Suzuki / 鈴木 たかのり ( @takanory)
PyCon JP Association Vice Chair
BeProud Inc. Director / Python Climber


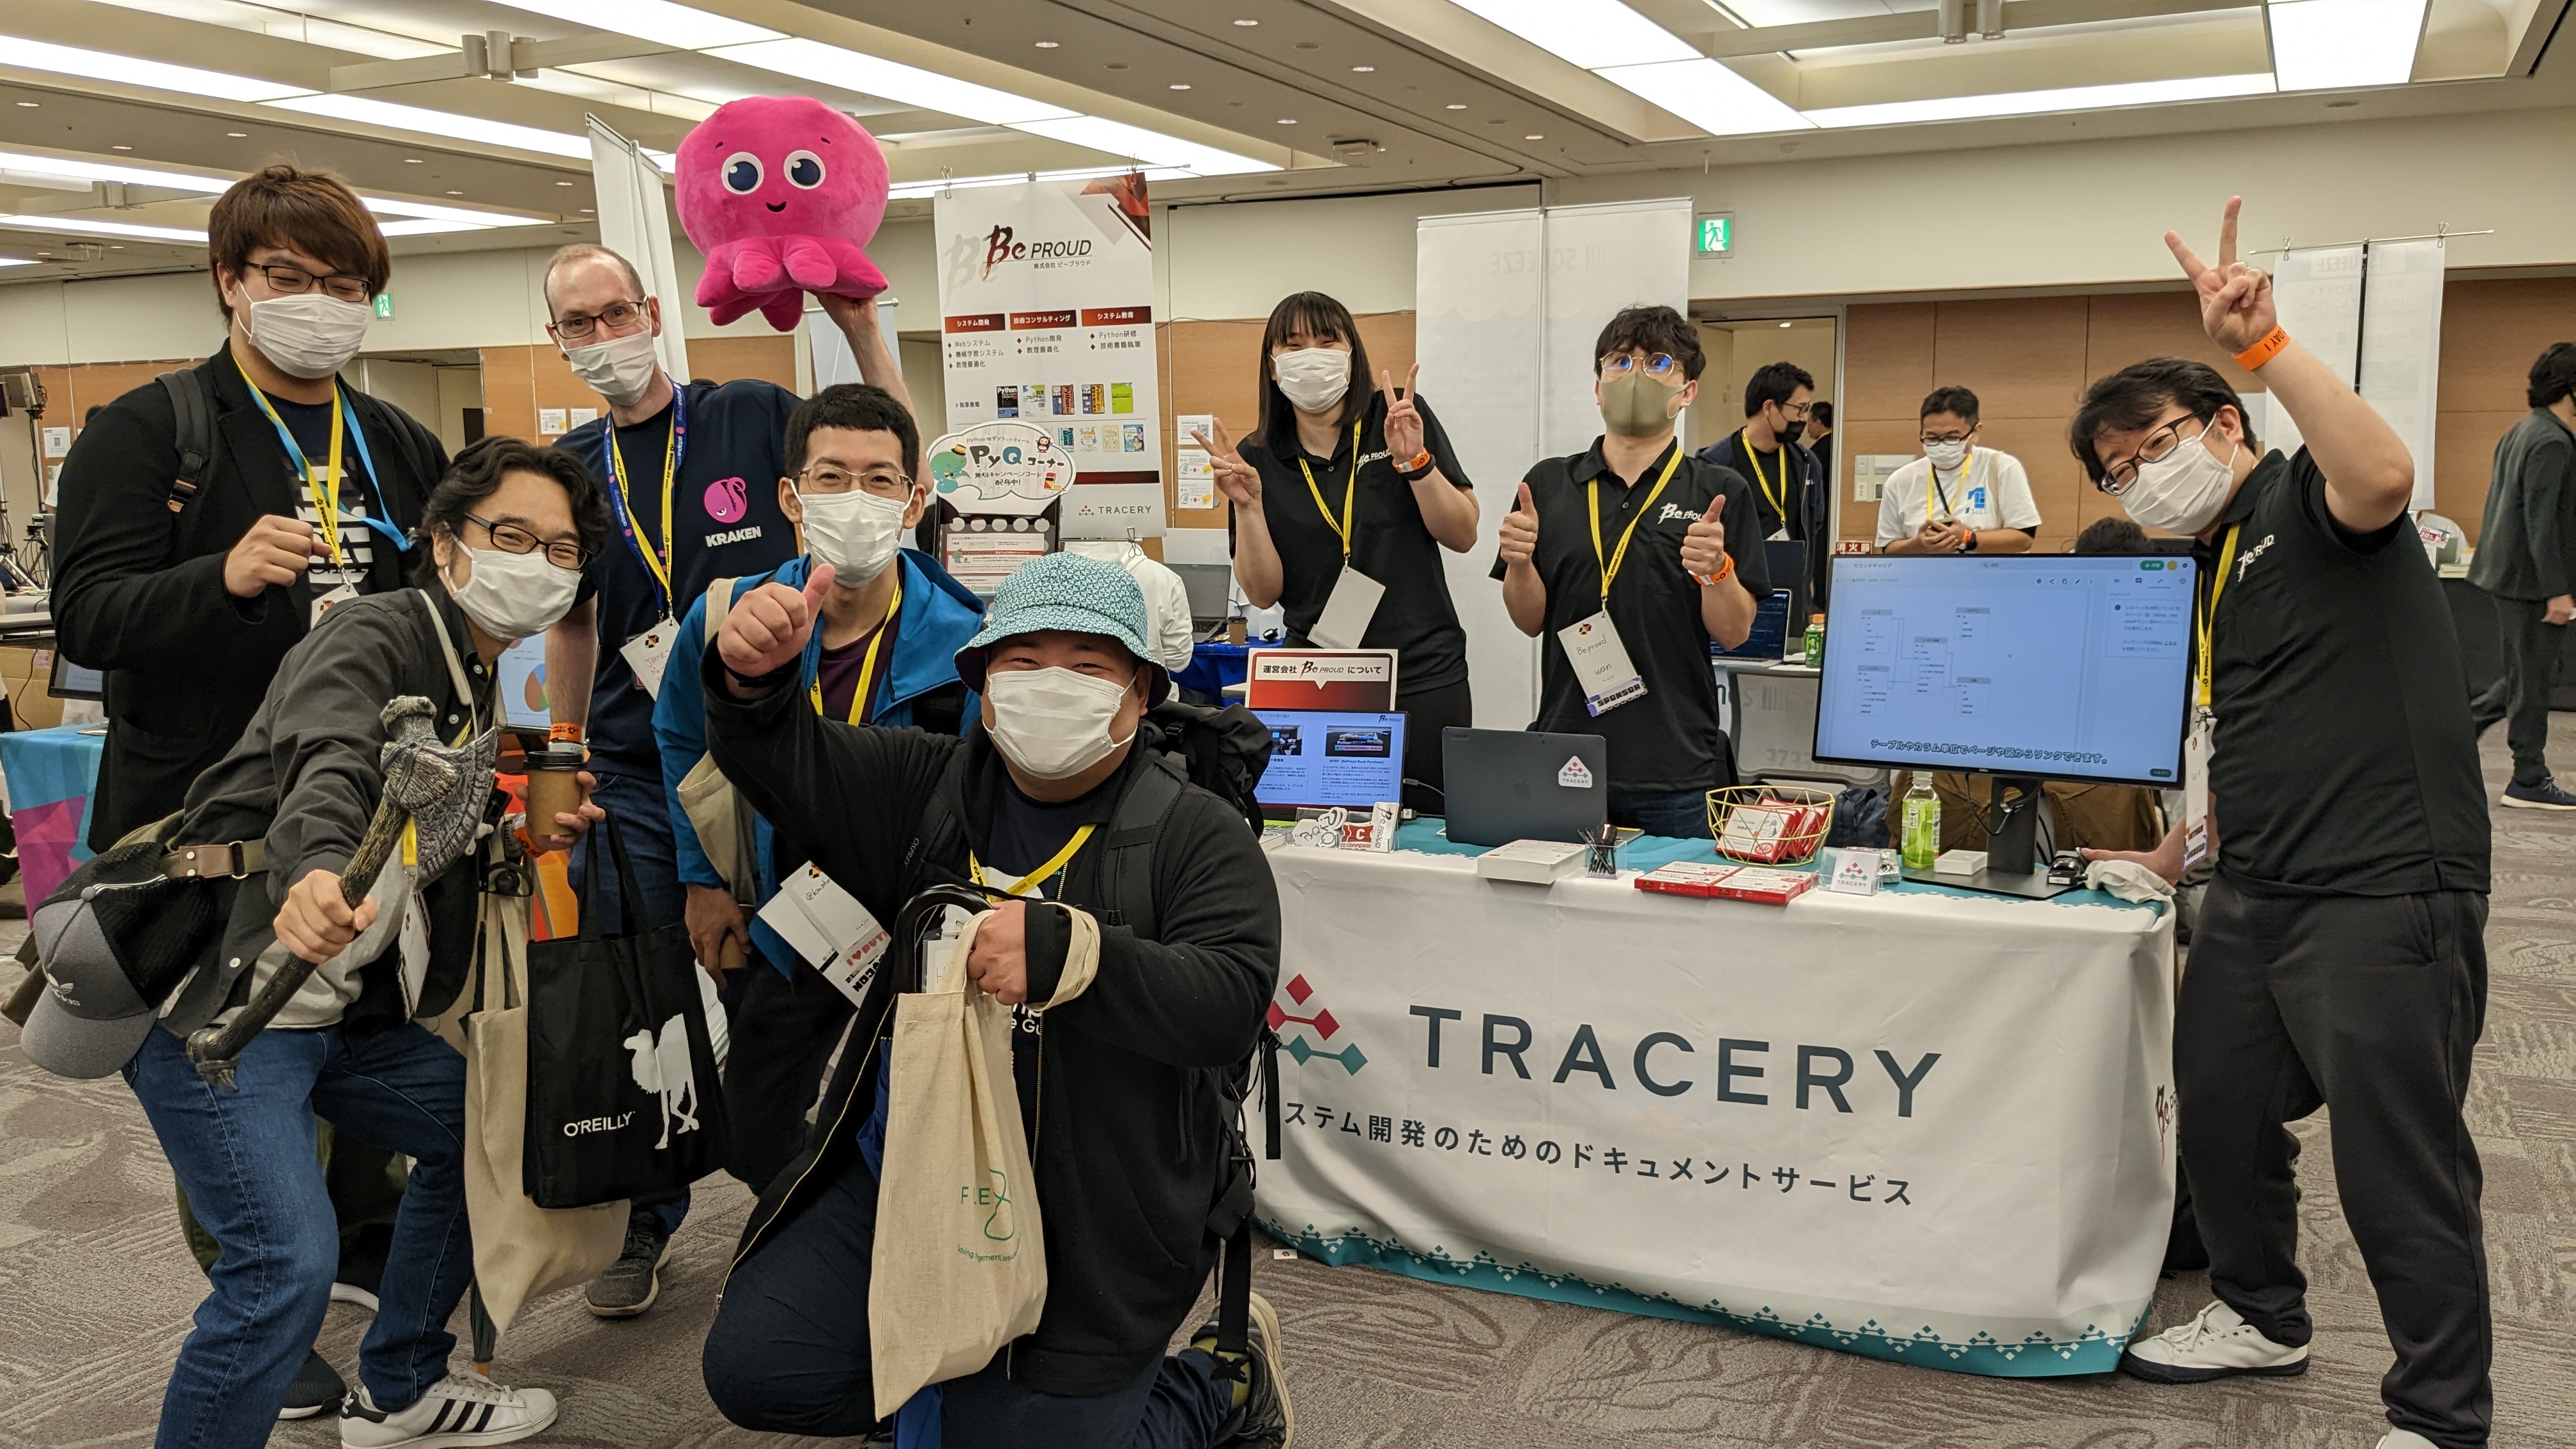
BeProud inc. 🏢
BeProud: Pythonシステム開発、Consulting
connpass: IT勉強会支援プラットフォーム
PyQ: Python独学プラットフォーム
TRACERY: システム開発ドキュメントサービス

BeProud Booth
AD is over / 宣伝は終了
Background and Motivation 💪
背景 と モチベーション
Conference Tasks
カンファレンスの タスク
I held PyCon JP(2014-2016) as Chair
Conference tasks:
👨💻 Keynotes, Talks and Trainings
🎫 Ticket sales and reception
🏬 Venue and facility(WiFi, Video…)
🍱 Foods, ☕️ Coffee, 🧁 Snacks and 🍺 Beers
Staff ask me the same things
スタッフは 同じこと を質問する
40+ staff
🐣 NEW staff : 🐔 OLD staff = 50 : 50
Programmer is Lazy
プログラマーは 怠惰
Let’s create a secretary!!
秘書 を作ろう!!
Goal / ゴール 🥅
How to create simple bot
How to create interactive bot
How to extend bot using libs and APIs
Why Slack ? / なぜ Slack? 💬
Launching the Slack app at any time 💻 📱
Easy to access
To do everything

You can create interactive bot
対話 botが作れるようになる

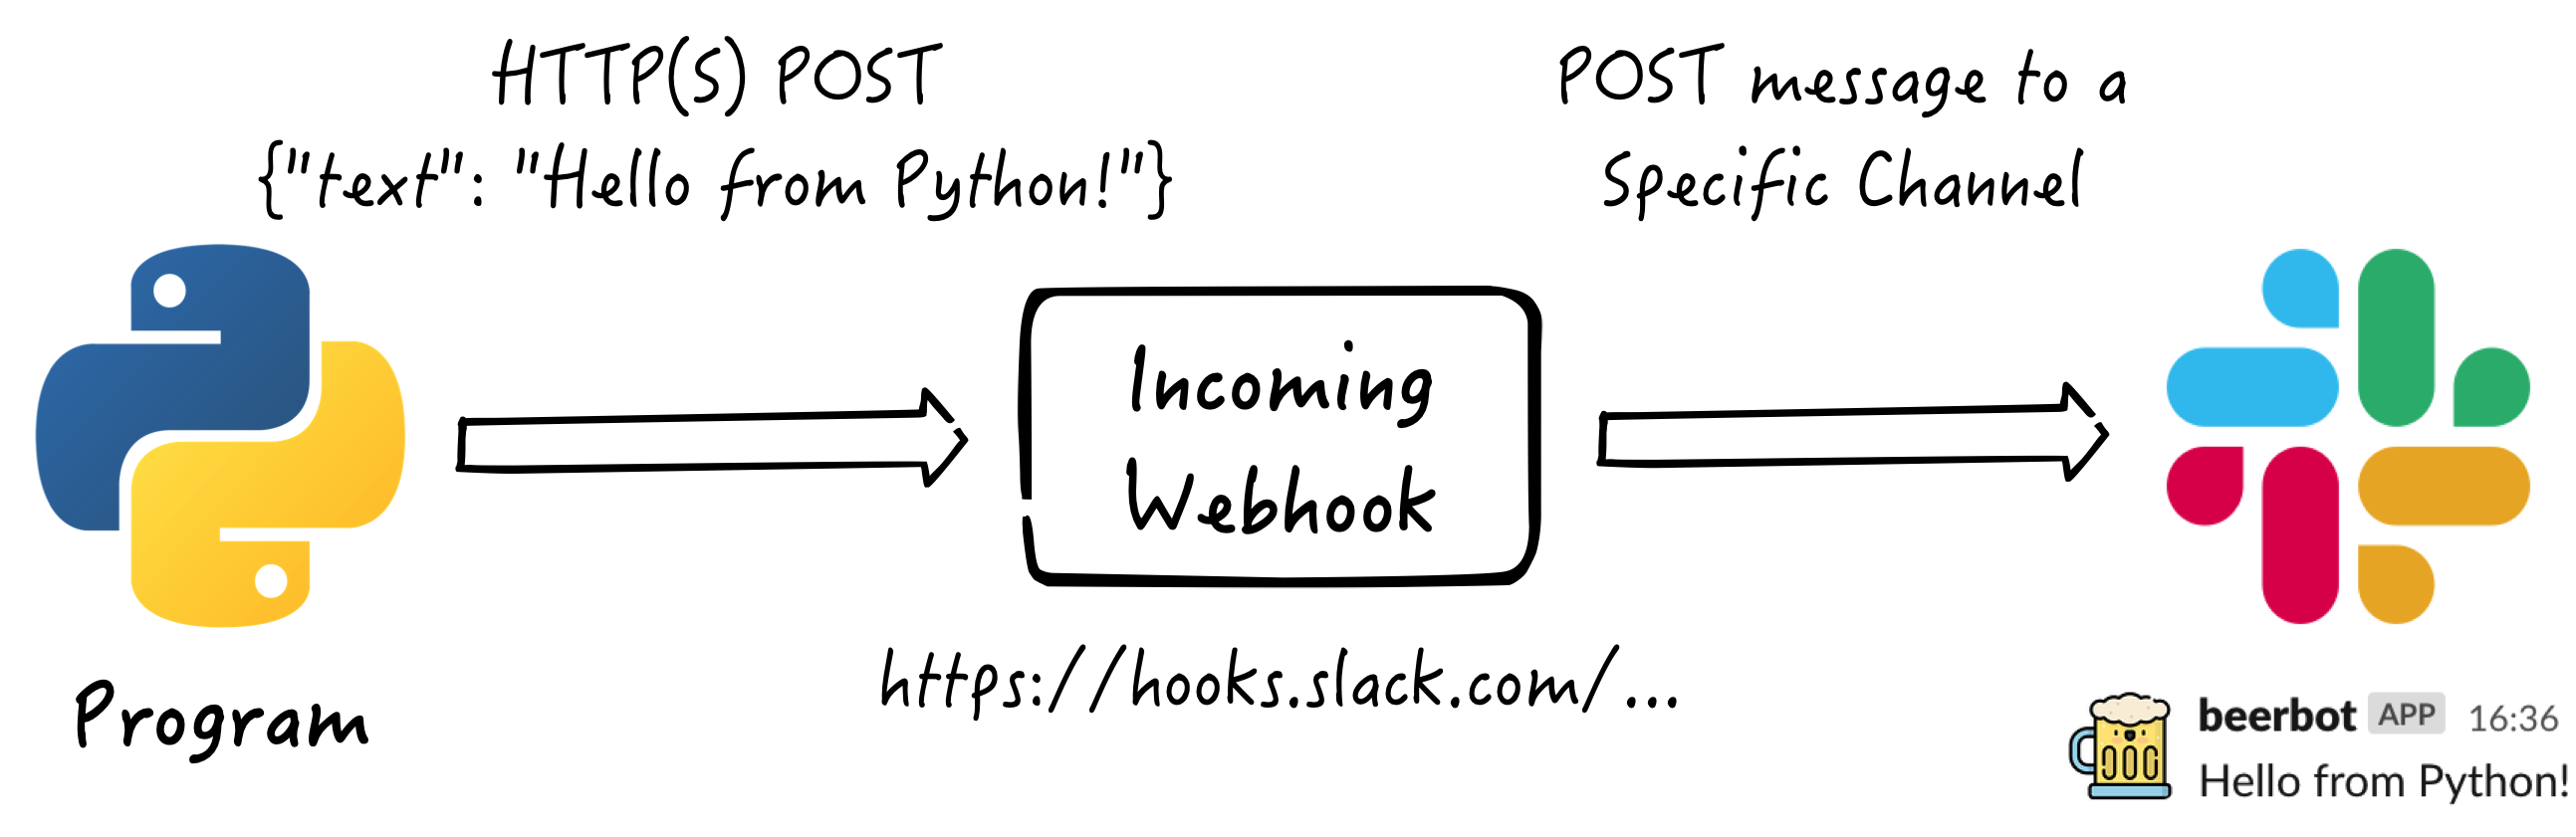
Simple integration with Incoming Webhooks 🪝
Incoming Webhooks での簡単な連携
System overview / システム概要
Create Incoming Webhooks Integration 🔧
Incoming Webhooks連携を 作成
Create Incoming Webhooks Integration
Generate Webhook URL
Create a Slack app
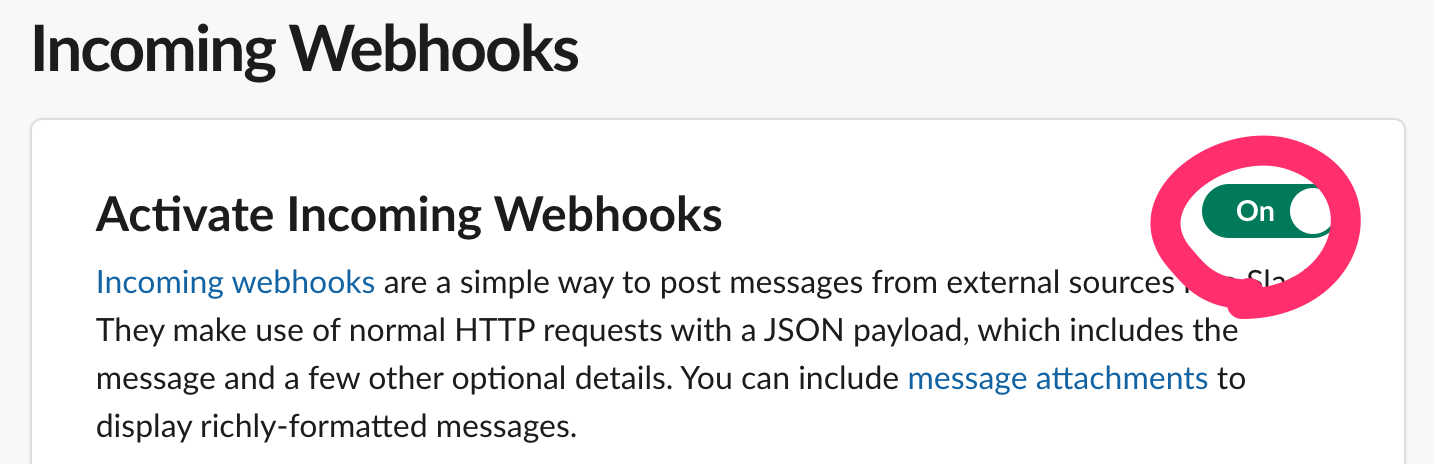
Activate Incoming Webhooks in the app
Add Webhook to Workspace
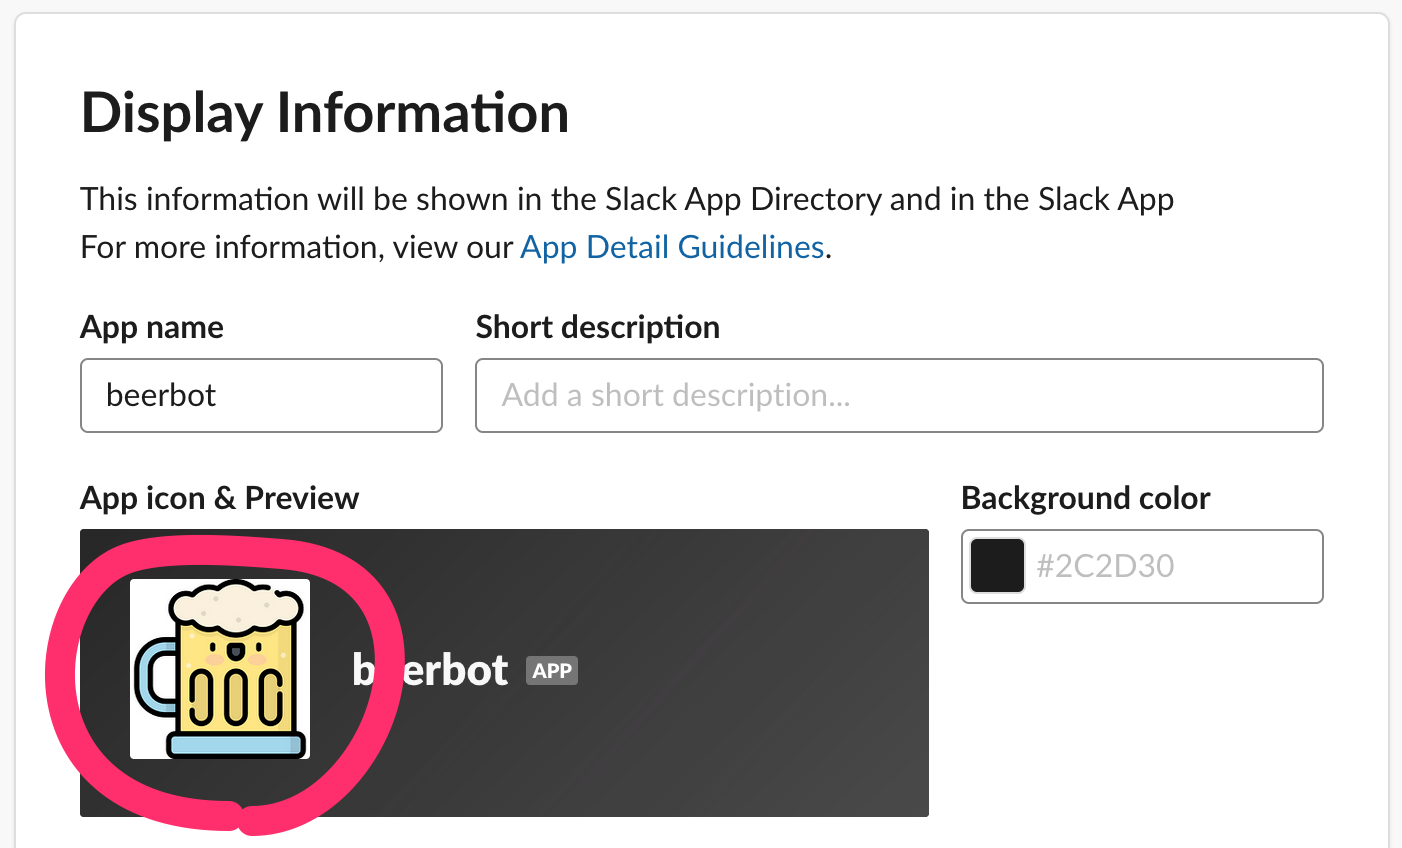
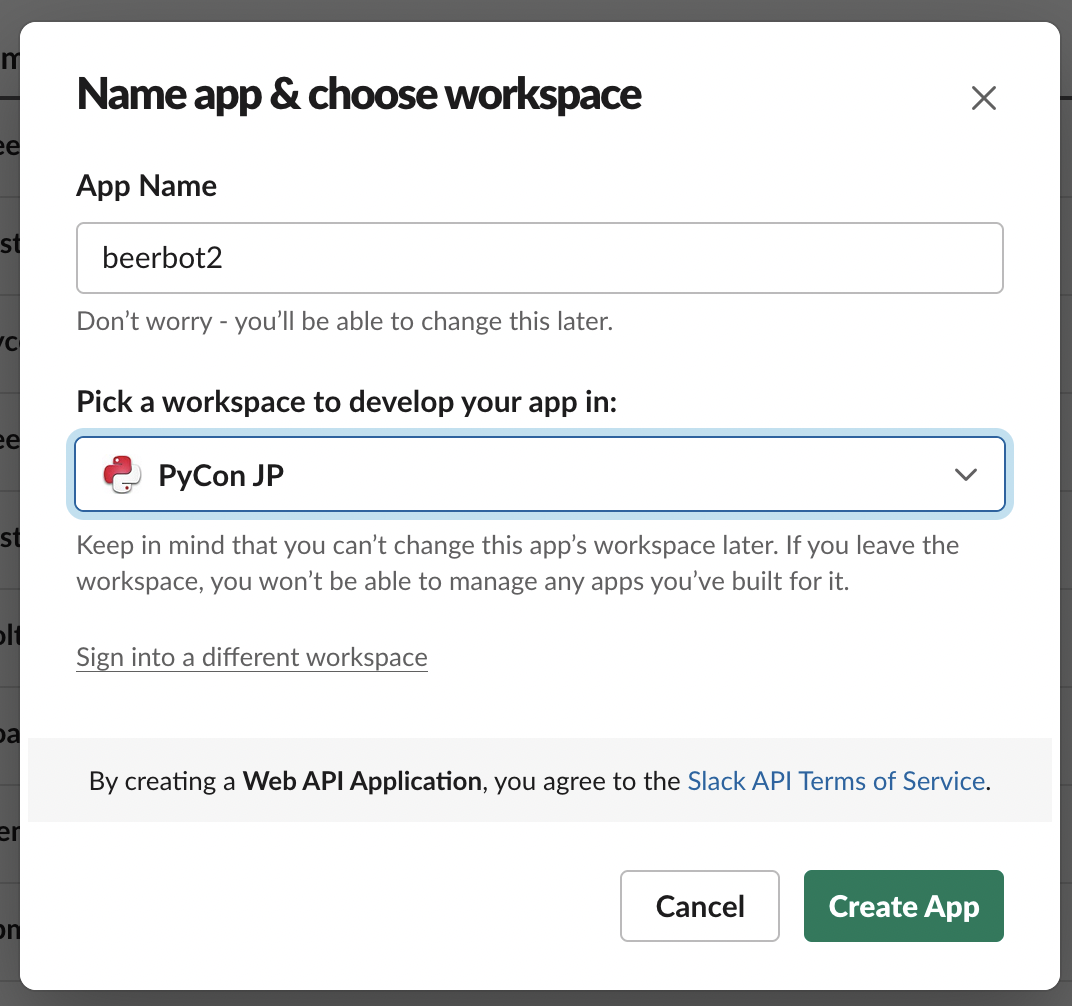
1. Create a Slack app / Slack appを作成

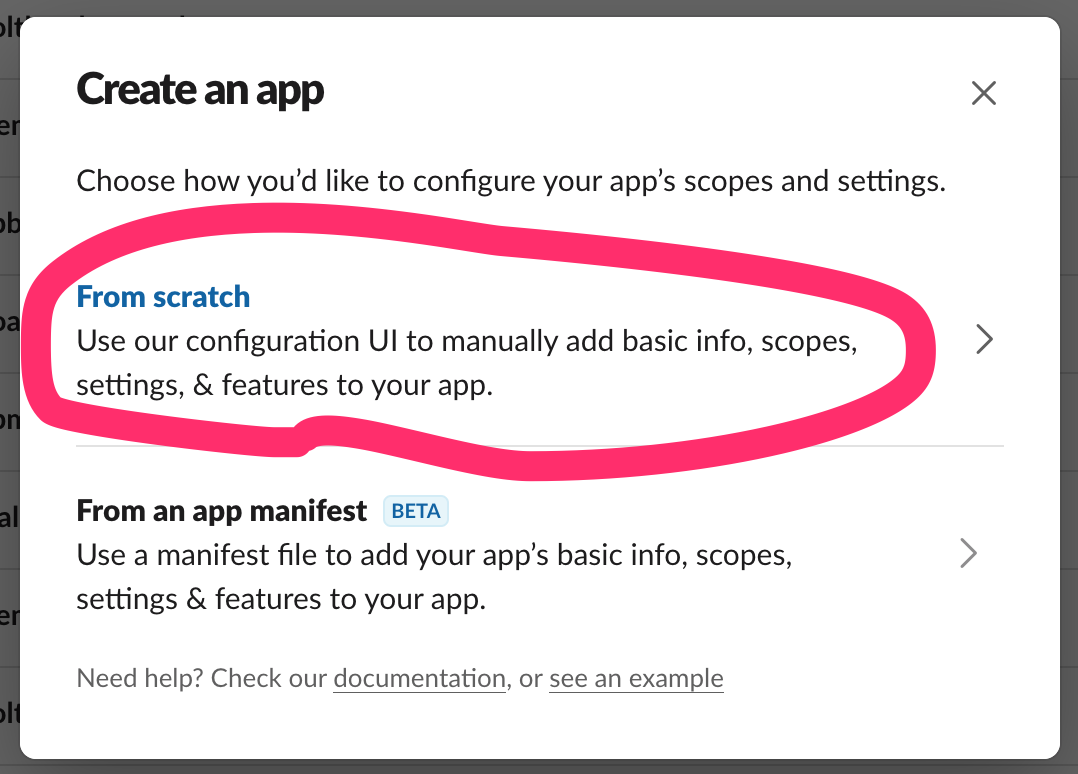
Enter name and choose workspace
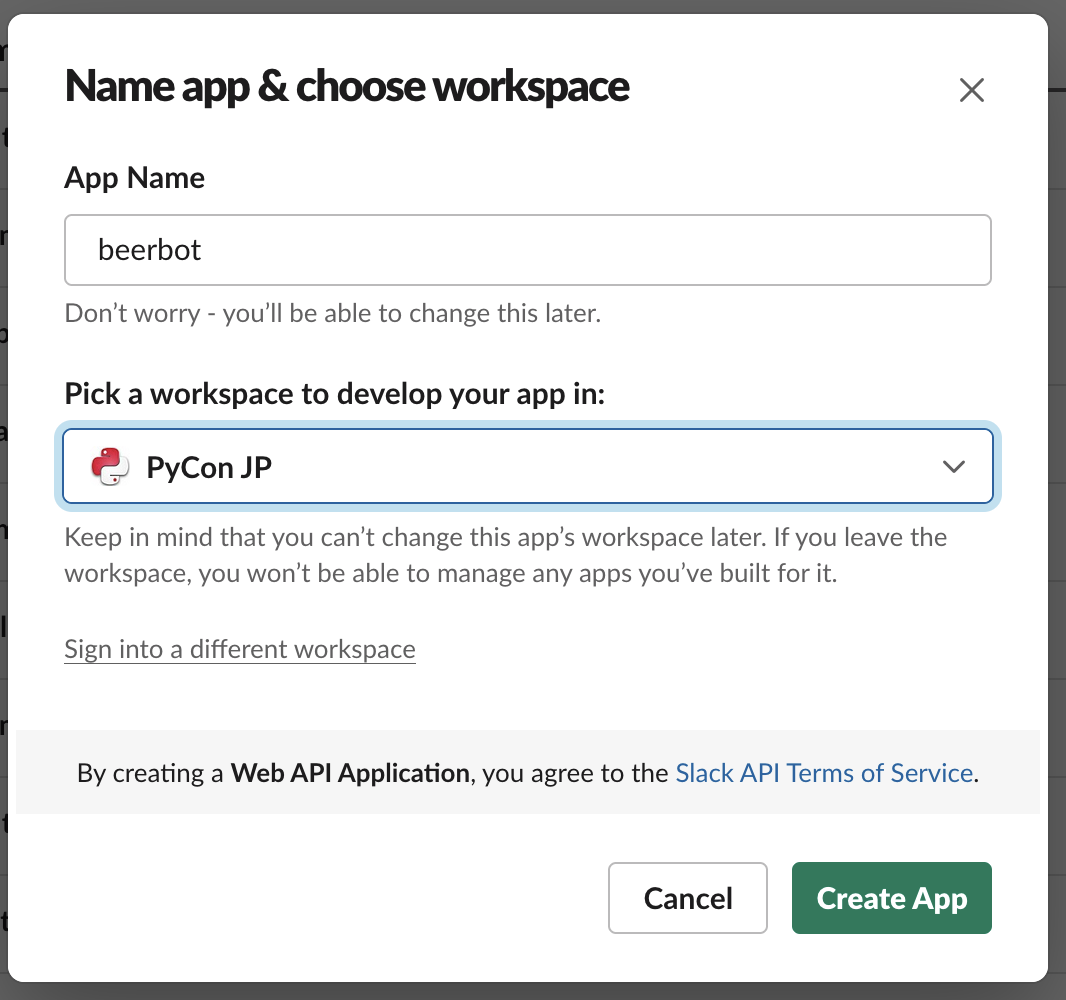
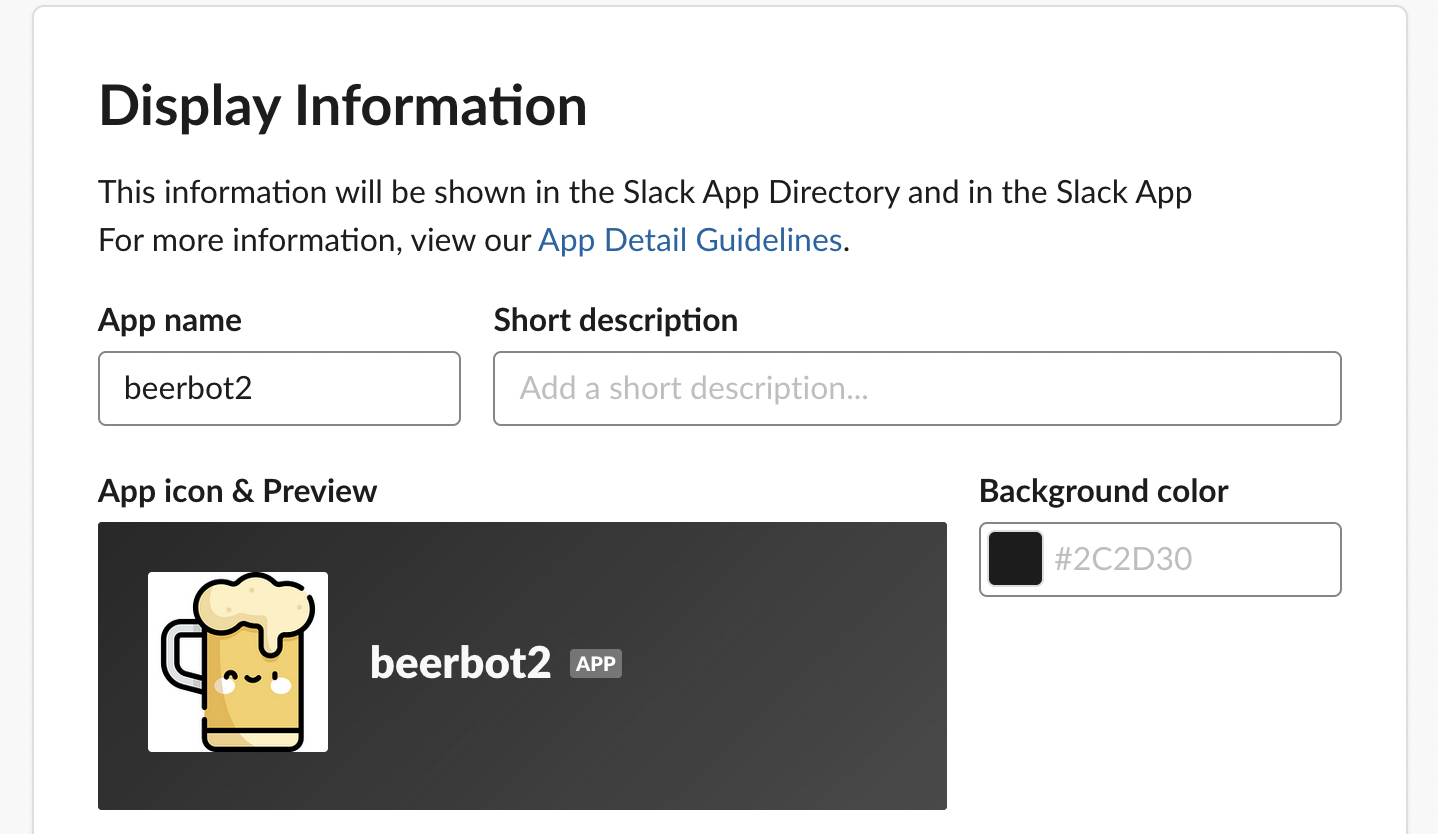
Set app icon (optional)
2. Activate Incoming Webhooks / 有効化
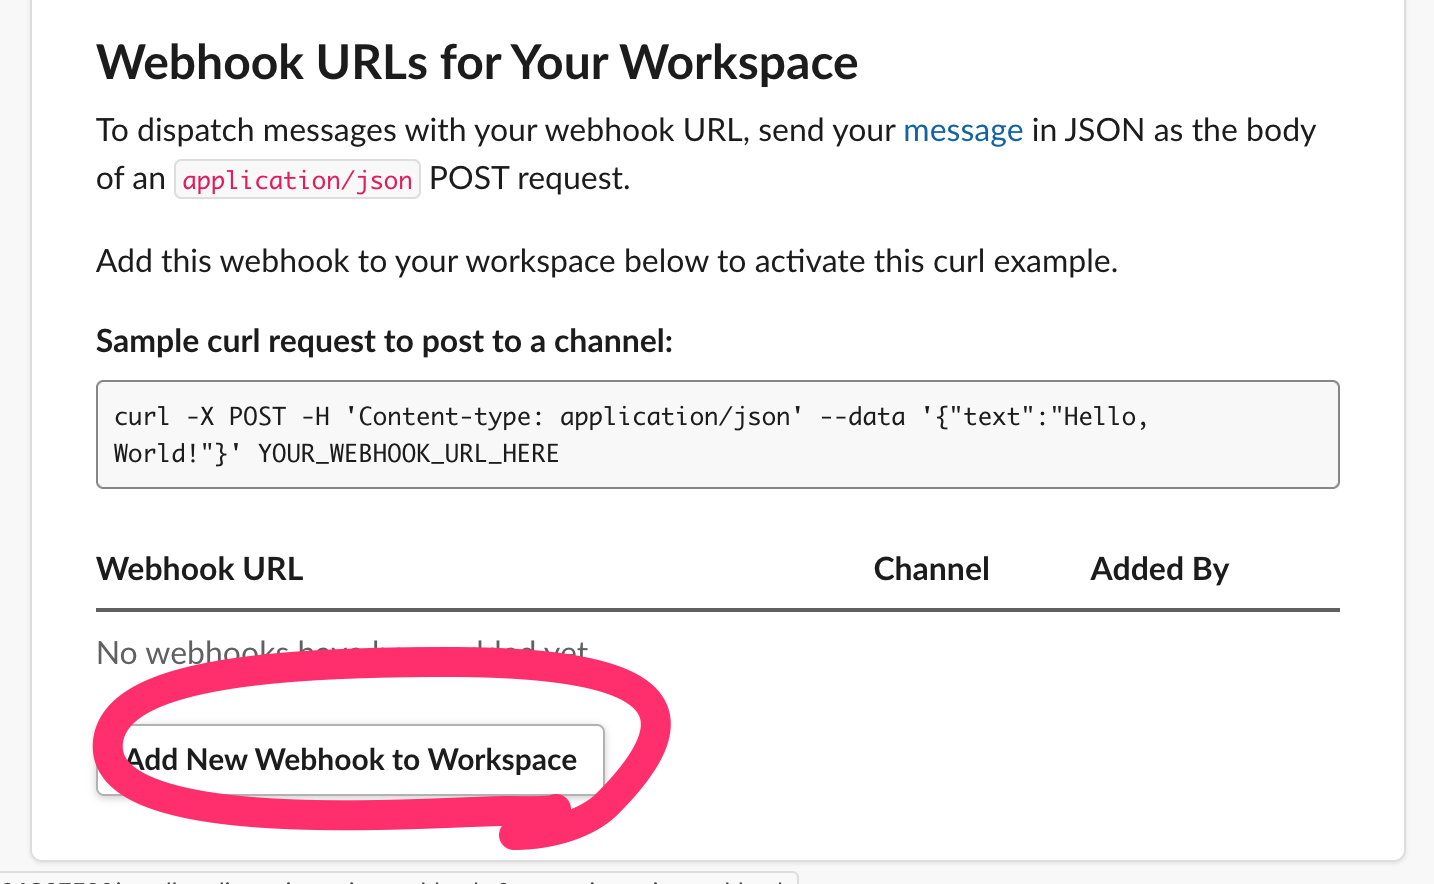
3. Add Webhook to Workspace / ワークスペースに追加
Click “Add New Webhook to Workspace”
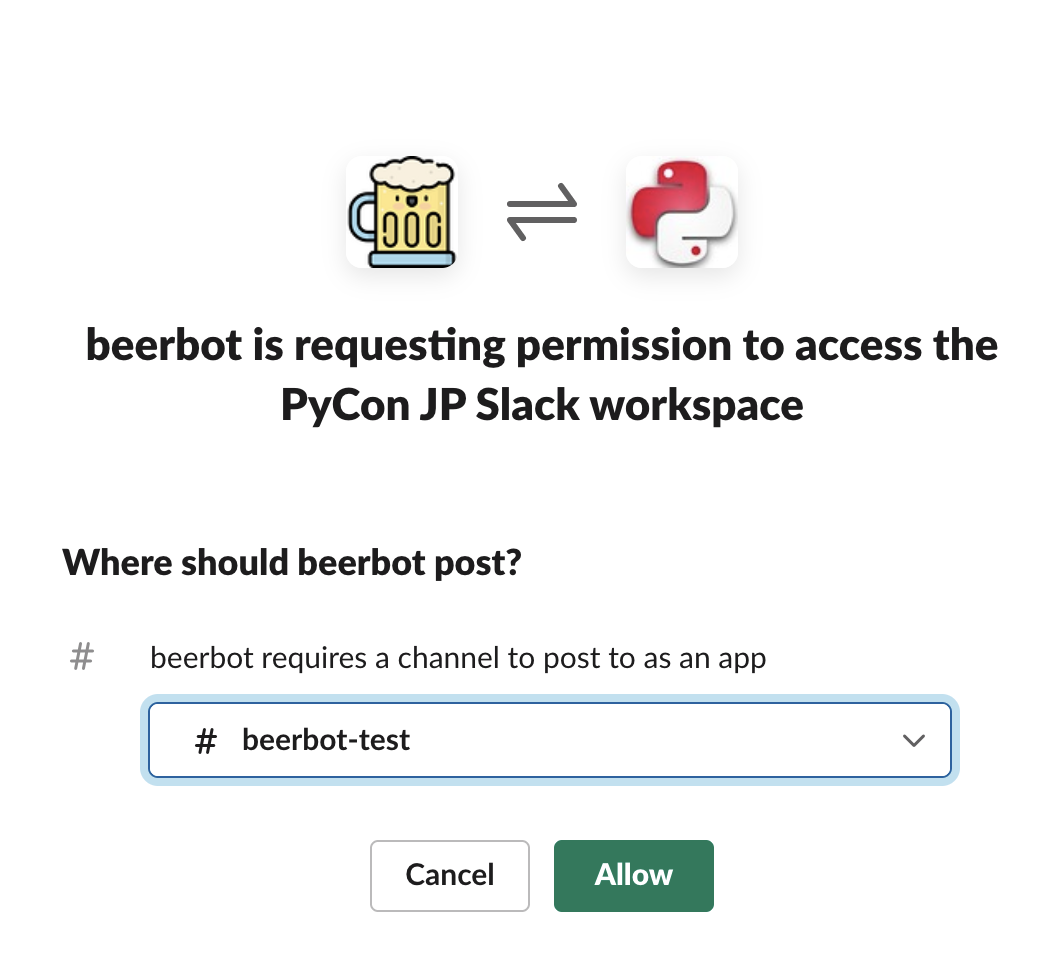
Choose channel → Click “Allow”
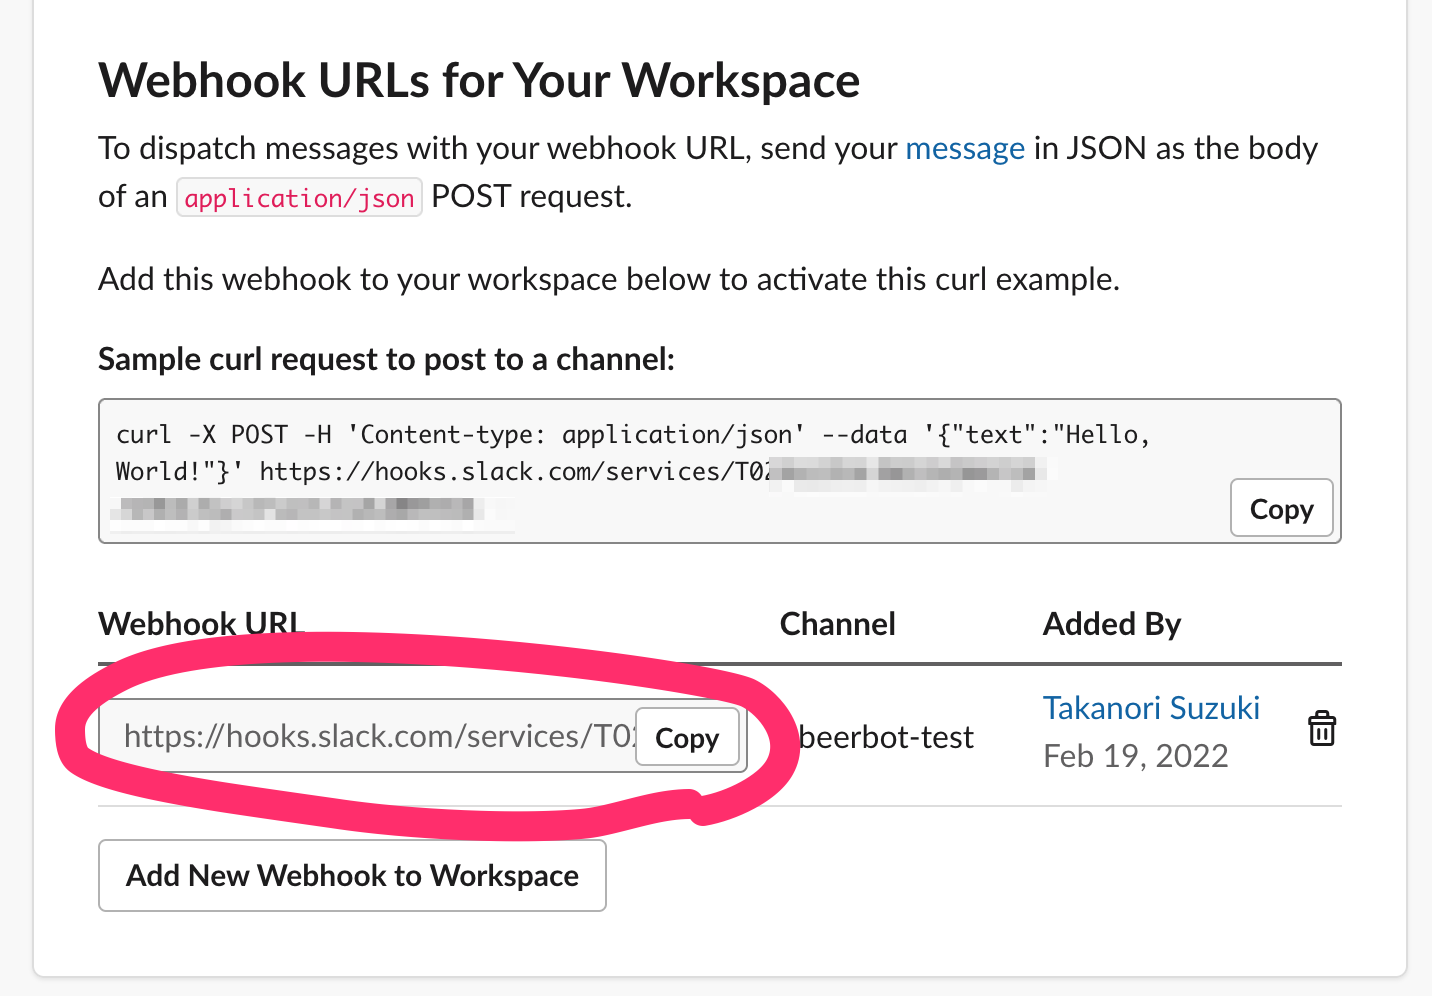
Get Webhook URL:
https://hooks.slack.com/...
Post message via Webhook URL 📬
Webhook URL 経由でメッセージを投稿
Post message with cURL
$ curl -X POST -H 'Content-type: application/json' \
> --data '{"text":"Hello Slack!"}' \
> https://hooks.slack.com/services/T000...
Post message with Python
see: urllib.request
import json
from urllib import request

url = "https://hooks.slack.com/services/T000..."
message = {"text": "Hello from Python!"}
data = json.dumps(message).encode()
request.urlopen(url, data=data)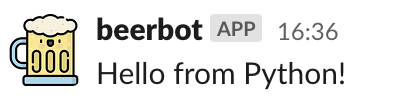
Post message with Requests
see: Requests
$ pip install requestsimport requests
url = "https://hooks.slack.com/services/T000..."
message = {"text": "Hello from Requests!"}
r = requests.post(url, json=message)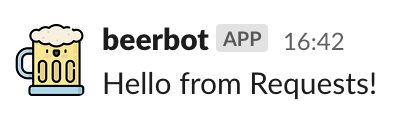
Post message with Slack SDK
see: Python Slack SDK
$ pip install slack-sdkfrom slack_sdk.webhook import WebhookClient
url = "https://hooks.slack.com/services/T000..."
webhook = WebhookClient(url)
r = webhook.send(text="Hello from Slack SDK!")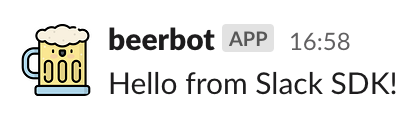
Formatting text / テキストを整形
from slack_sdk.webhook import WebhookClient

url = "https://hooks.slack.com/services/T000..."
webhook = WebhookClient(url)
# *bold*, <url|text>, :emoji: and etc.
sdk_url = "https://slack.dev/python-slack-sdk/"
r = webhook.send(
    text=f"*Hello* from <{sdk_url}|Slack SDK>! :beer:")
Block Kit 🧱
Block Kit
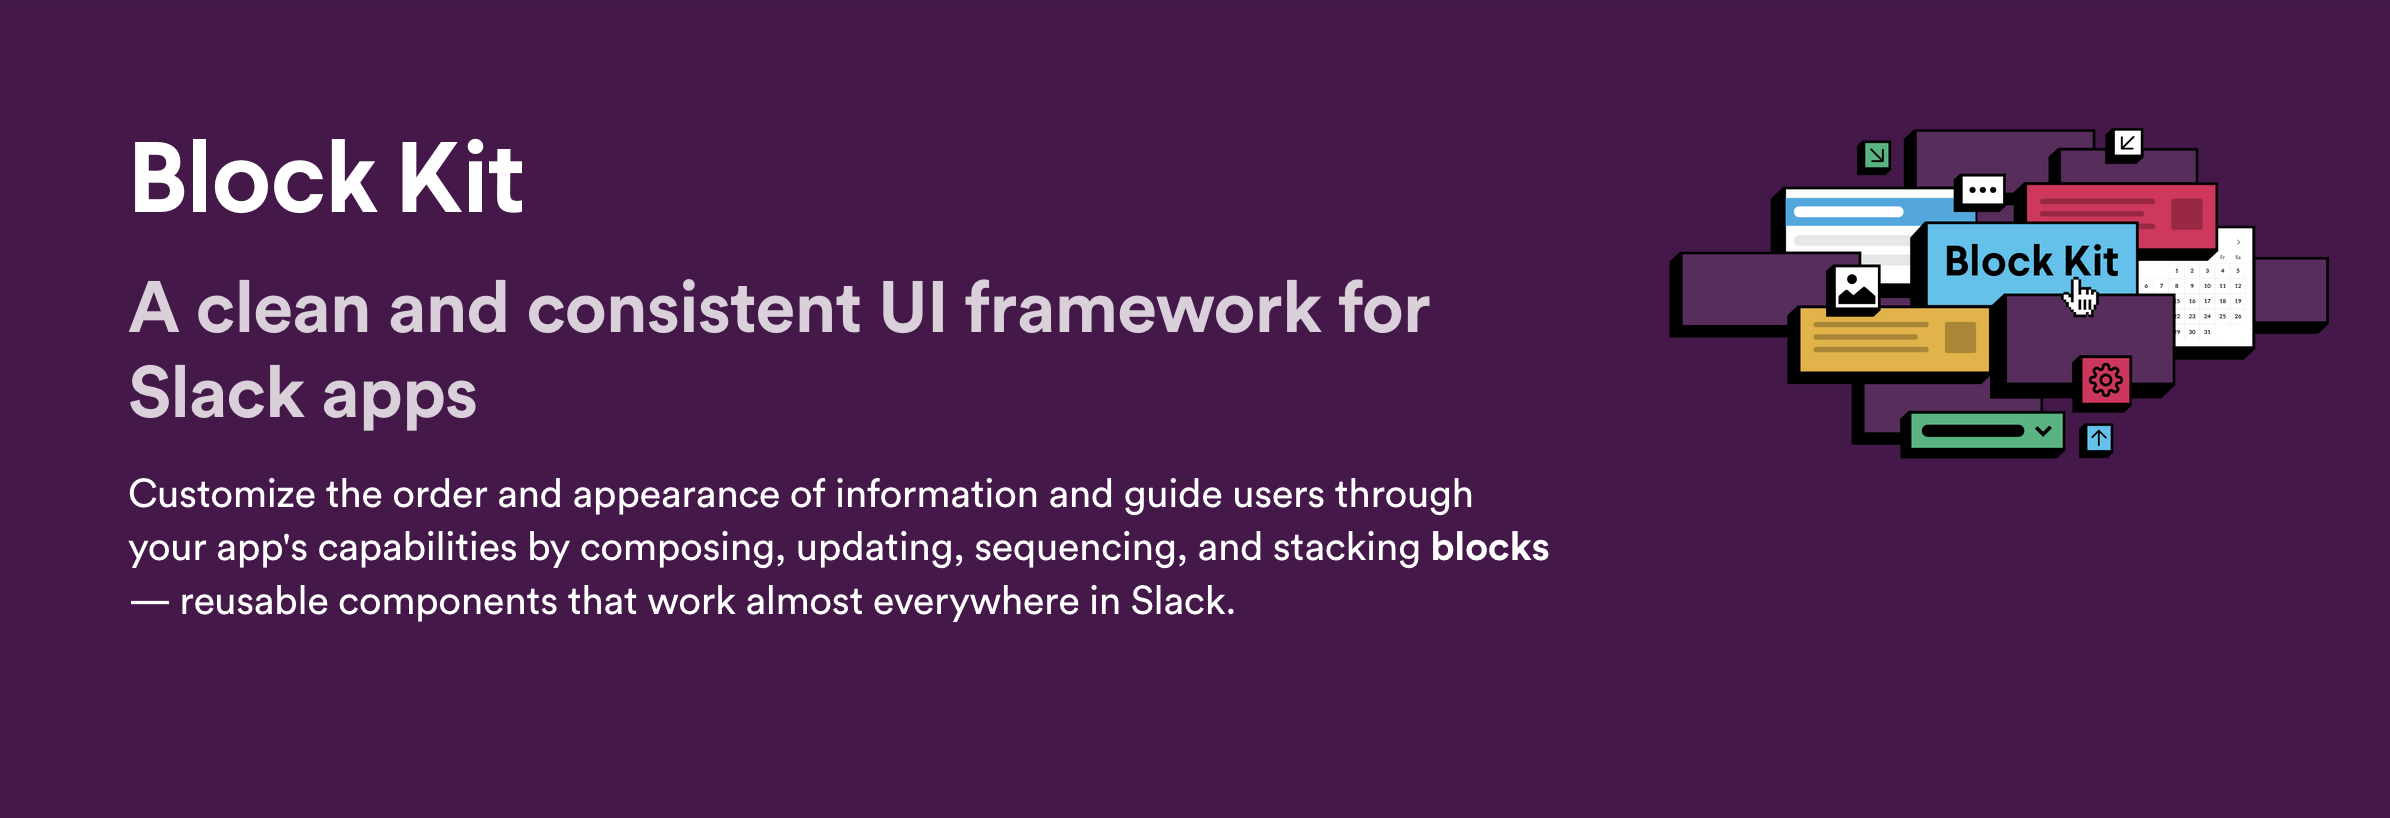
see: Block Kit
Example of Block Kit
blocks = [{
    "type": "section",
    "text": {
         "type": "mrkdwn"
         "text": "*THANK YOU* for coming to my talk !:tada: Please give me *feedback* about this talk :bow:",
    },
    "fields": [
         {"type": "mrkdwn", "text": "*Love*"},
         {"type": "mrkdwn", "text": "*Hobby*"},
         {"type": "plain_text", "text": "Ferrets, :beer:, LEGO"},
         {"type": "plain_text", "text": ":trumpet:, :man_climbing:"},
    ],
}]
response = webhook.send(blocks=blocks)
Block Kit Builder
Summary of Incoming Webhooks
まとめ: Incoming Webhooks
Easy to post messages from programs 📬
Create complex messages with Block Kit 🧱
But one-way (program➡️Webhook➡️Slack)
Interactive bot 🤝
対話型 のbot
Connection protocols / 接続方式
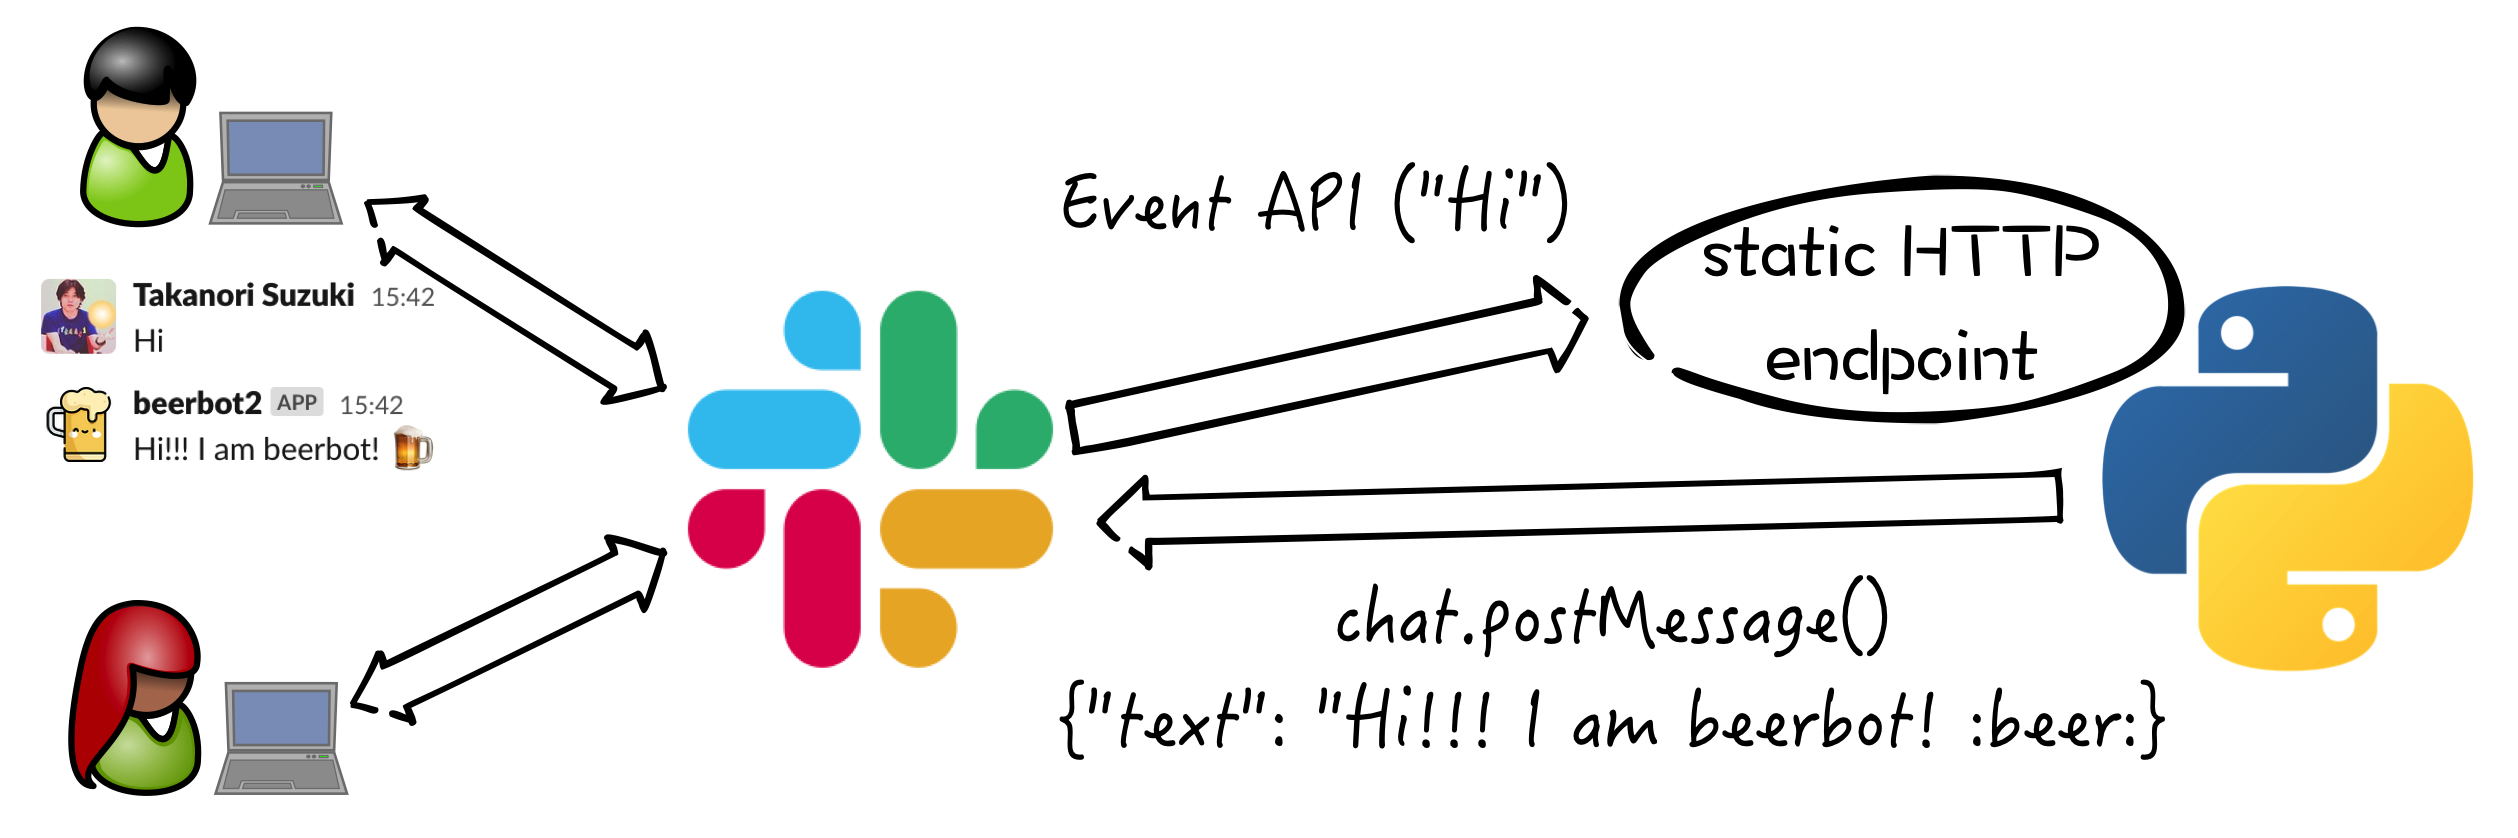
Events API over HTTP
Socket Mode
Events API over HTTP
Socket Mode
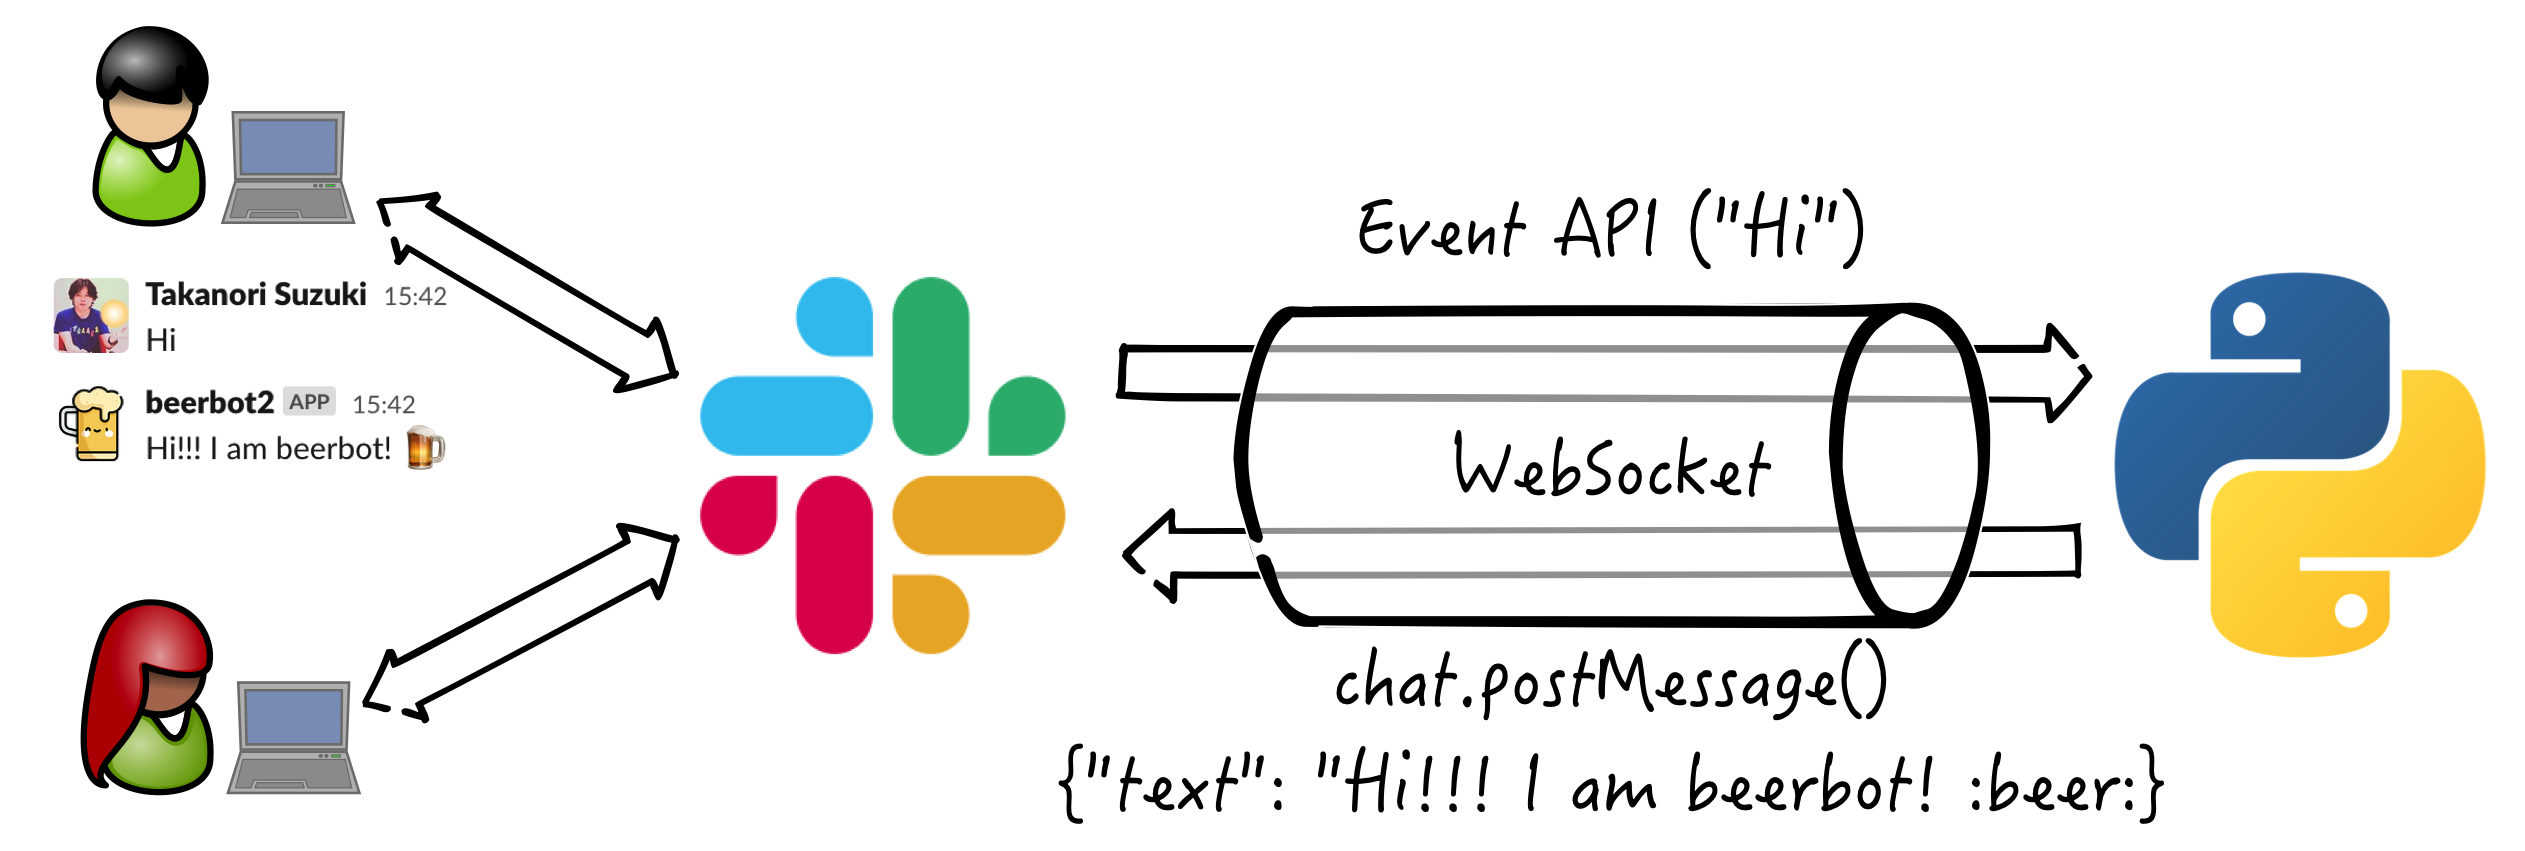
see: Intro to Socket Mode
Connection protocols / 接続方式
Events API over HTTP
Socket Mode 👈
Create bot user 🤖
bot userを 作成
Create bot user
Create bot user with Socket Mode
Create a Slack app (same procedure)
Enable Socket Mode
Subscribe bot event
Add Bot Token Scopes
Install App to Workspace
Invite bot user to Slack channels
1. Create a Slack app / Slack appを作成
Enter name and choose workspace
Set app icon (optional)
2. Enable Socket Mode / Socket Mode有効化
Select “Socket Mode” → Turn toggle on
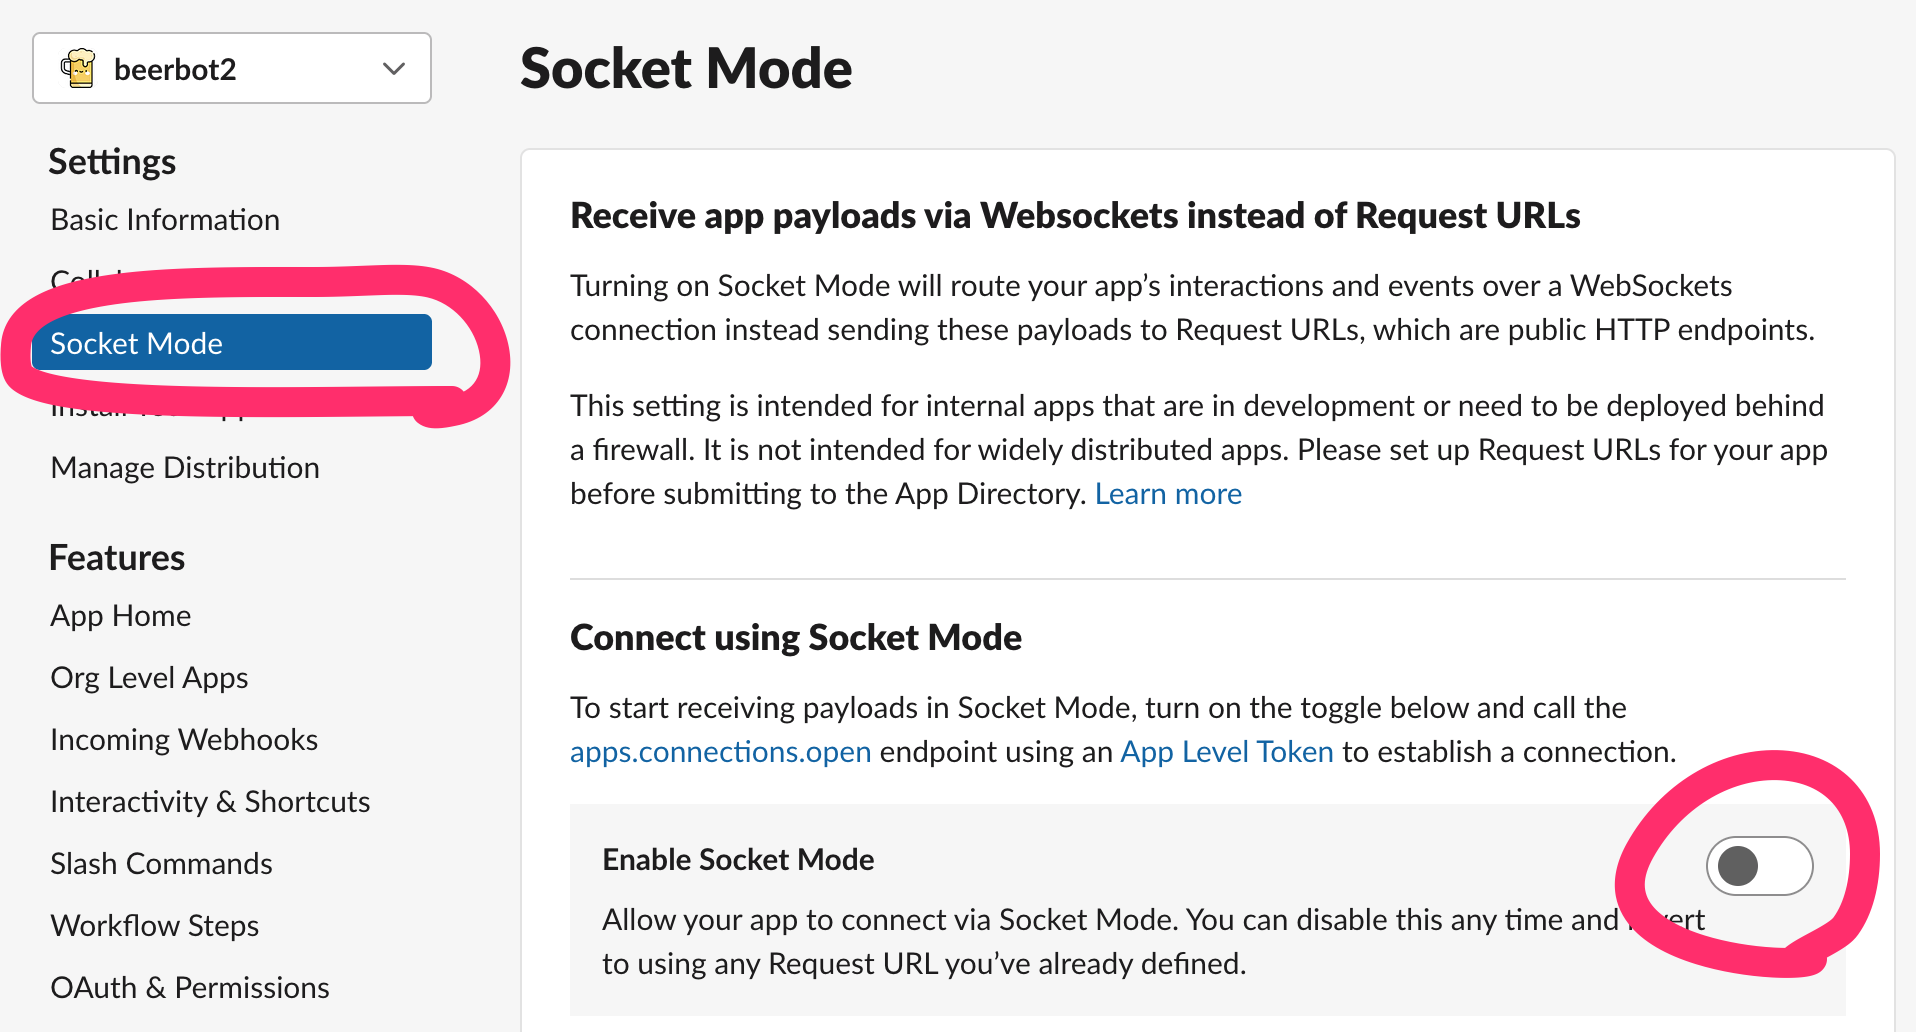
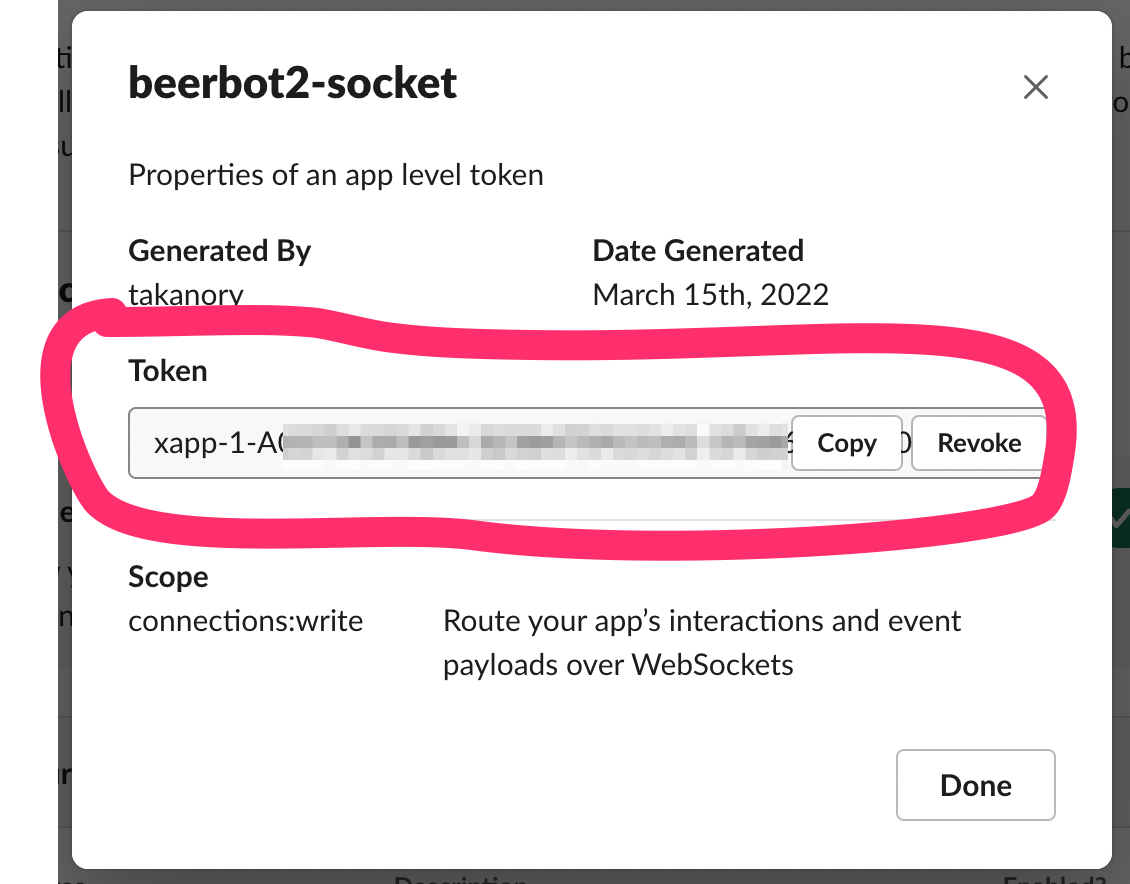
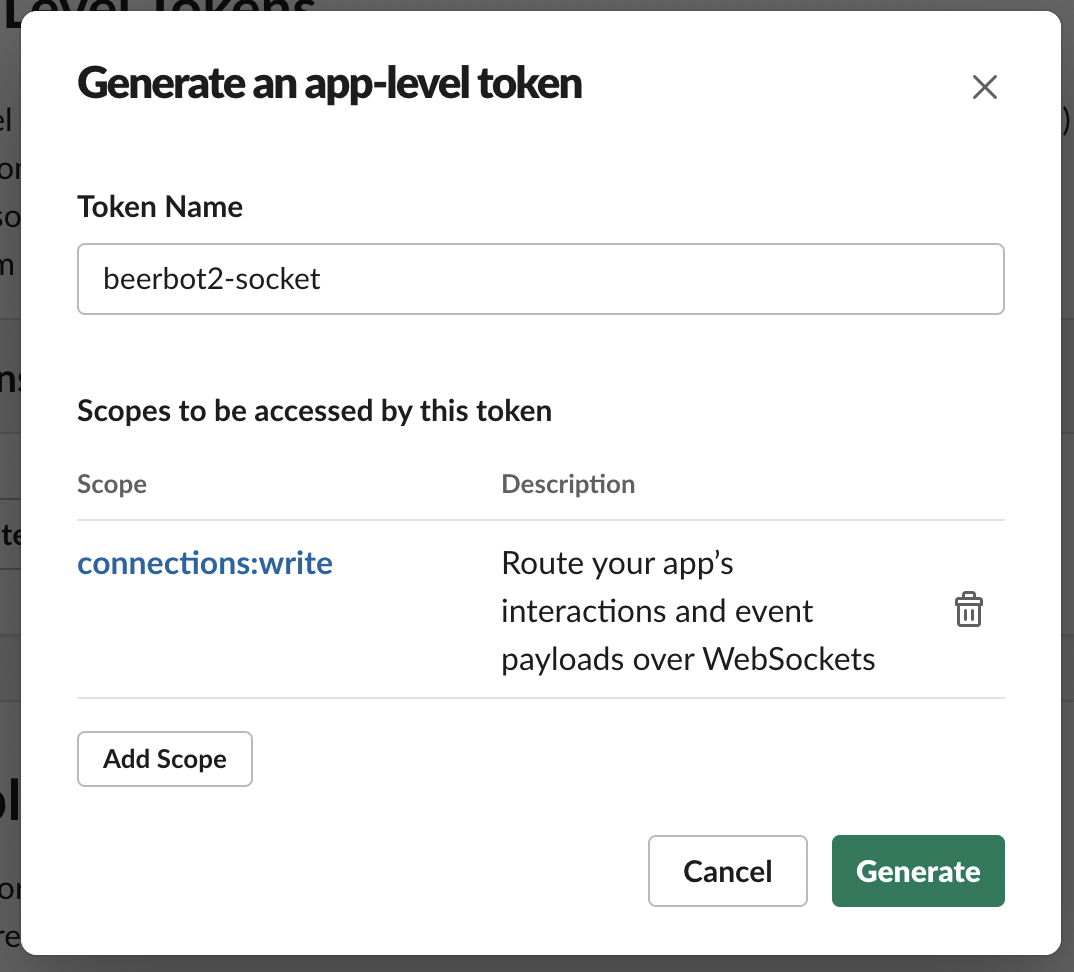
Enter token name → Click “Generate”
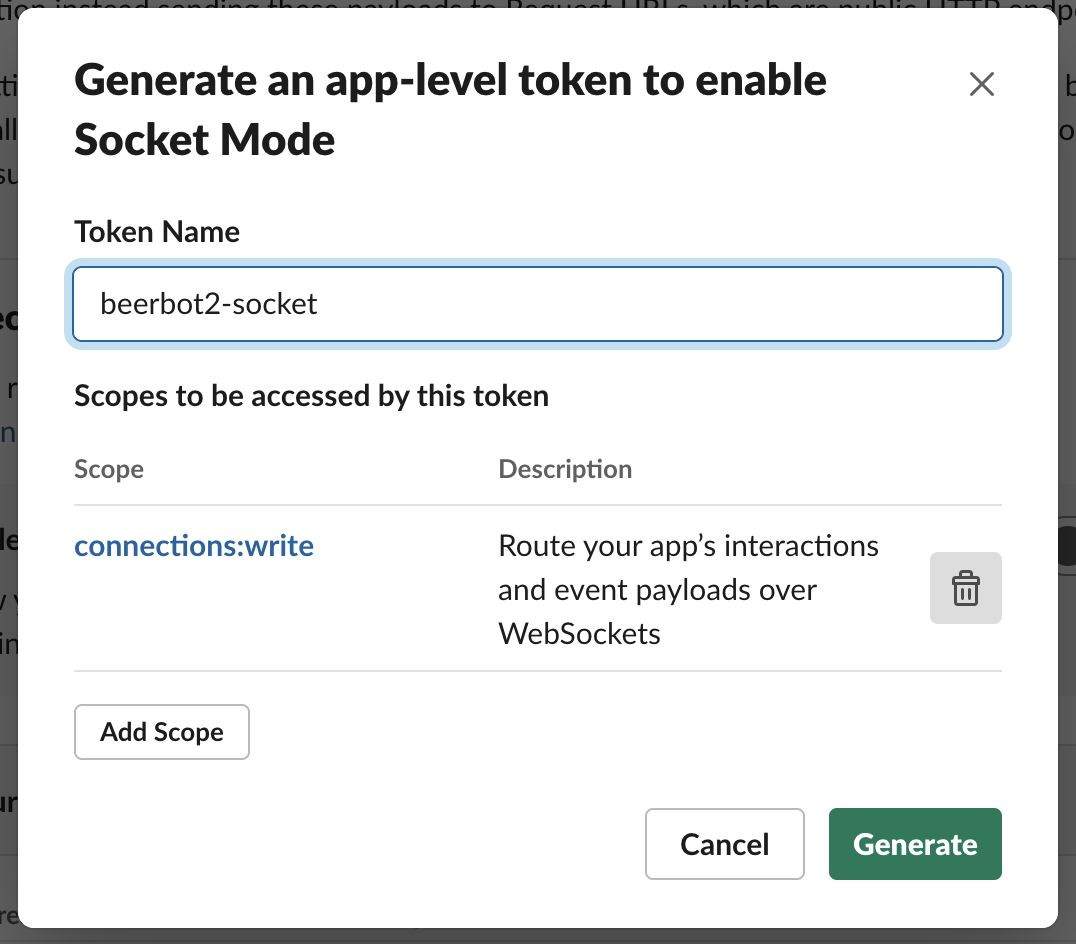
Get app-level token:
xapp-...
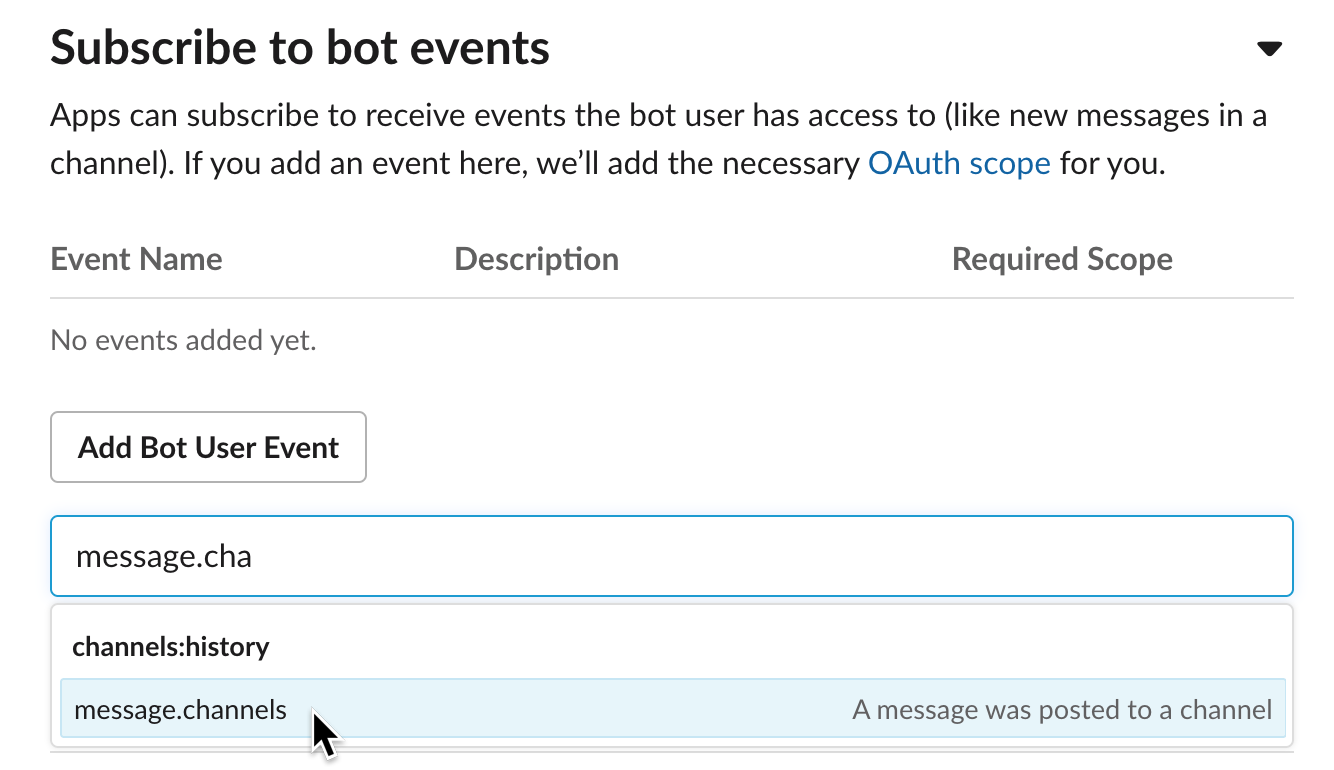
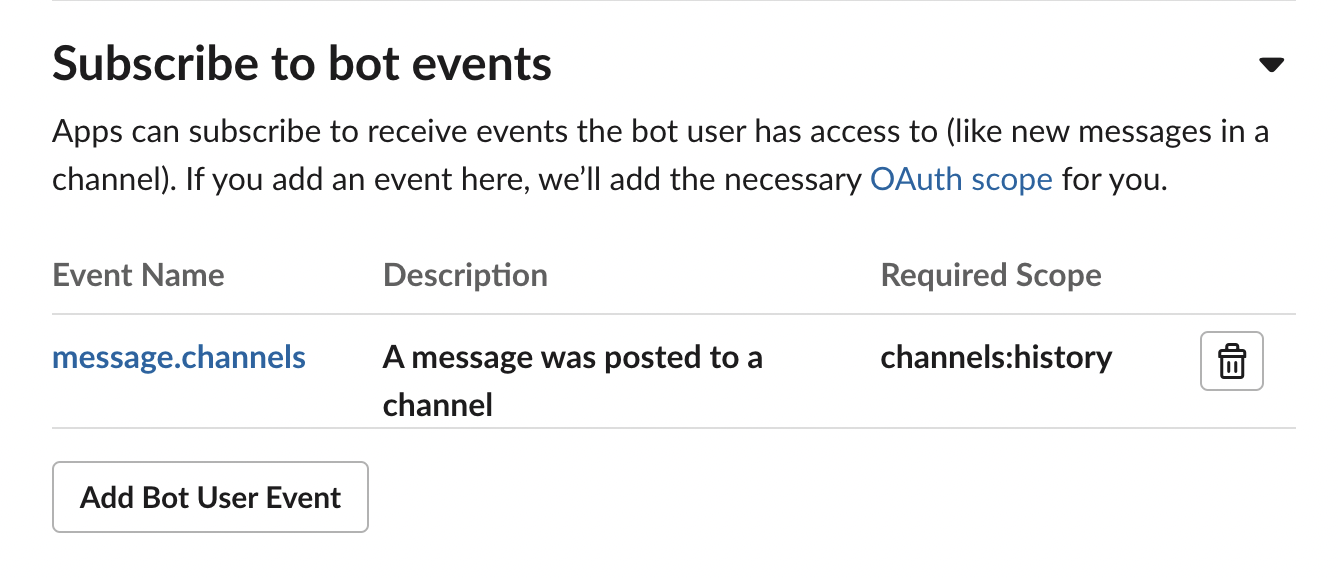
3. Subscribe bot event / イベント登録
Select “Event Subscriptions” → Turn toggle on
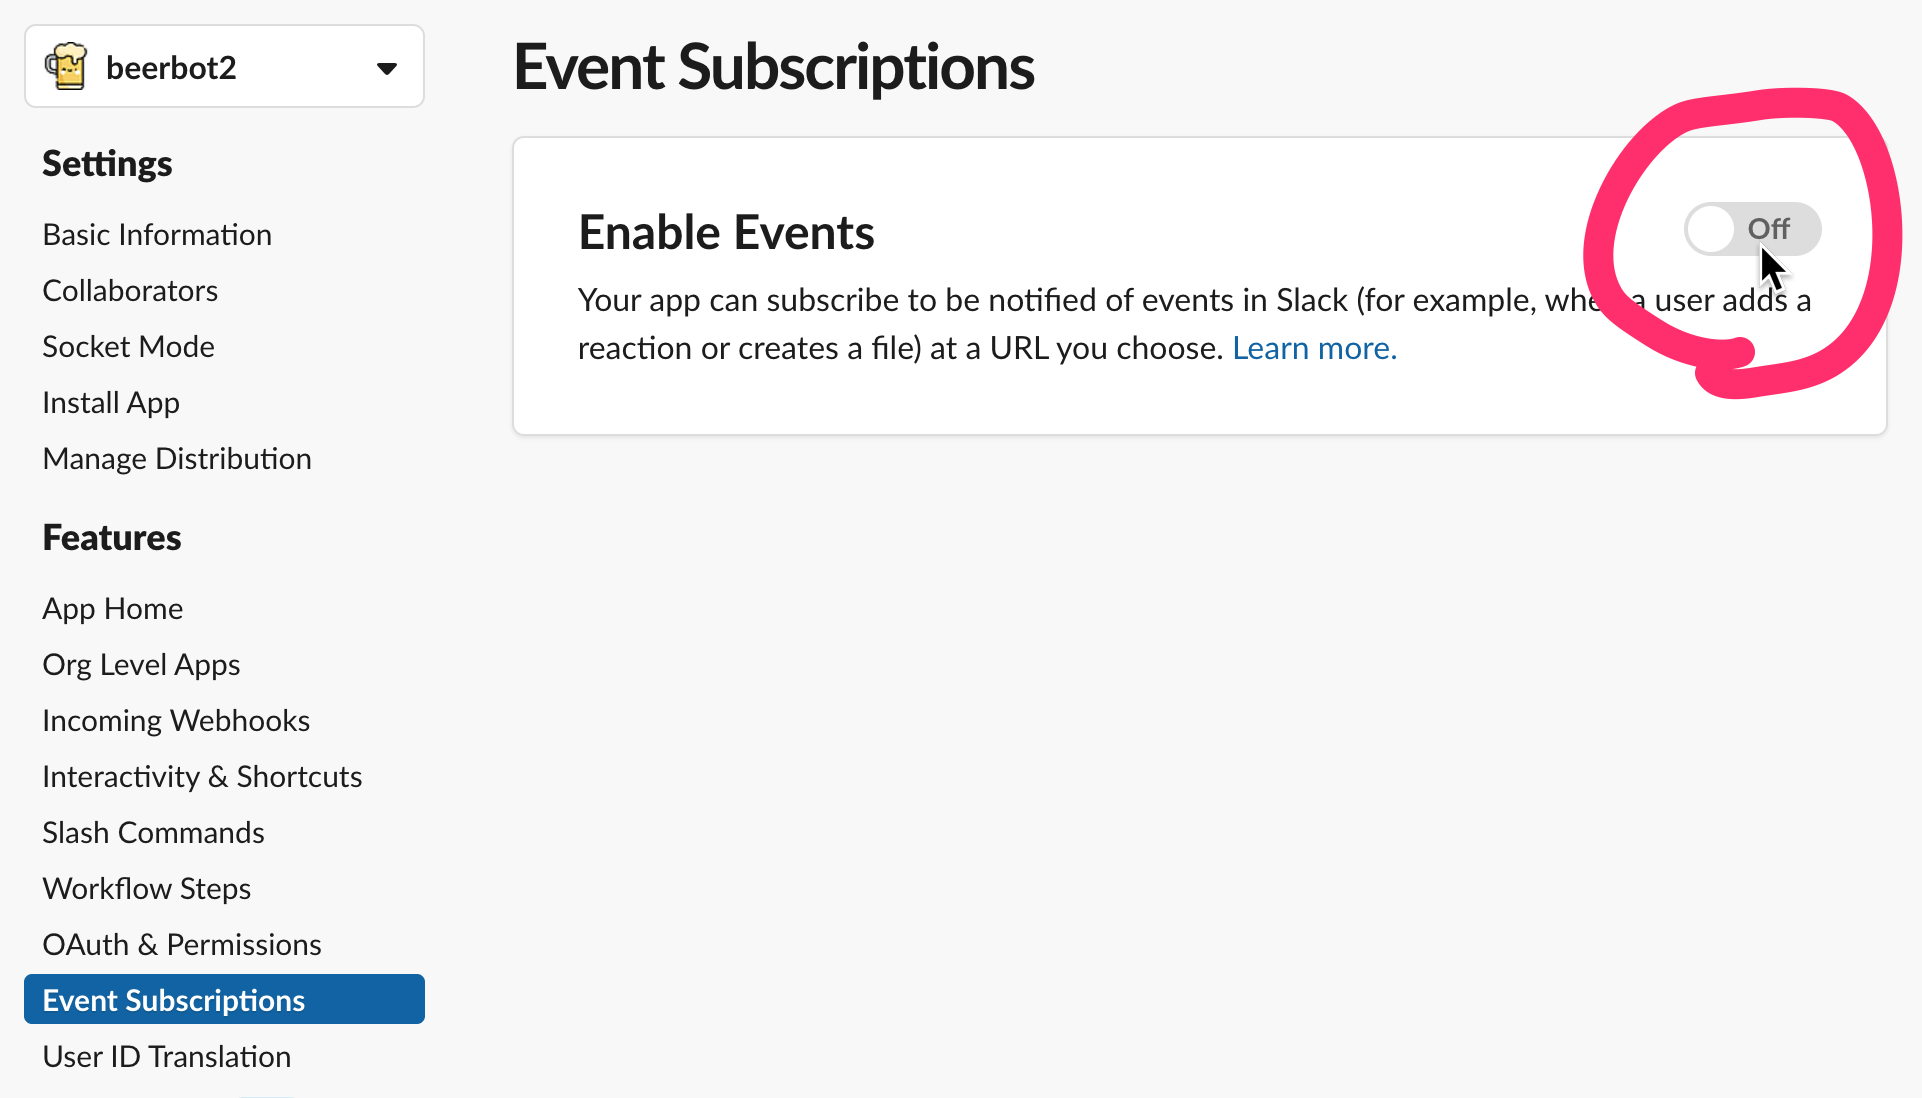
Add “message.channels” to bot events
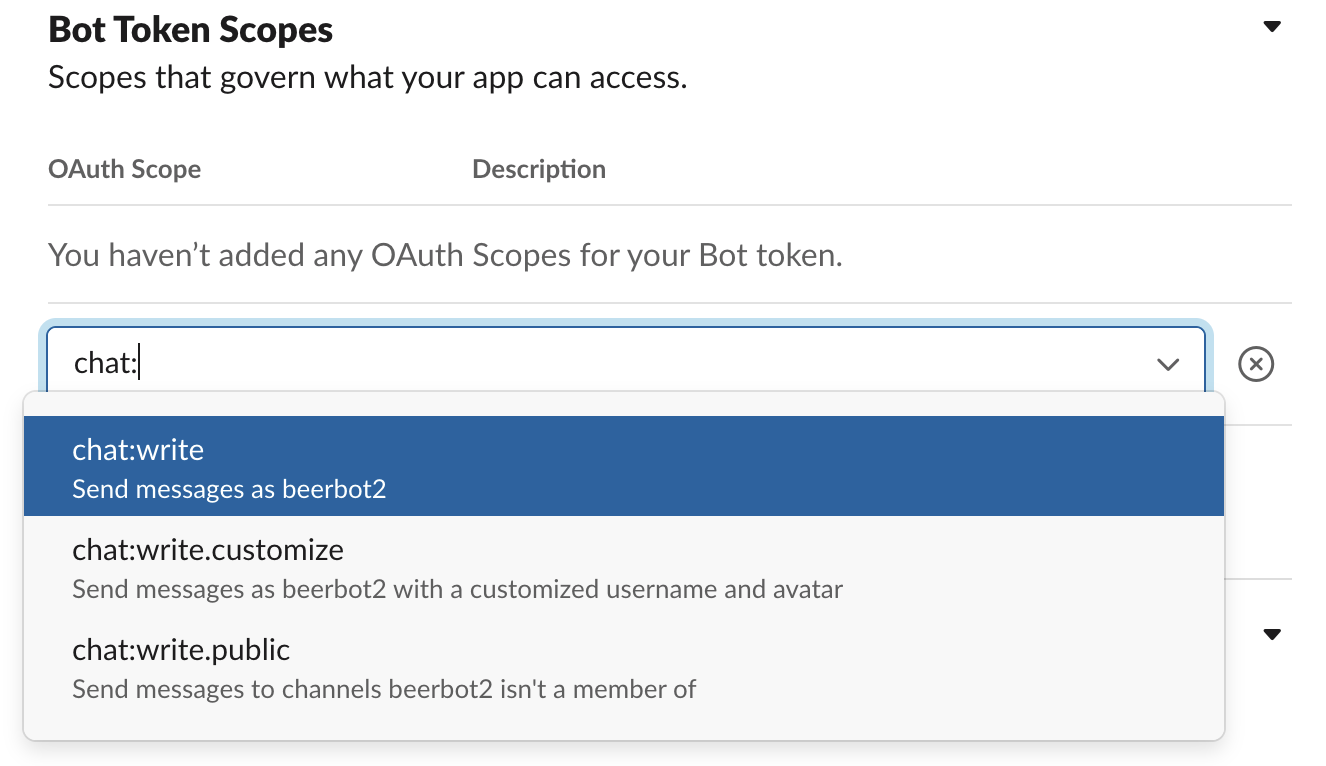
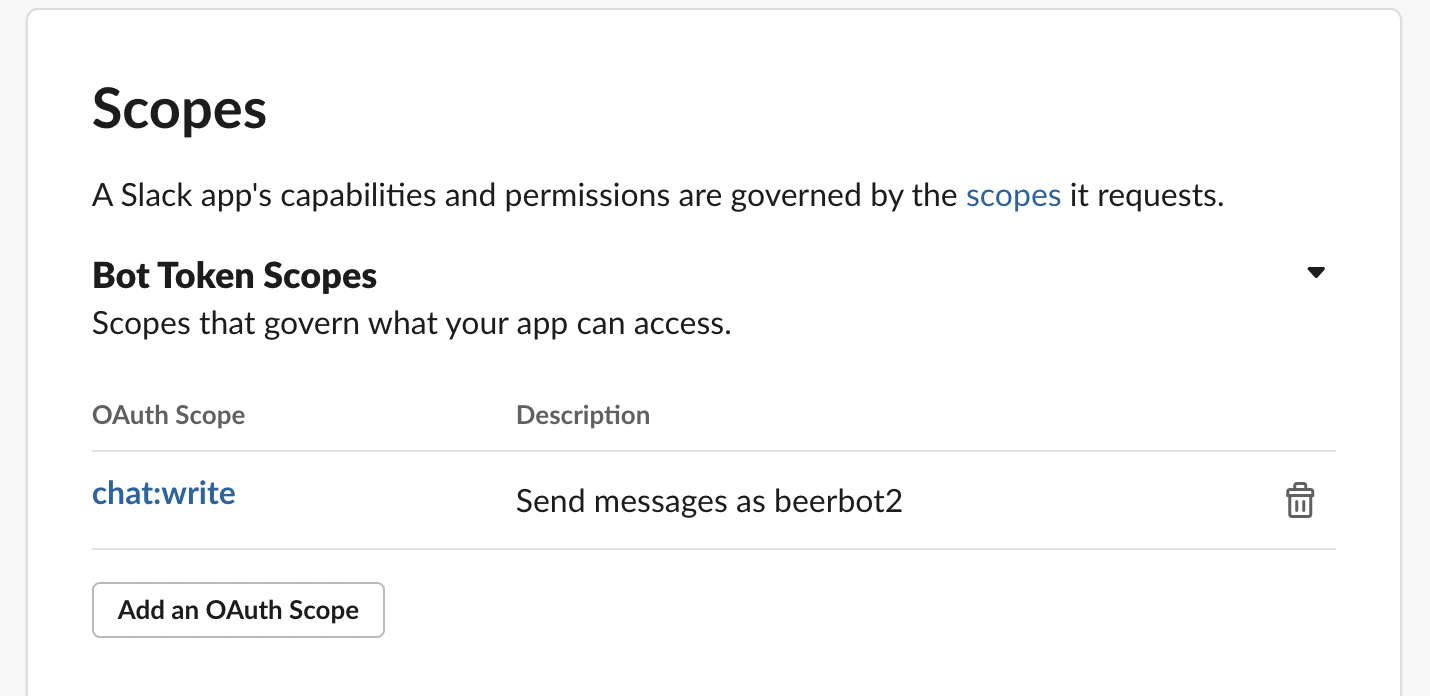
4. Add Bot Token Scopes / スコープ追加
Select “OAuth & Permissions”
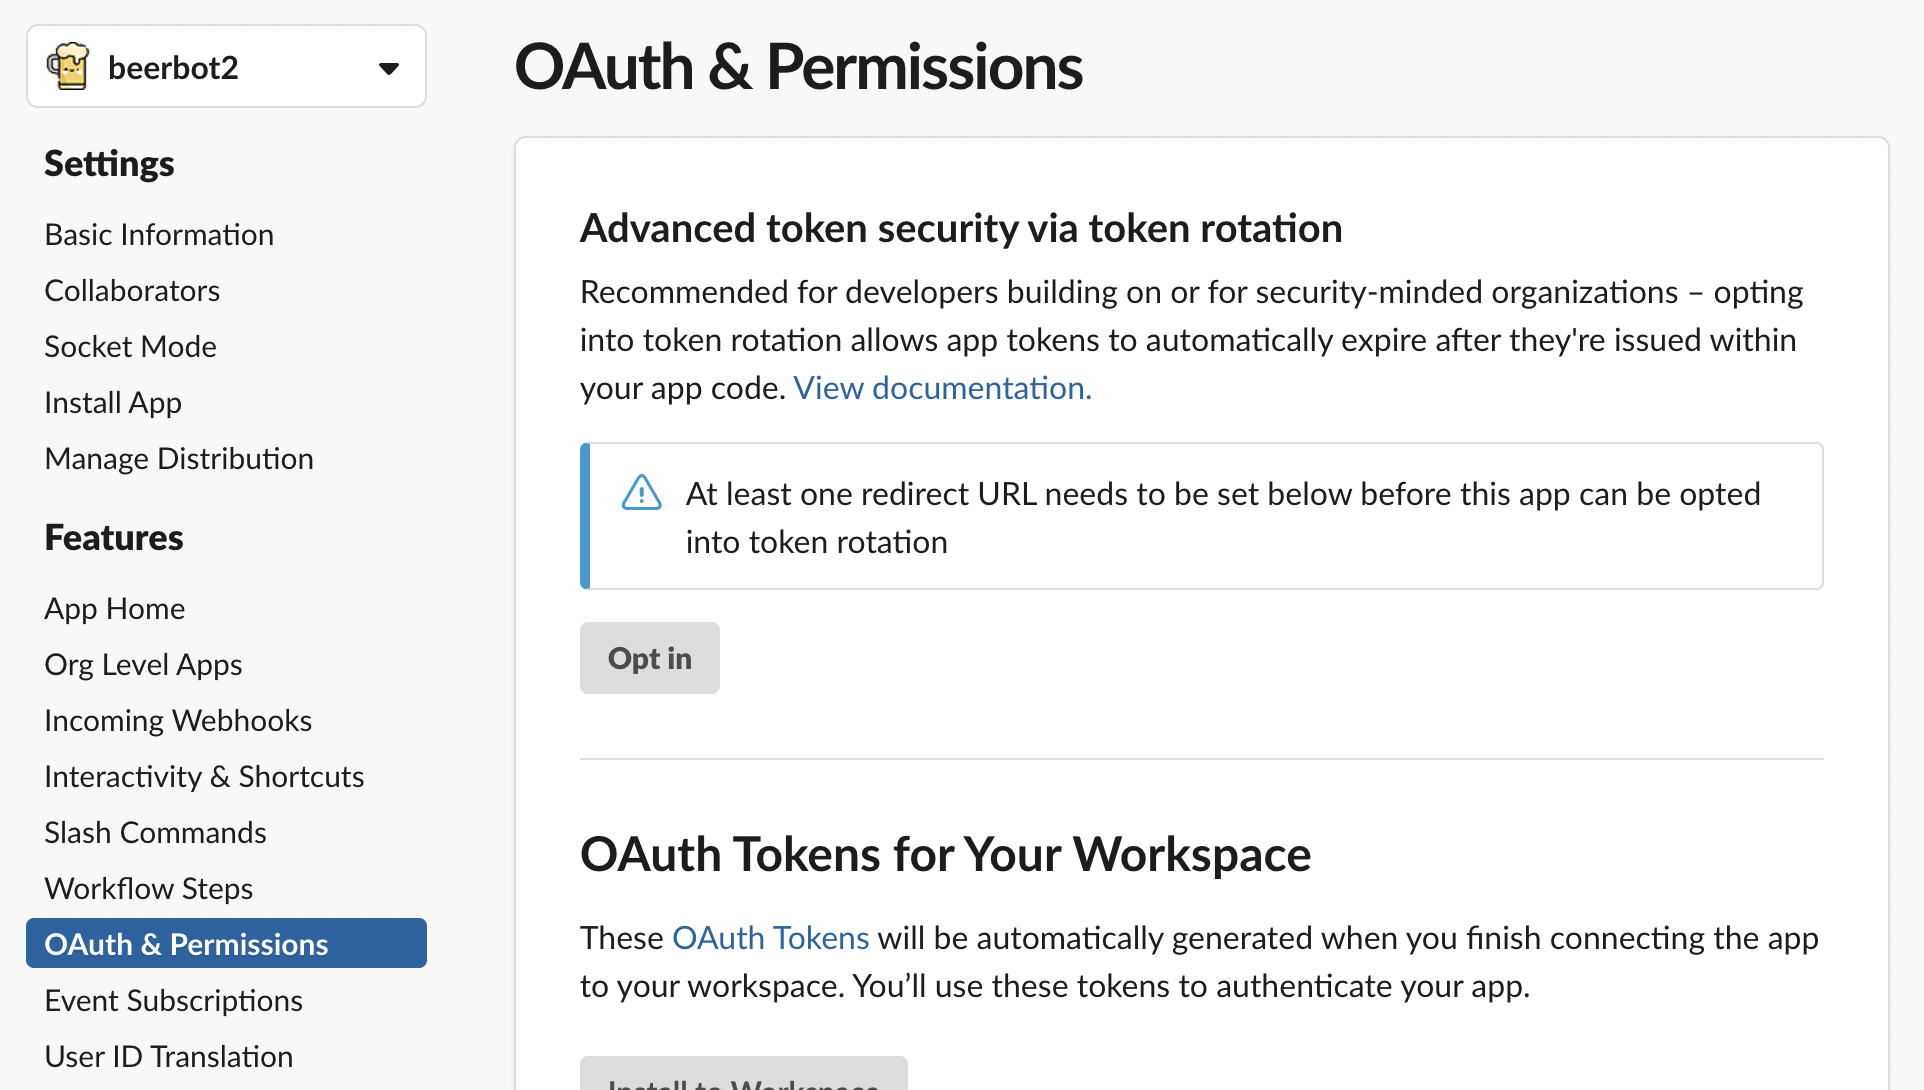
Click “Add on OAuth Scope”
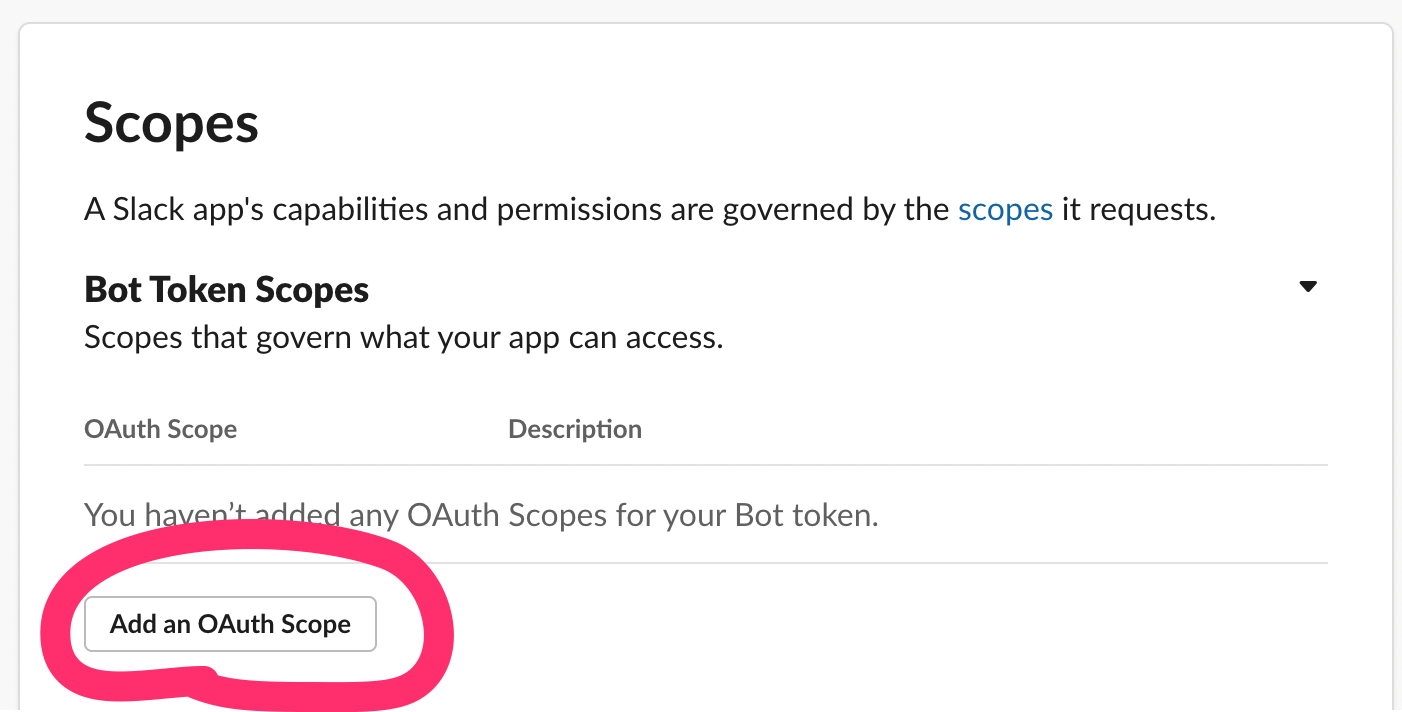
Add “chat:write” to Bot Token Scopes
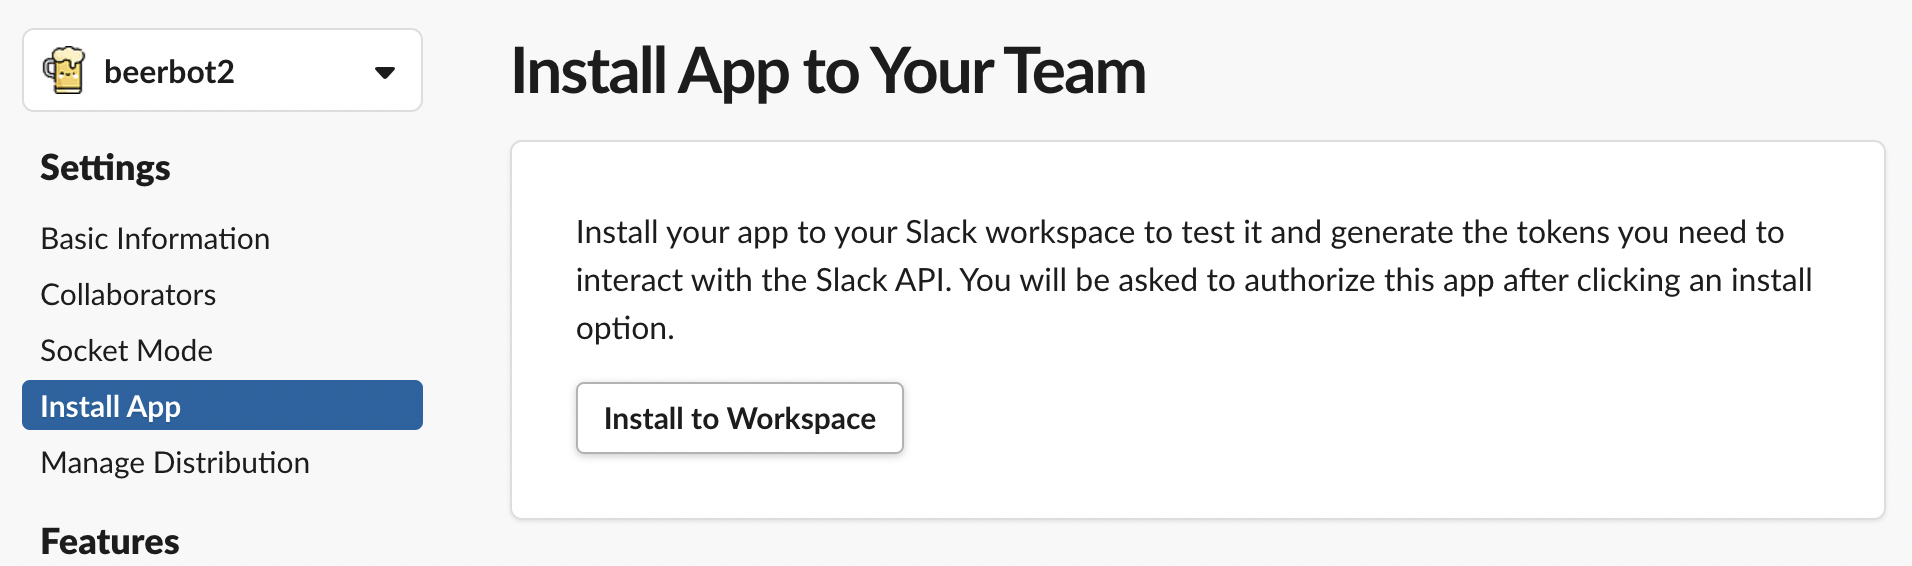
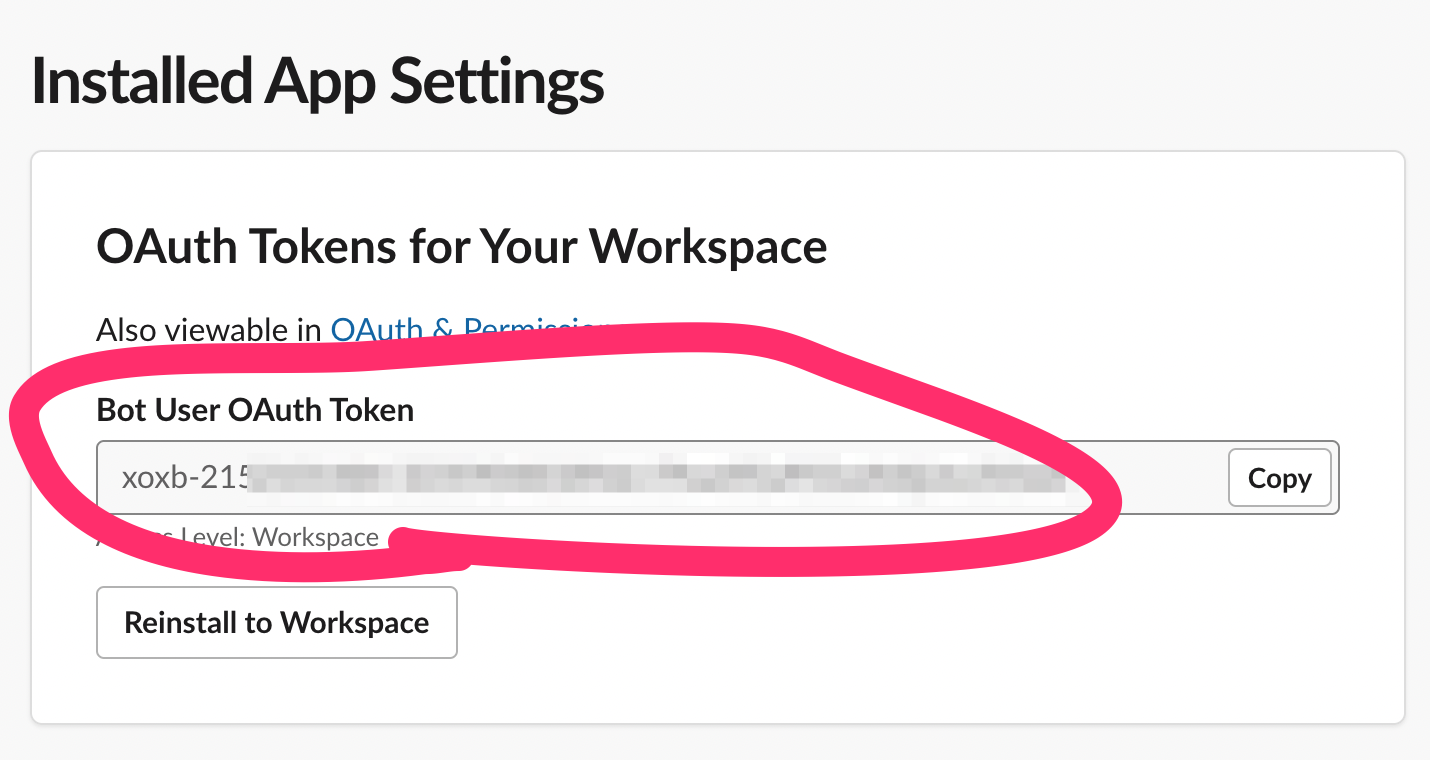
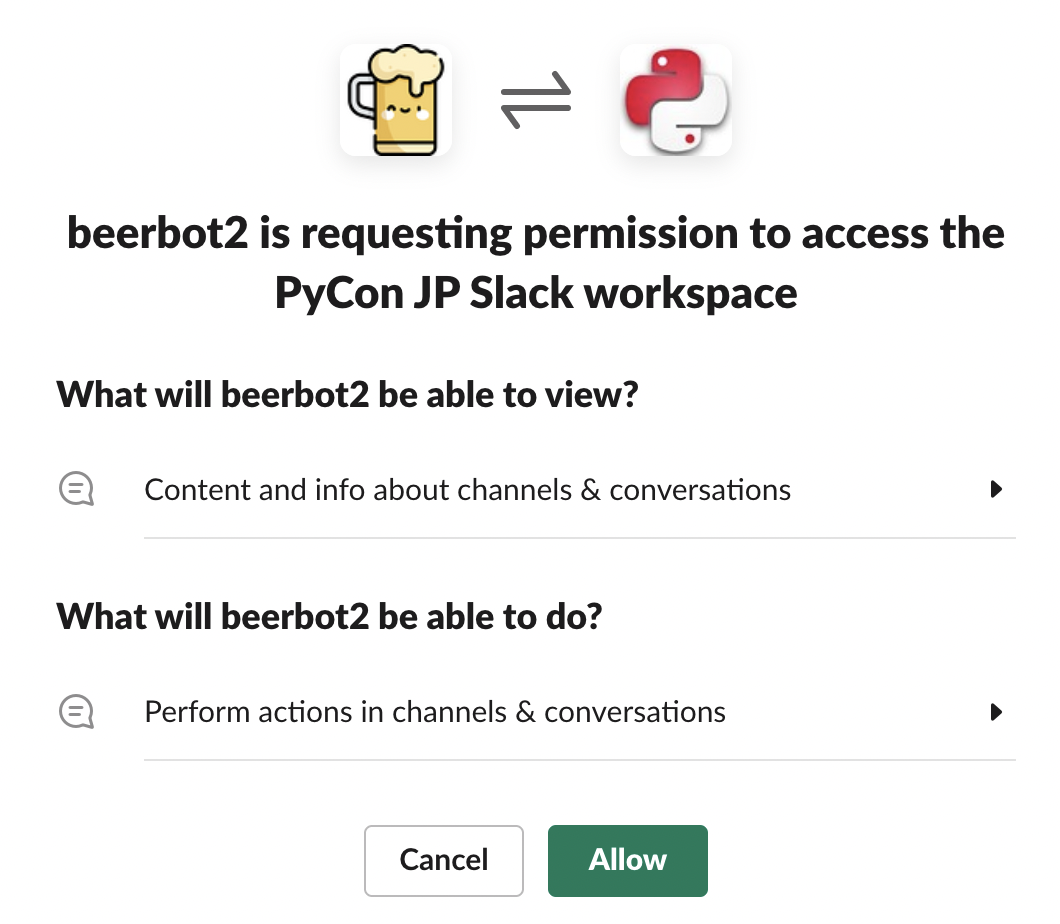
5. Install App to Workspace / アプリをインストール
Select “Install App” → Click “Install to Workspace”
Switch OAuth screen → Click “Allow” button
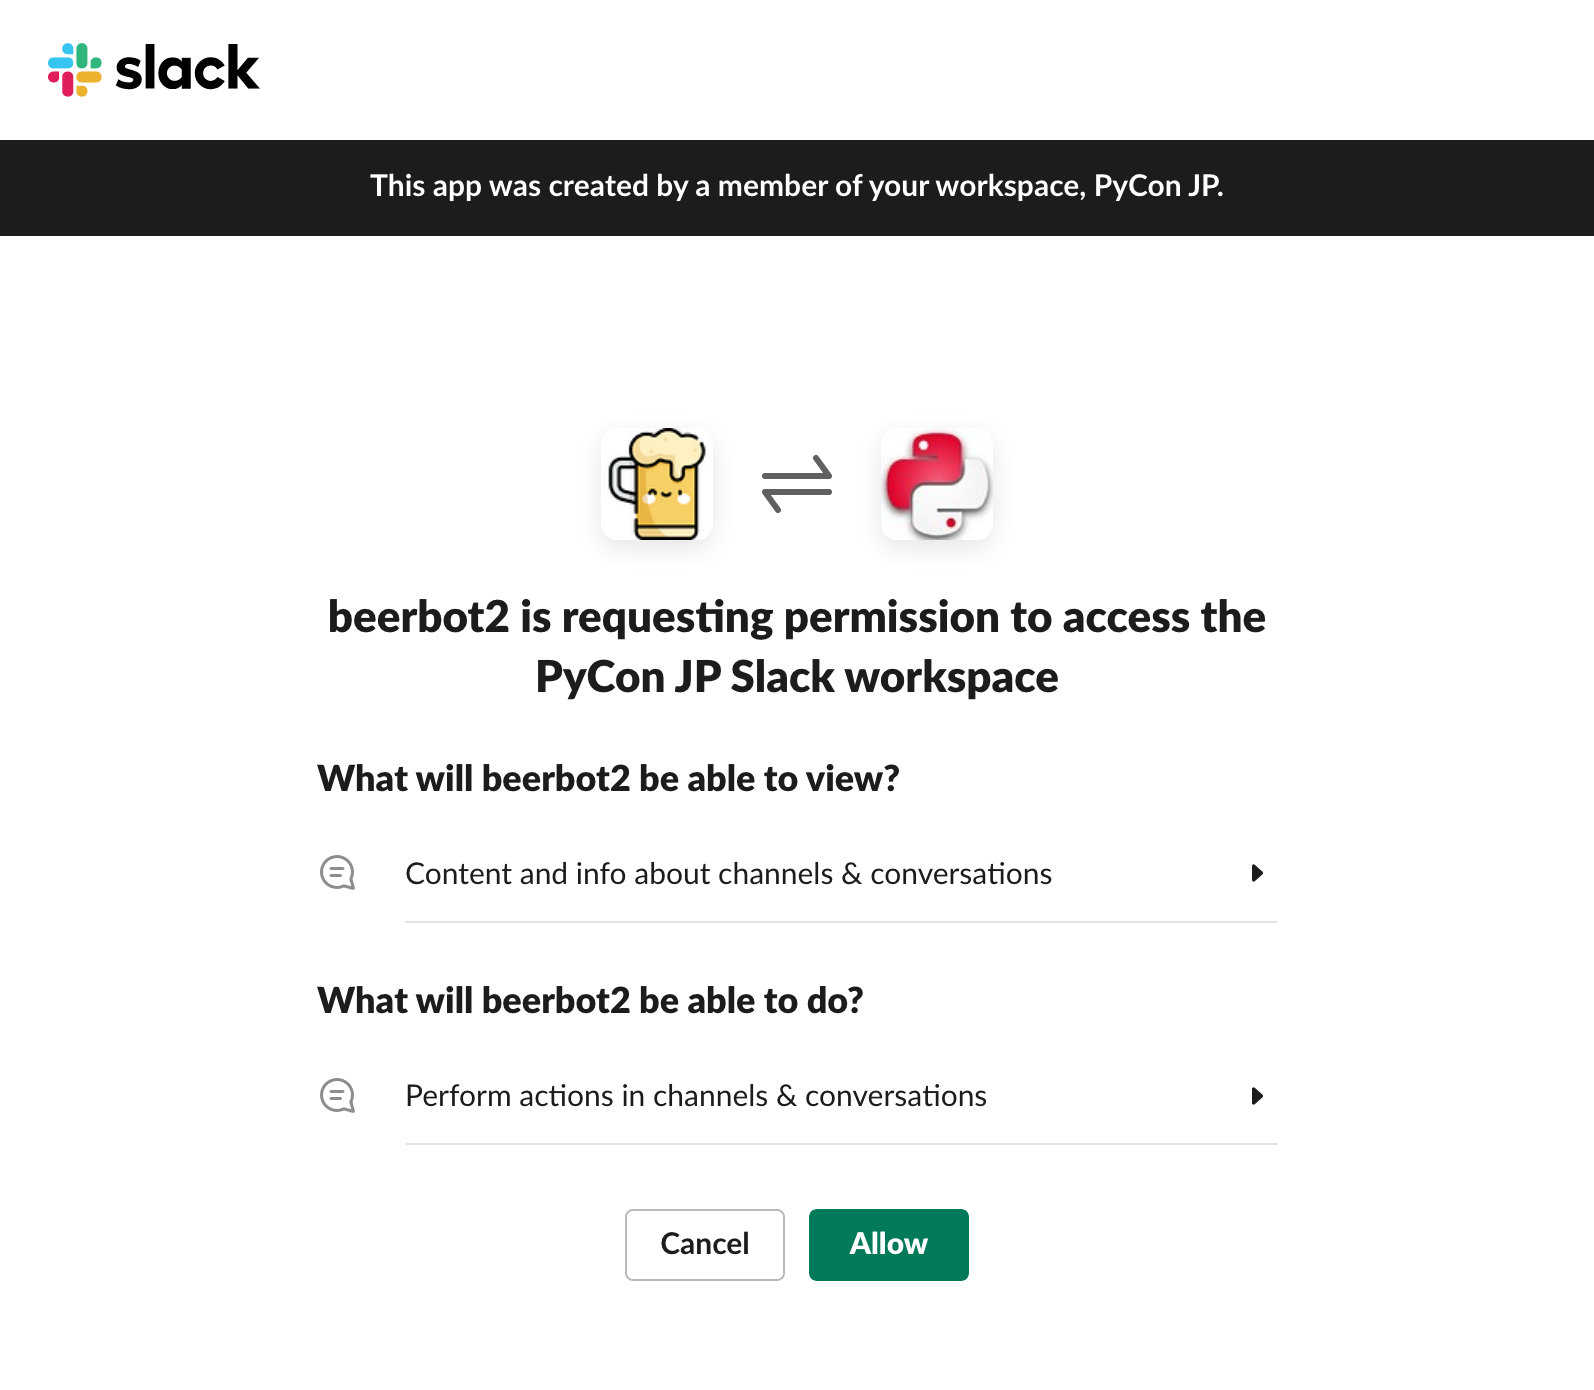
Get Bot Token:
xoxb-...
Invite bot user to channels
botユーザーをチャンネルに招待

Long and Complex !! 🤯
手順が 長い し 複雑 !!
App Manifest ⚙️
App Manifest
YAML-formatted configuration for Slack apps
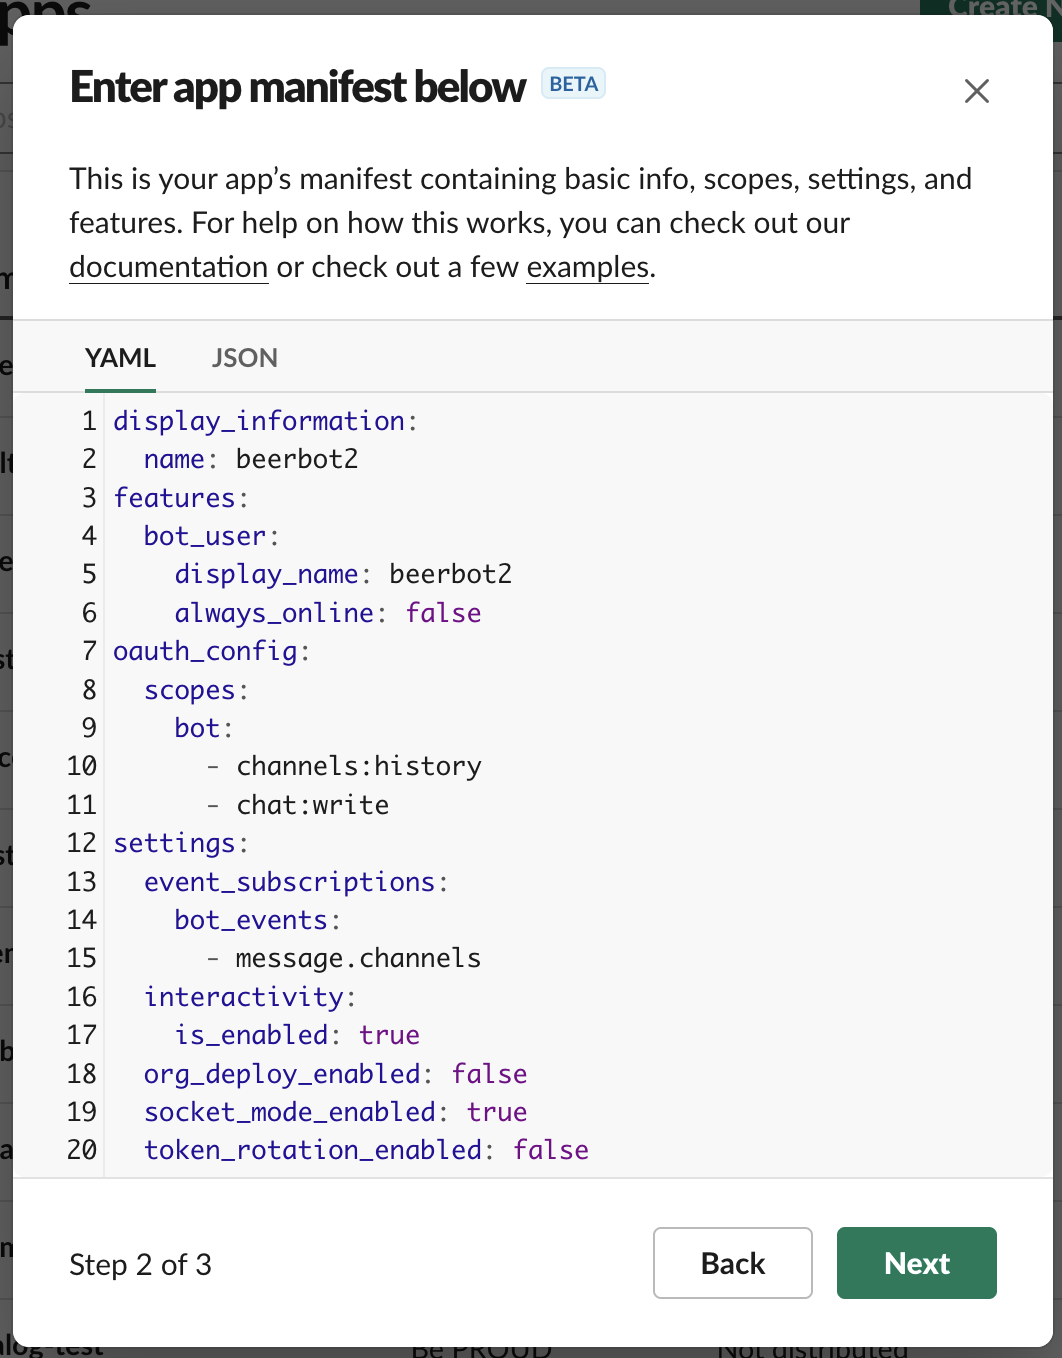
Example of App Manifest
display_information:
  name: beerbot2
features:
  bot_user:
    display_name: beerbot2
    always_online: false
oauth_config:
  scopes:
    bot:
      - channels:history
      - chat:write
settings:
  event_subscriptions:
    bot_events:
      - message.channels
  interactivity:
    is_enabled: true
  org_deploy_enabled: false
  socket_mode_enabled: true
  token_rotation_enabled: false
Get App Manifest / App Manifestを取得
Select “App Manifest” menu

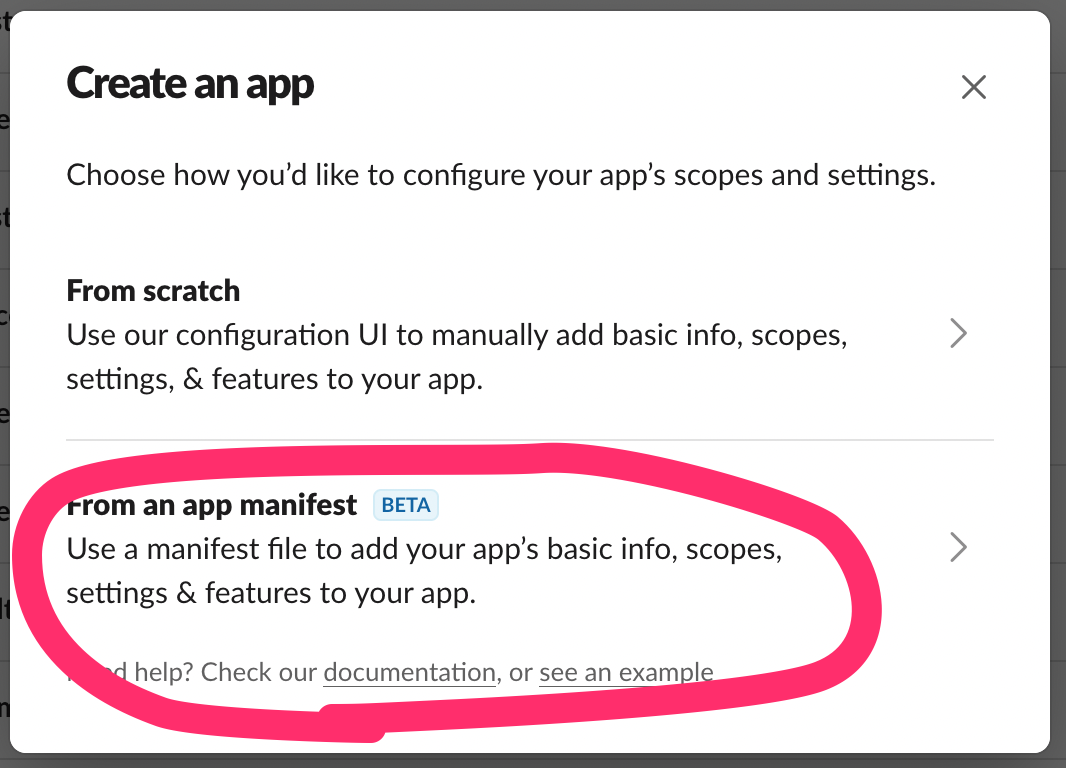
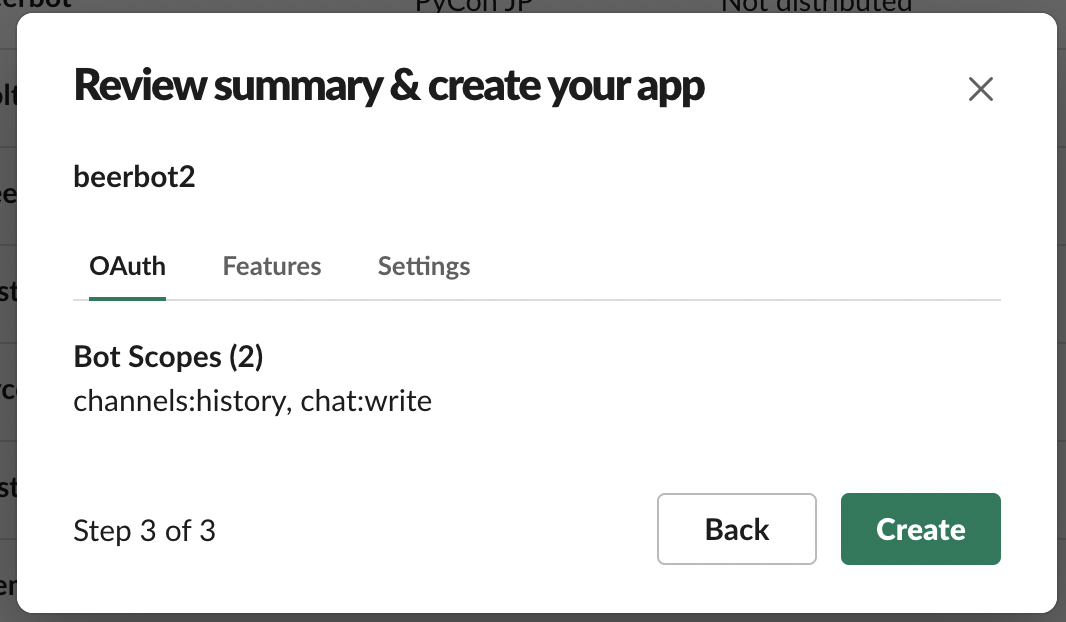
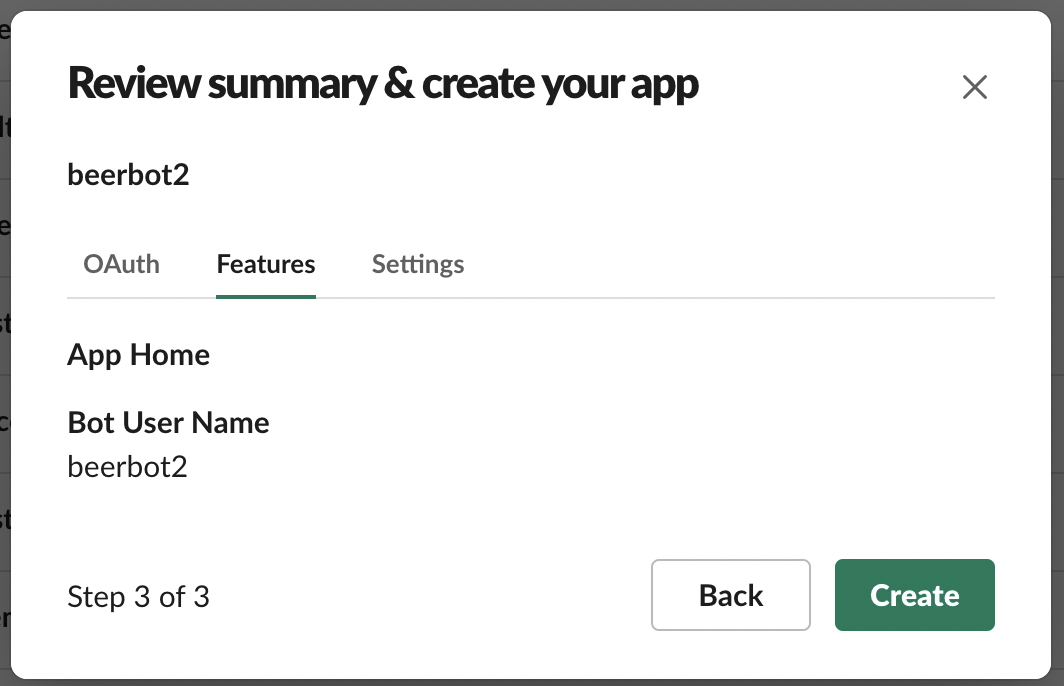
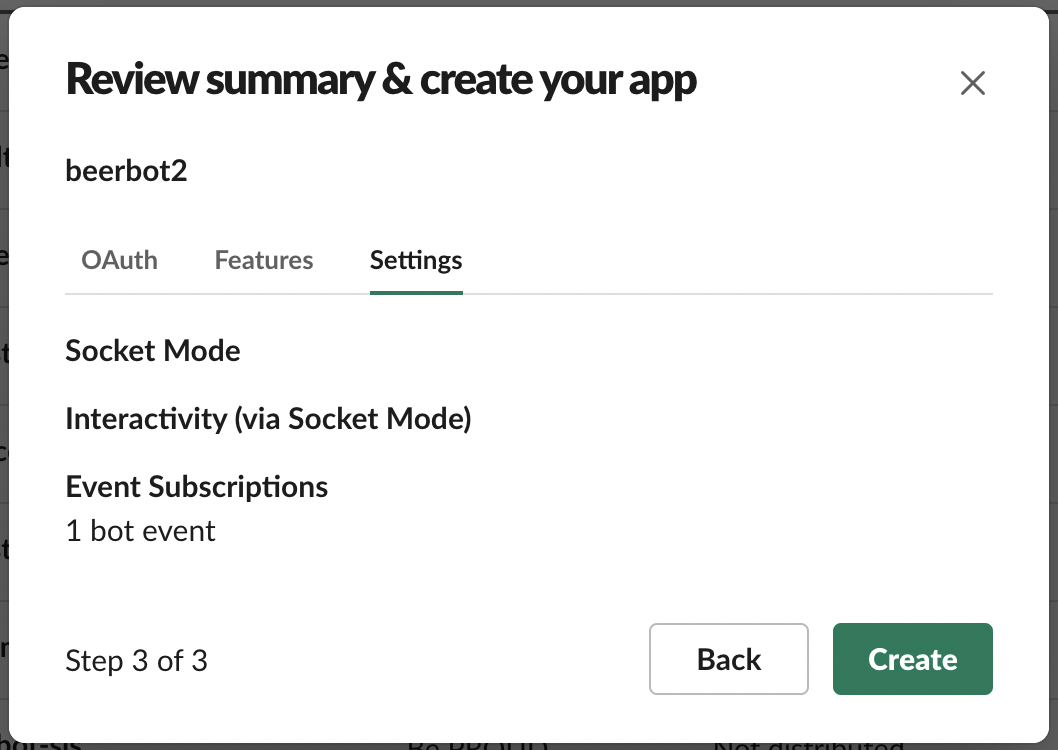
Create new app with App Manifest
App ManifestでSlack appを作成
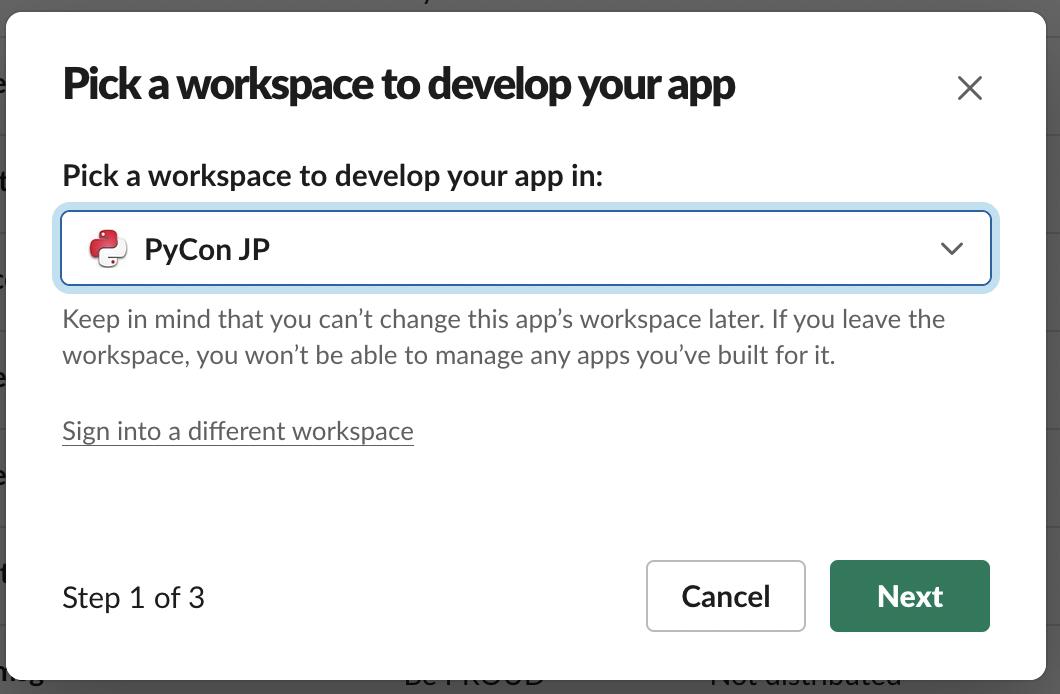
Select “From an app manifest”
Select workspace → Click “Next”
Enter app manifest YAML
Review app summary → Click “Create”
Install App to Workspace
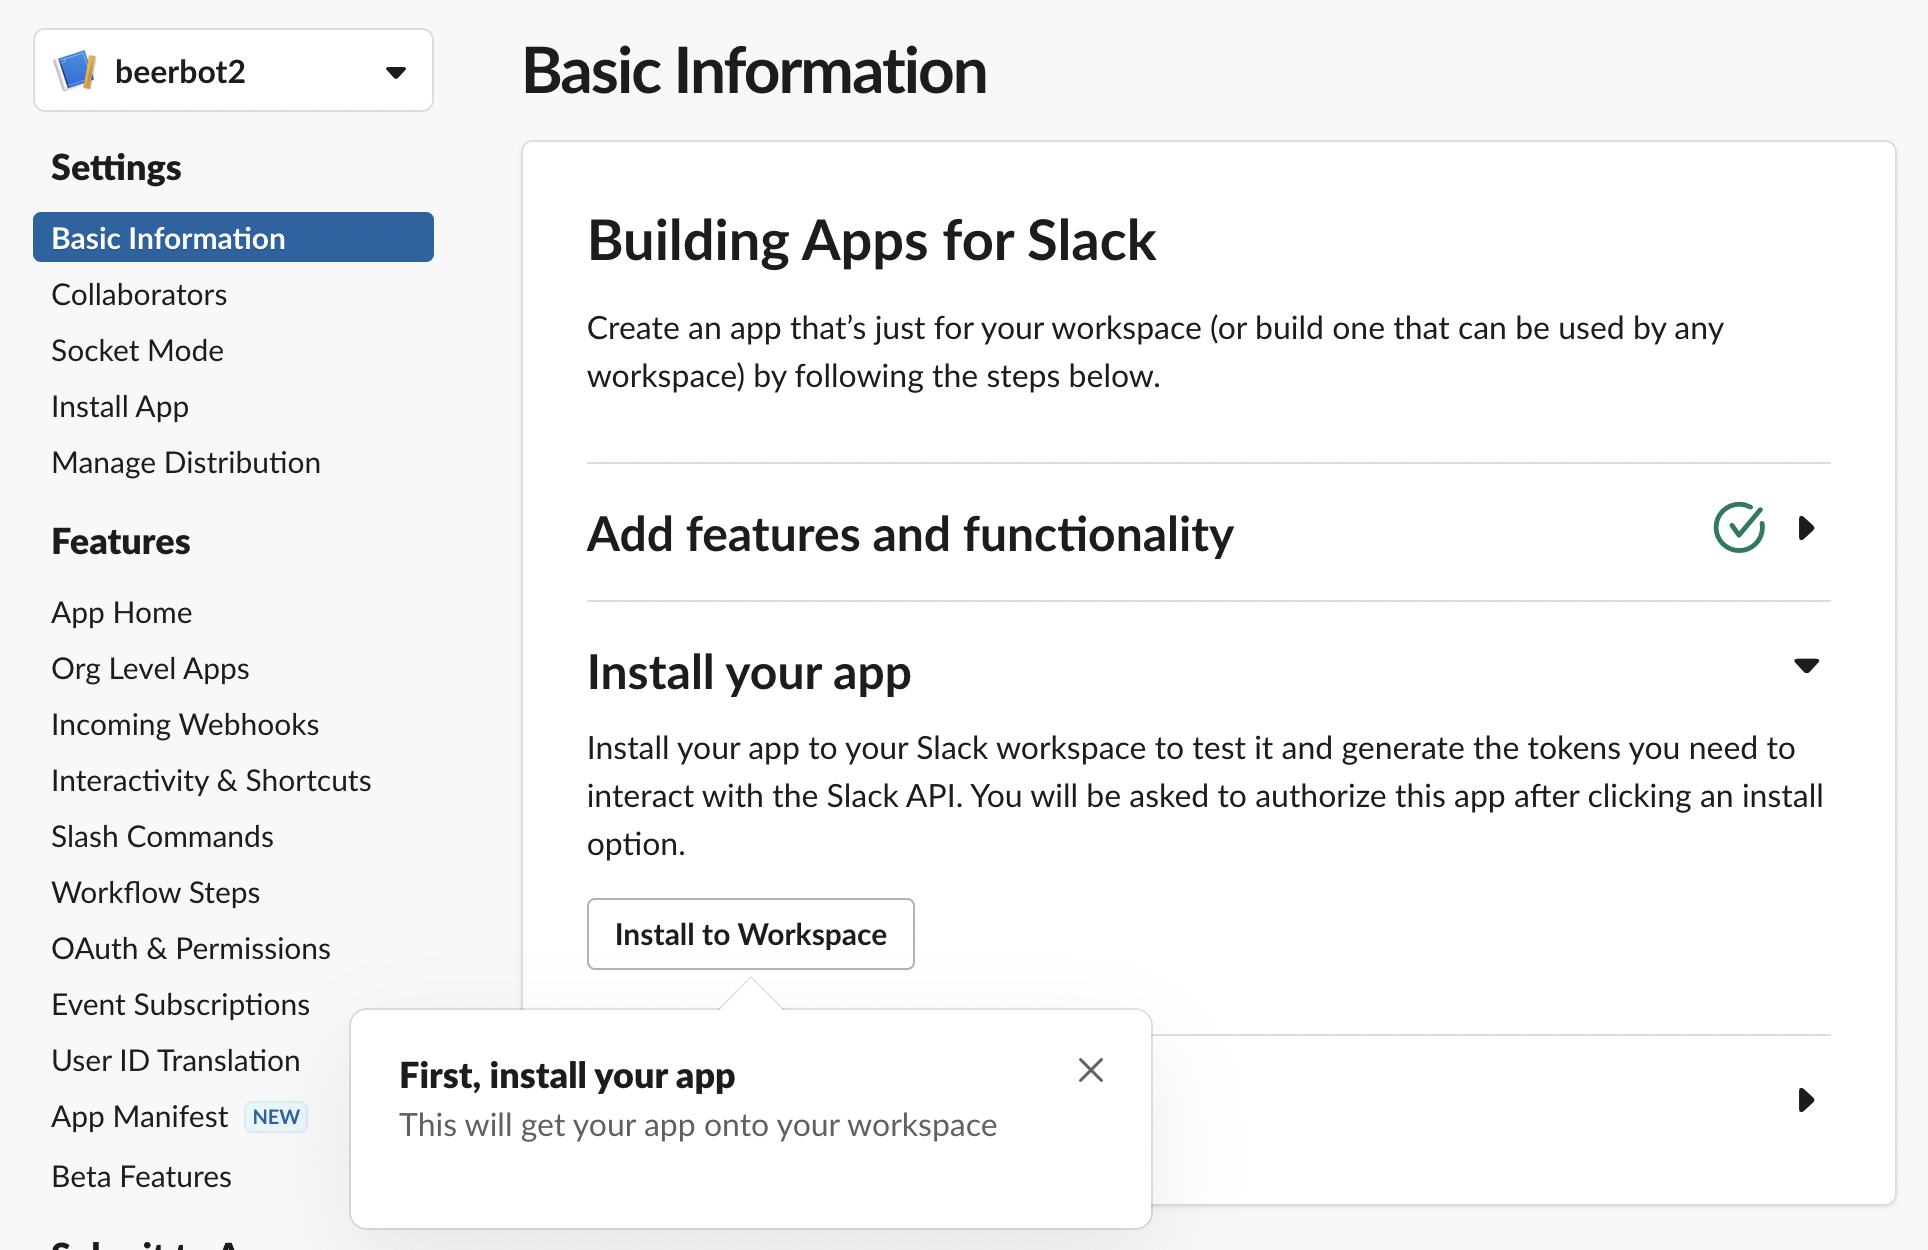
Generate App-Level Token
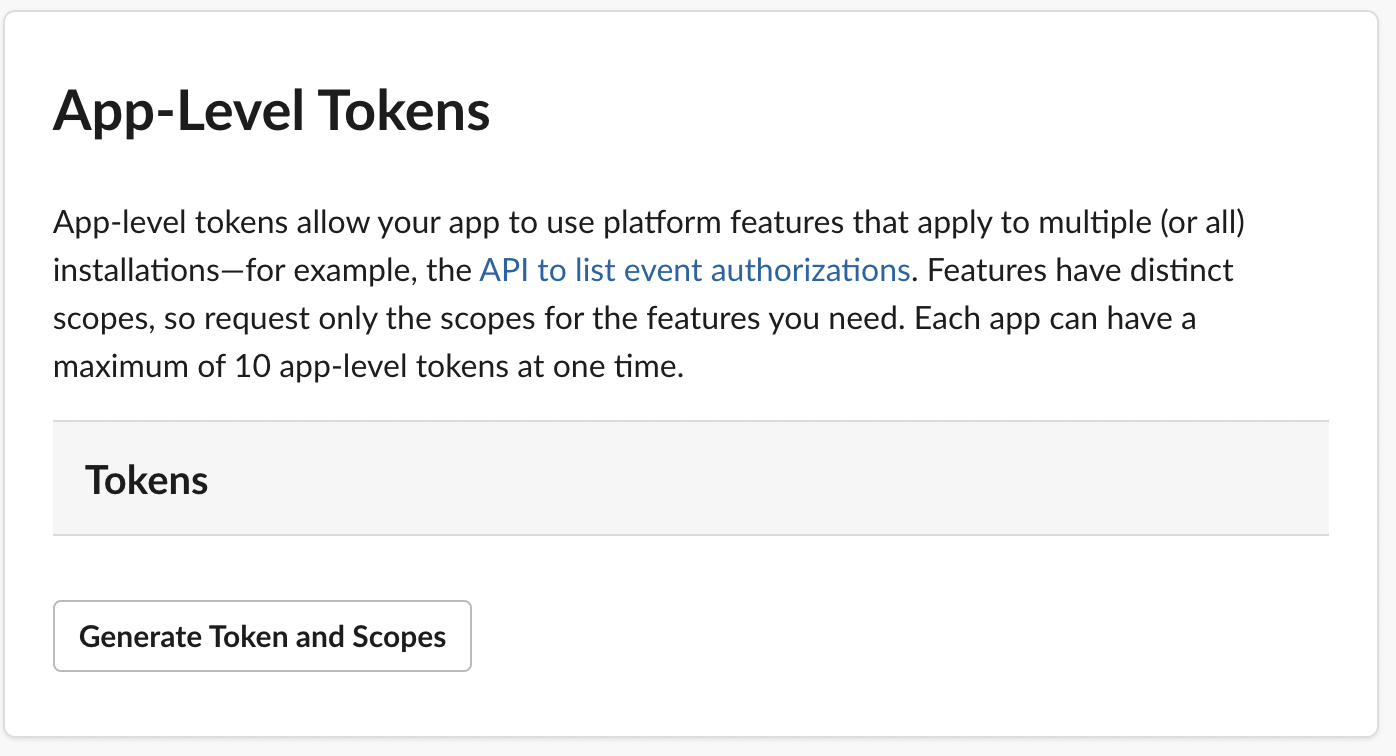
Short and Reusable !! 🥳
短い し 再利用 できる!!
Create bot with Bolt ⚡️
Bolt を使ってbotを作成
Bolt for Python
Python framework to build Slack app in a flash
Developped by Slack
see:
The Bolt family of SDKs (JavaScript, Java)
Install Bolt for Python
$ mkdir beerbot
$ cd beerbot
$ python3.10 -m venv env
$ . env/bin/activate
(env) $ pip install slack-bolt
Create a simple bot with Bolt
簡単なbotをBoltで 作成
import os
from slack_bolt import App
from slack_bolt.adapter.socket_mode import SocketModeHandler
app = App(token=os.environ["SLACK_BOT_TOKEN"])
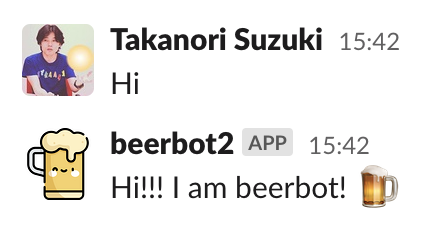
# match any message contains "Hi"
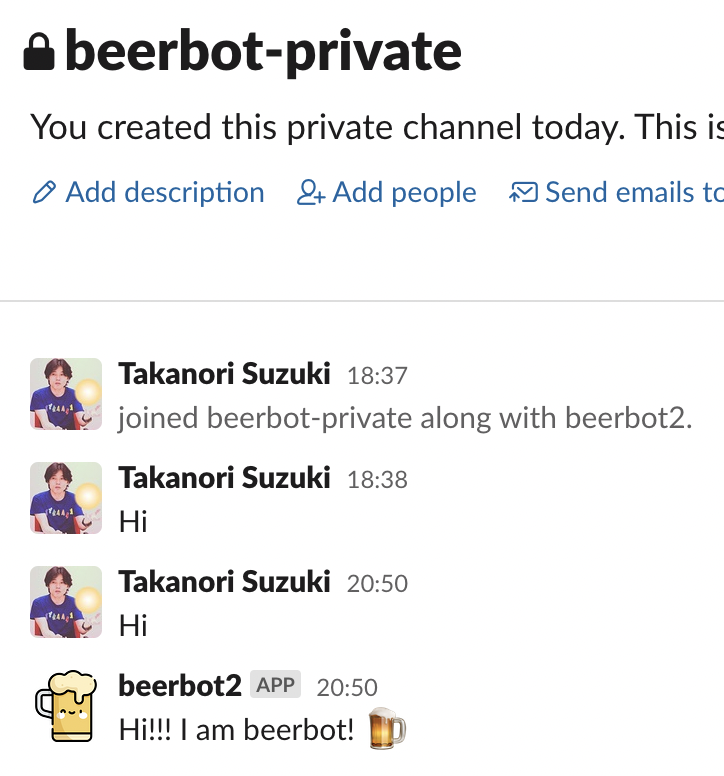
@app.message("Hi")
def handle_hi_message(message, say):
say("Hi!!! I am beerbot! :beer:")
if __name__ == "__main__":
app_token = os.environ["SLACK_APP_TOKEN"]
SocketModeHandler(app, app_token).start()
Running bot / botを 実行
# Set 2 tokens in environment variables
(env) $ export SLACK_APP_TOKEN=xapp-...
(env) $ export SLACK_BOT_TOKEN=xoxb-...
(env) $ python app.py
⚡️ Bolt app is running!I can interact with the bot ! 🎉
botと 会話 できた!
Extend bot 🔧
botを 拡張
@app.message() decolator
# match any message contains "Hi"
@app.message("Hi")
def handle_hi_message(message, say):
say("Hi!!! I am beerbot! :beer:")
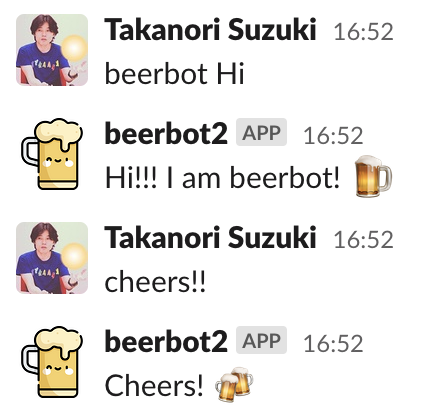
# match any message contains "cheers"
@app.message("cheers")
def handle_cheers_message(mesasge, say):
say("Cheers! :beers:")
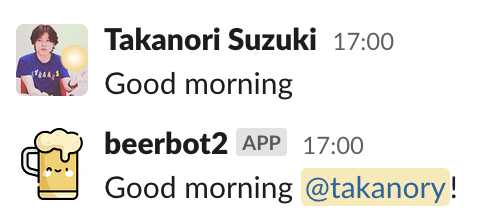
mention / メンション
@app.message("morning")
def handle_morning_message(message, say):
    """reply morning greetings with mention"""
    user = message["user"]  # get user ID
    say(f"Good morning <@{user}>!")
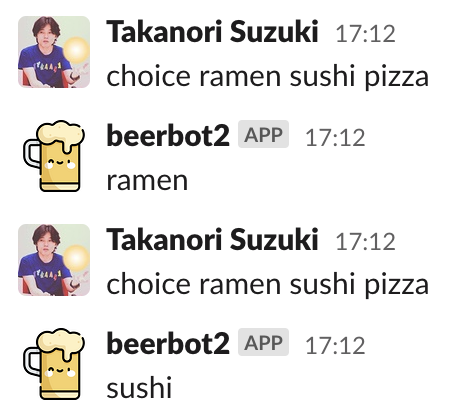
Use regular expression / 正規表現を使う
import random
import re

@app.message(re.compile(r"choice (.*)"))
def handle_choice(say, context):
    """random choice from words"""
    # get matched text from context["matches"]
    words = context["matches"][0].split()
    say(random.choice(words))
Use regular expression / 正規表現を使う
@app.message(re.compile(r"(\d+)\s*(beer|tea)"))
def handle_beer_or_tea(say, context):
    """serve a specified number of beers or teas"""
    count = int(context["matches"][0])
    beer_or_tea = context["matches"][1]
    say(f":{beer_or_tea}:" * count)

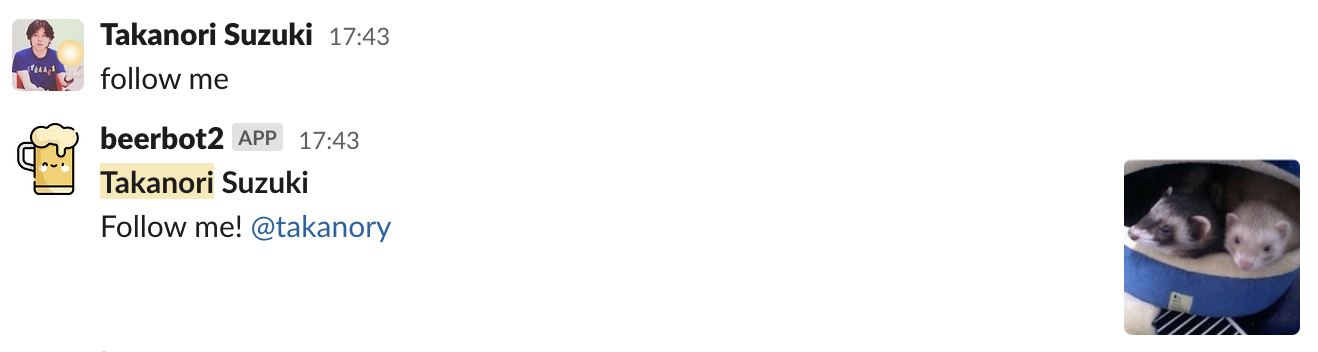
Block Kit support
@app.message("follow me")
def handle_follow_me(message, say):
    """send follow me message with icon"""
    blocks = [{
        "type": "section",
        "text": {
            "type": "mrkdwn",
            "text": "*Takanori Suzuki*\nFollow me! <https://twitter.com/takanory|@takanory>",
        },
        "accessory": {
            "type": "image", "alt_text": "takanory",
            "image_url": "https://pbs.twimg.com/profile_images/192722095/kurokuri_400x400.jpg",
        }}]
    say(blocks=blocks)
Logging / ロギング
import logging
logging.basicConfig(level=logging.DEBUG)

@app.message("log")
def handle_log(message, say, logger):
    logger.debug(f"message: {message['text']}")
    say("logs exported!")
$ python app.py
⚡️ Bolt app is running!
DEBUG:app.py:handle_log:message: log
DEBUG:app.py:handle_log:message: please write log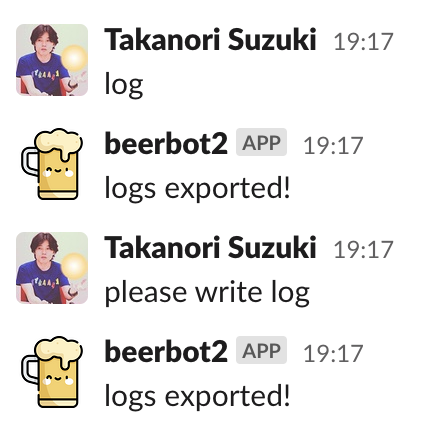
Events and Scopes 🔭
イベント と スコープ
Events and Scopes
Can only receive events in Bot Events
Can only execute APIs allowed by Bot Token Scopes
Current Bot Events and Scopes
Events
- message.channels:
message posted to public channels
Scopes
- channels:history:
View messages in public channels
- chat:write:
Post message
Current Bot Events and Scopes
Cannot read/write messages on private channels
Add Events and Scopes for private channels
Select “Event Subscriptions” → Click “Add Bot User Event”
Add message.groups event→ Click “Save Changes”

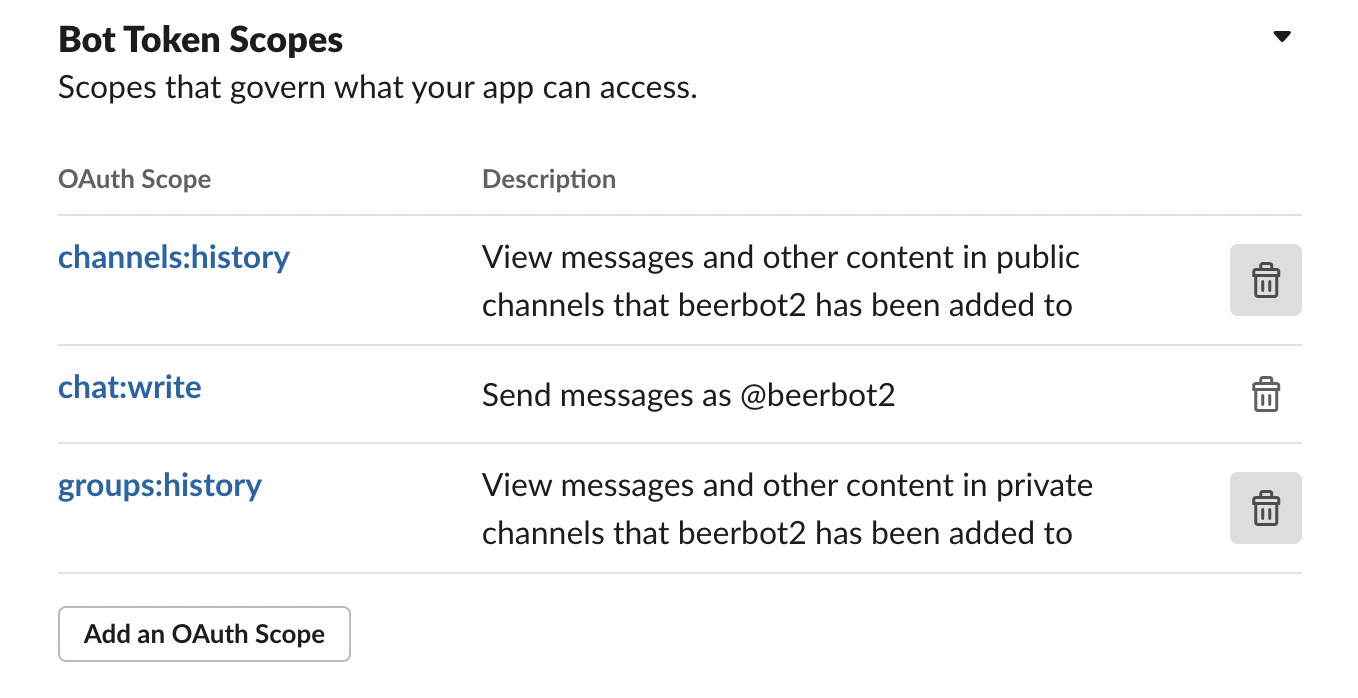
Add Events and Scopes for private channels
Select “OAuth & Permissions”
groups:history scope is automatically added
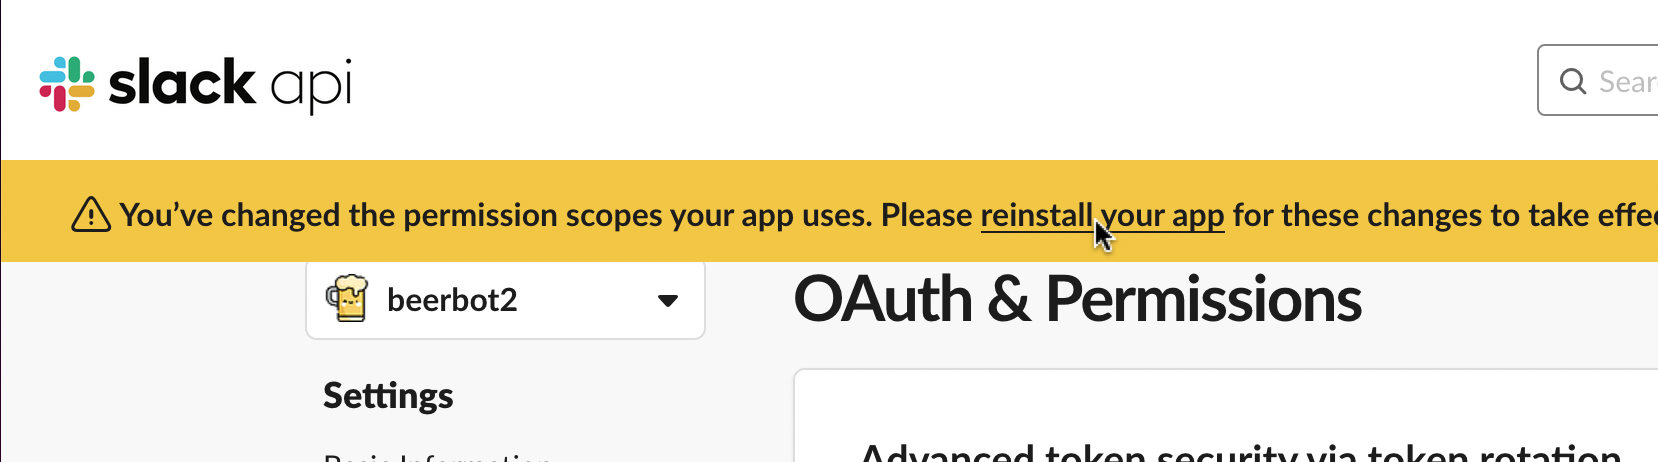
Add Events and Scopes for private channels
Reinstall app to workspace
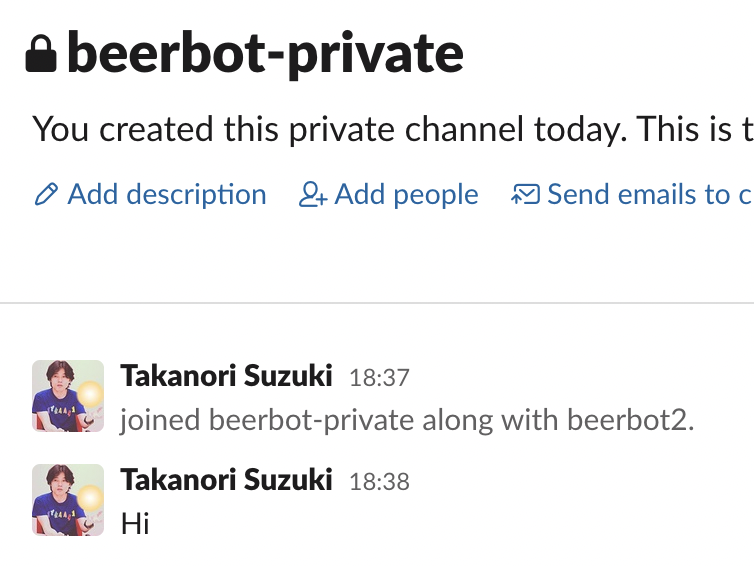
Add Events and Scopes for private channels
Bot can read/write messages in private channel
To know user joined a channel
ユーザーのチャンネルへの参加を知る
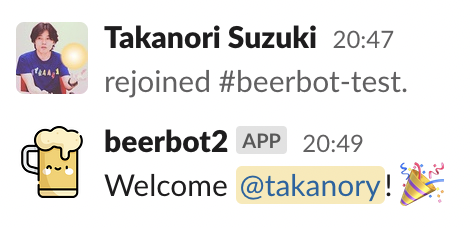
Add member_joined_channel event → Reinstall app
# A user joined a public or private channel
@app.event("member_joined_channel")
def member_joined(event, say):
    """send a welcome message to a new member"""
    user = event["user"]  # get user ID
    say(f"Welcome <@{user}>! :tada:")
Add Emoji reaction / emojiリアクション
Add reactions:write scope → Reinstall app
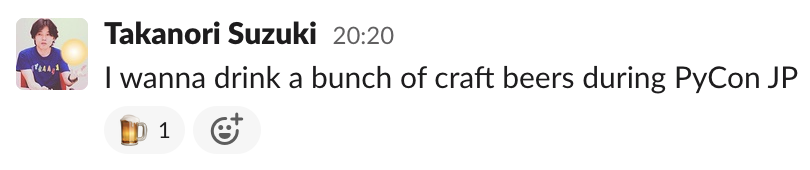
@app.message("beer")
def add_beer_emoji(client, message):
    """add :beer: emoji reaciton"""
    client.reactions_add(
        channel=message["channel"],
        timestamp=message["ts"],
        name="beer",
    )
Summary of Events and Scopes
まとめ: イベントとスコープ
To receive new events
To use new API with new scopes
Add events and/or scopes → Reinstall app
see: Events API types
see: Permission scopes
Case studies 📚
事例紹介
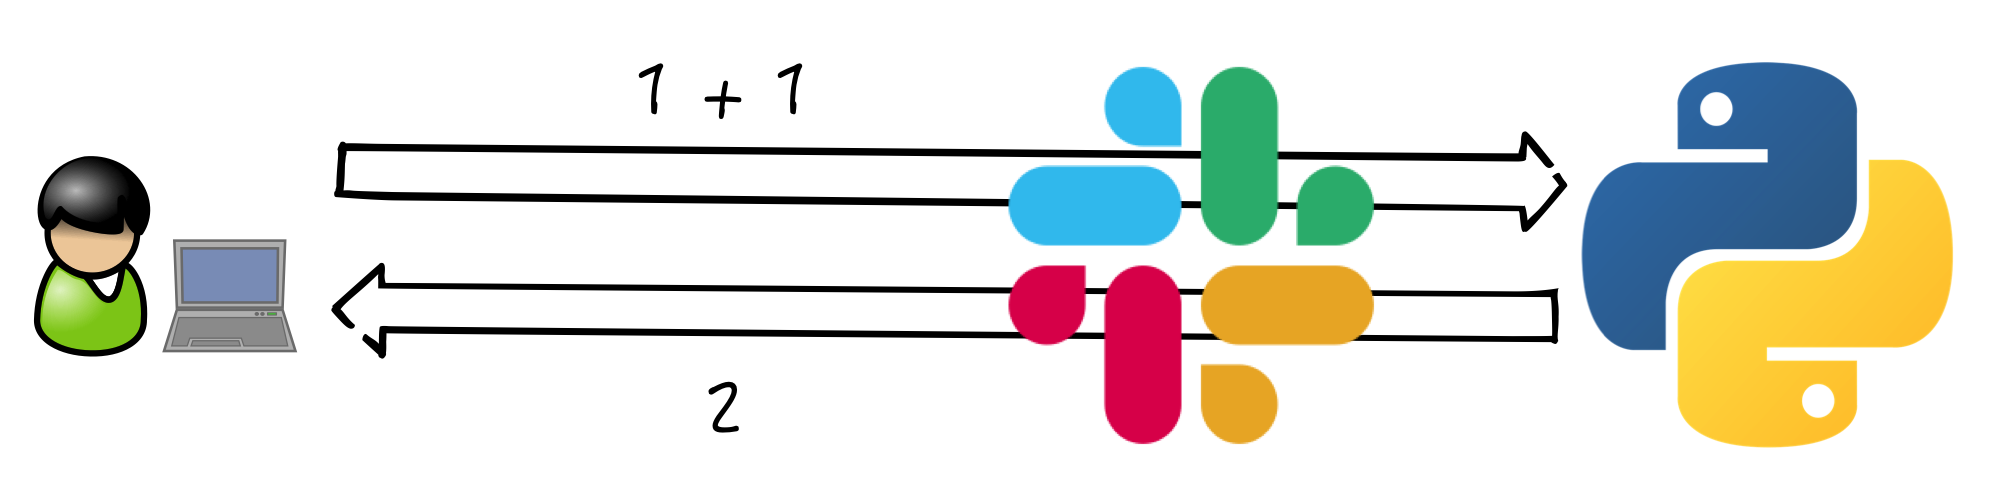
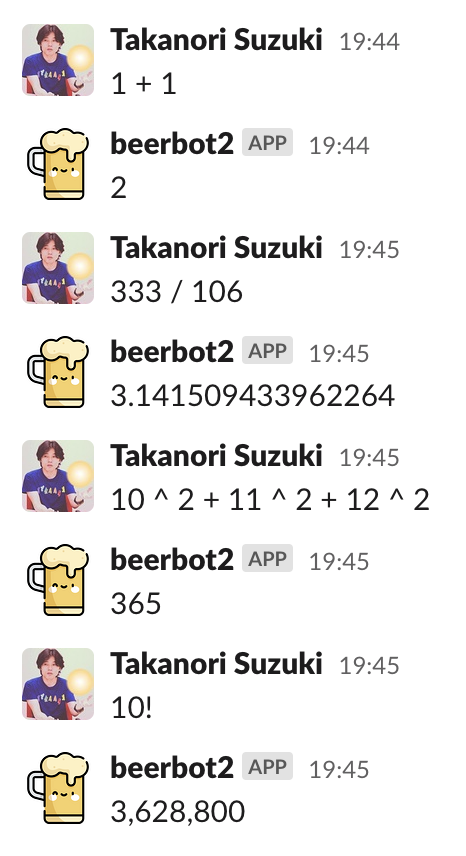
Calculator function using SymPy 🔢
SymPy を使った電卓機能
Calculator function using SymPy
Motivation
I feel heavy to call a calculator app on my smartphone
It seems useful if Slack as a calculator
System overview / システム概要
about SymPy
SymPy: Python library for symbolic mathematics
$ pip install sympycalc() function using Sympy
from sympy import sympify, SympifyError

@app.message(re.compile(r"^([-+*/^%!().\d\s]+)$"))
def calc(message, context, say):
    """calculator function"""
    try:
        formula = context["matches"][0]
        num = sympify(formula)  # Simplifies the formula
        # convert into or float
        answer = int(num) if num.is_Integer else float(num)
        say(f"{answer:,}")
    except SympifyError:
        pass
Slack as a calculator!! 🎉
Slackが 電卓 になった!!
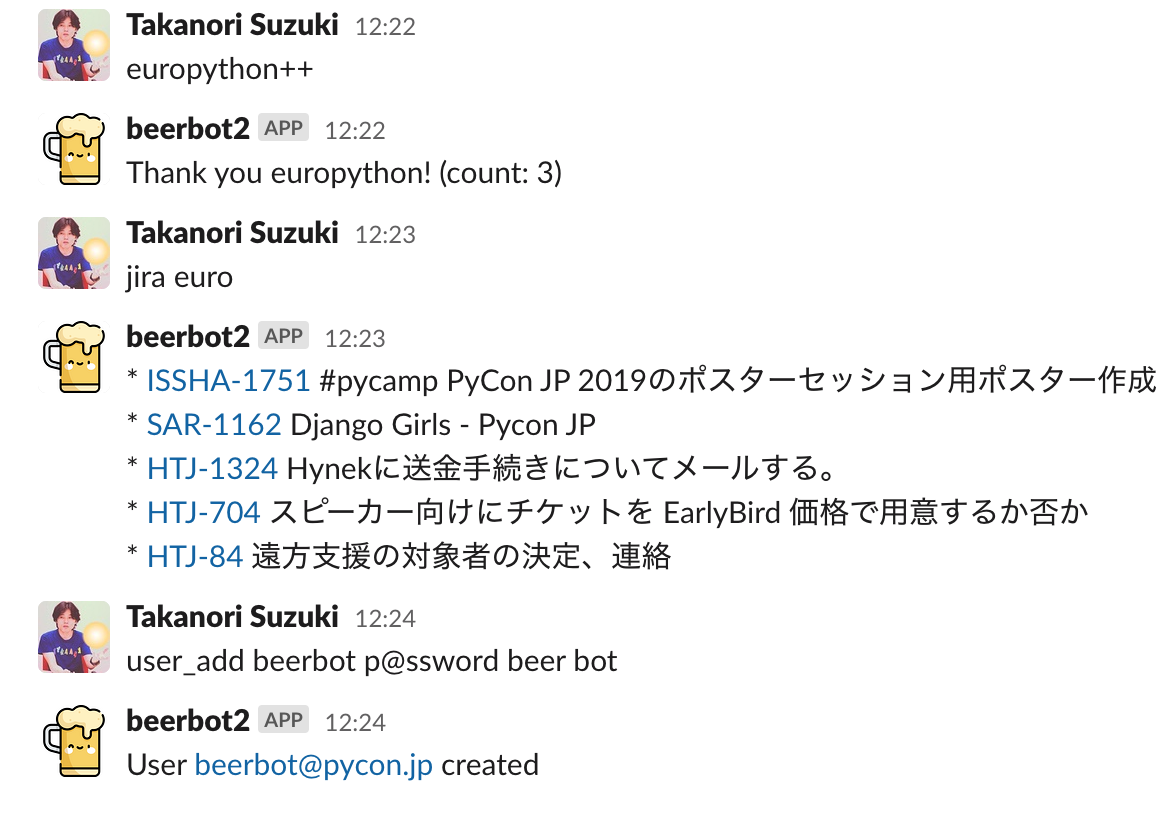
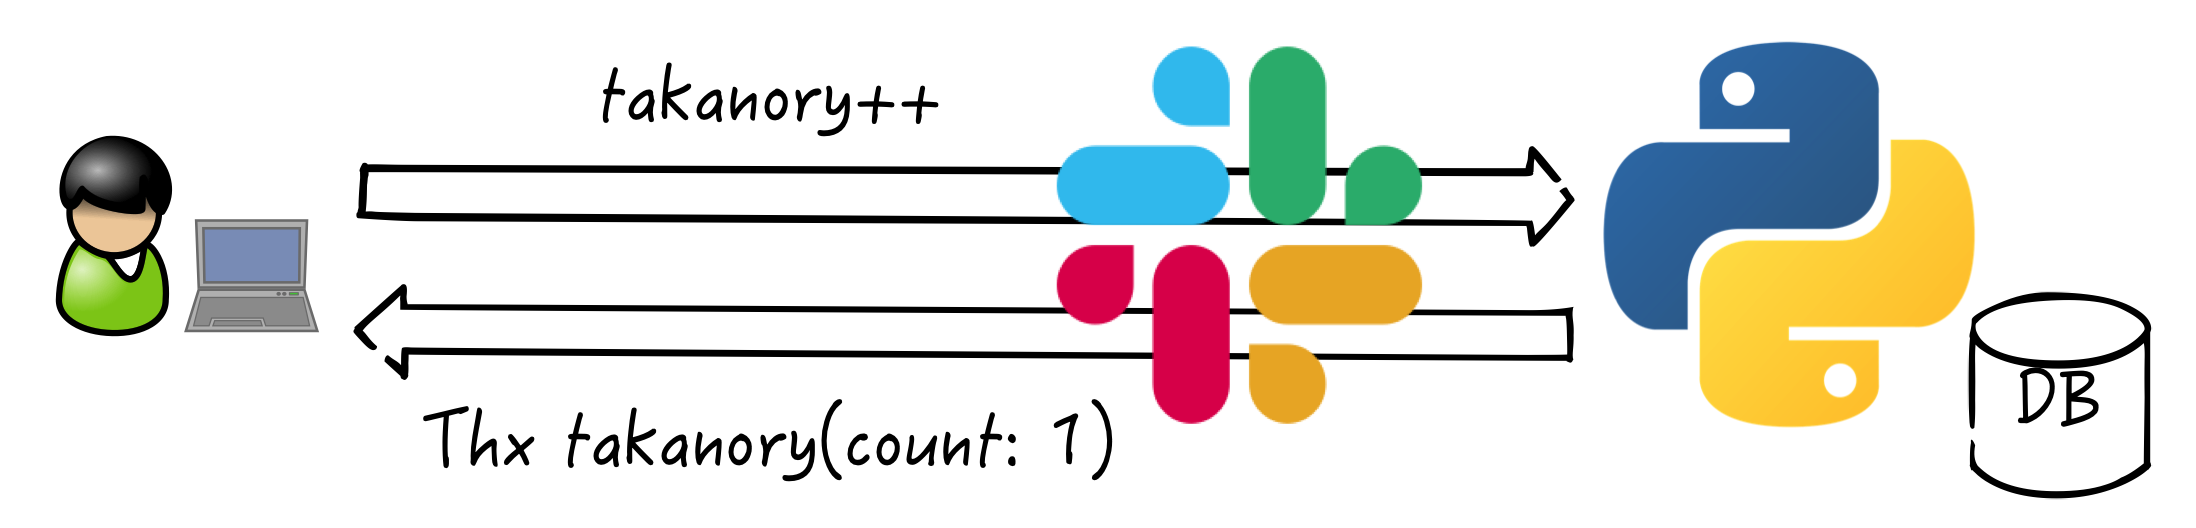
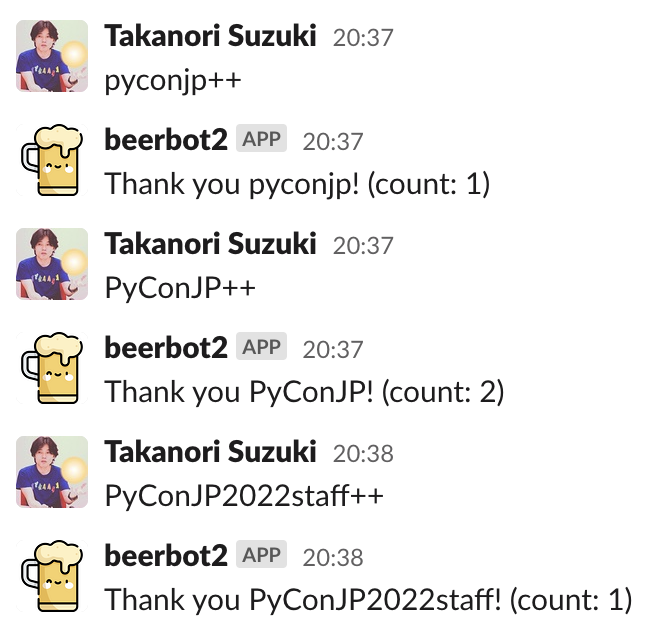
Plus-plus feature using Peewee ORM 👍
Peewee ORM を使ったプラプラ機能
Plus-plus feature using Peewee ORM
Motivation
In PyCon JP, I want to make a culture that appreciates each other staff 👍
System overview / システム概要
about Peewee
Simple and small ORM.
a small, expressive ORM
supports sqlite, mysql and postgresql
$ pip install peeweeplusplus_model.py
from peewee import SqliteDatabase, Model, CharField, IntegerField

db = SqliteDatabase("plusplus.db")

class Plusplus(Model):
    name = CharField(primary_key=True)  # fields
    counter = IntegerField(default=0)

    class Meta:
        database = db

db.connect()
db.create_tables([Plusplus], safe=True)
plusplus() function using Peewee
from plusplus_model import Plusplus

@app.message(re.compile(r"^(\w+)\+\+")) # match "word++" pattern
def plusplus(say, context):
    """increments a counter with a name"""
    name = context["matches"][0]
    # Get or create object
    plus, created = Plusplus.get_or_create(
        name=name.lower(),
        defaults={'counter': 0},
    )
    plus.counter += 1
    plus.save()
    say(f"Thank you {name}! (count: {plus.counter})")
I can appreciate it! 🎉
感謝 できる!!
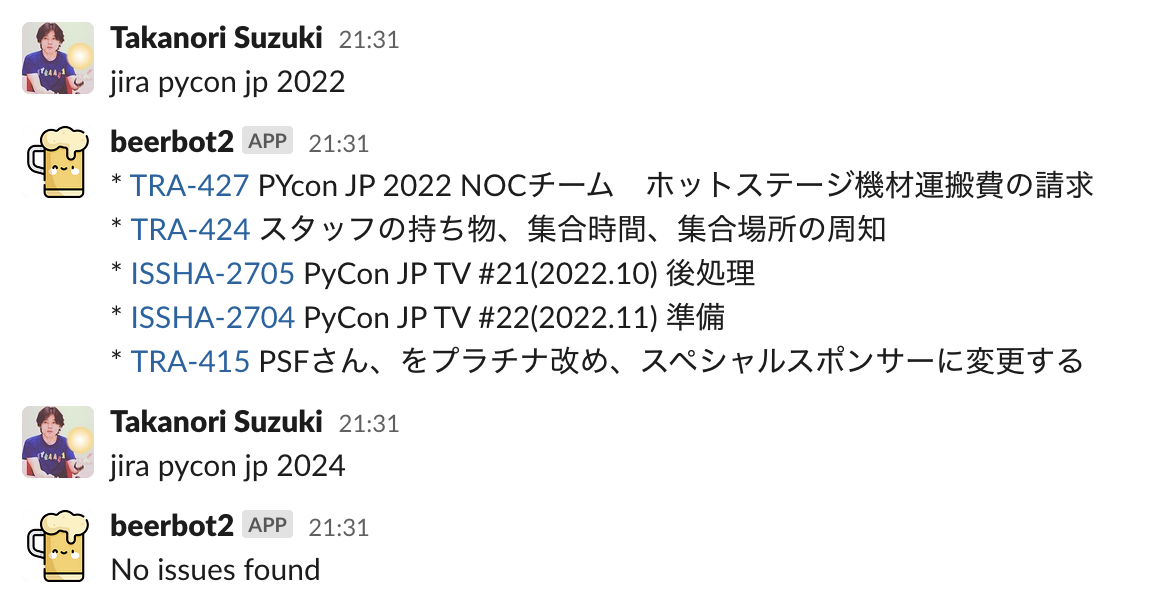
Search issues with Jira APIs 🔎
Jira API で課題を検索
Search issues with Jira APIs
Motivation
Jira is very useful
Jira Web is slow
Search issues without Jira Web
System overview / システム概要

about Python Jira
Python library to work with Jira APIs
$ pip install jiraAuthentication/ 認証
Create an API token
from jira import JIRA

url = "https://jira.atlassian.com/"
jira = JIRA(url, basic_auth=("email", "API token"))Search issues / 課題を検索
@app.message(re.compile(r"^jira (.*)$"))
def jira_search(message, context, say):
    keywords = context["matches"][0]
    jql = f'text ~ "{keywords}" order by created desc'
    text = ""
    # get 5 recent issues
    for issue in jira.search_issues(jql, maxResults=5):
        issue_id = issue.key
        url = issue.permalink()
        summary = issue.fields.summary
        text += f"* <{url}|{issue_id}> {summary}\n"
    if not text:
        text = "No issues found"
    say(text)
Free from Jira web! 🎉
Jira webからの 解放!
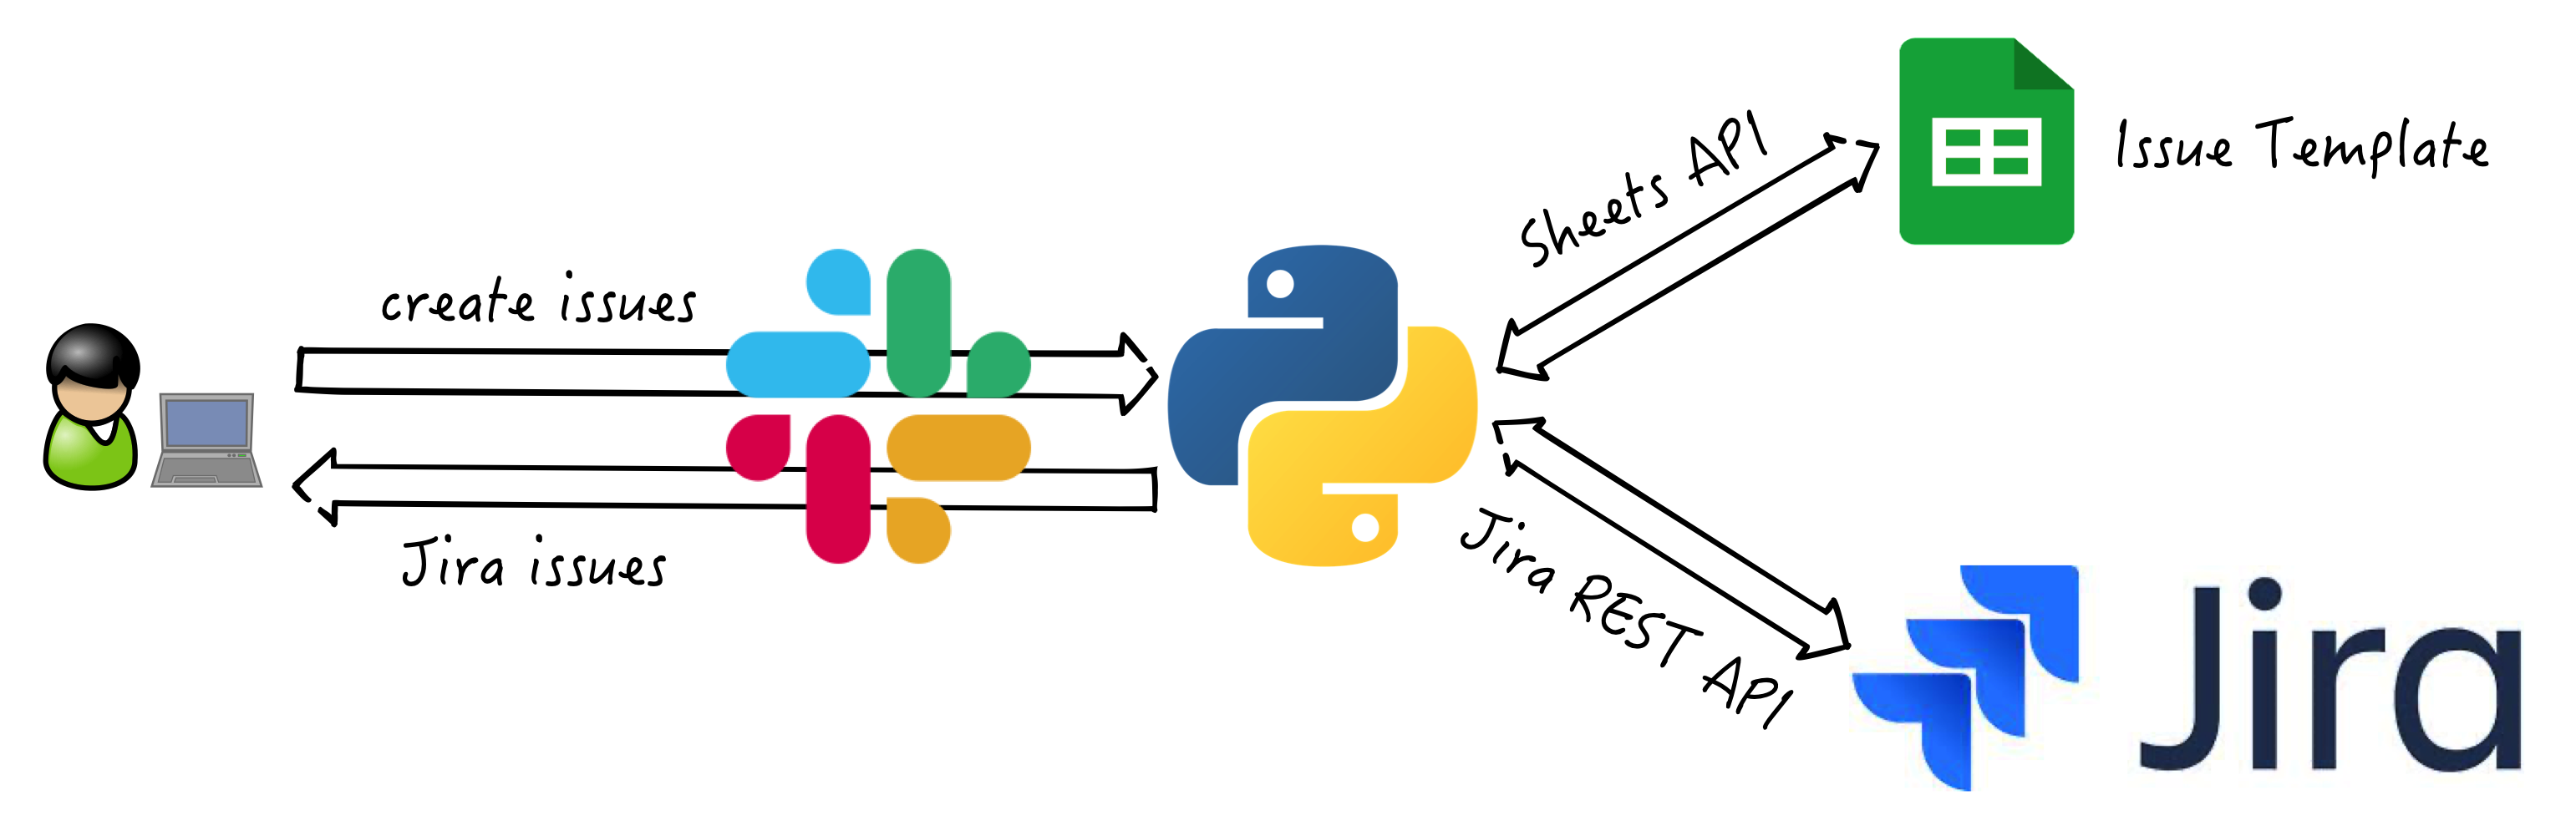
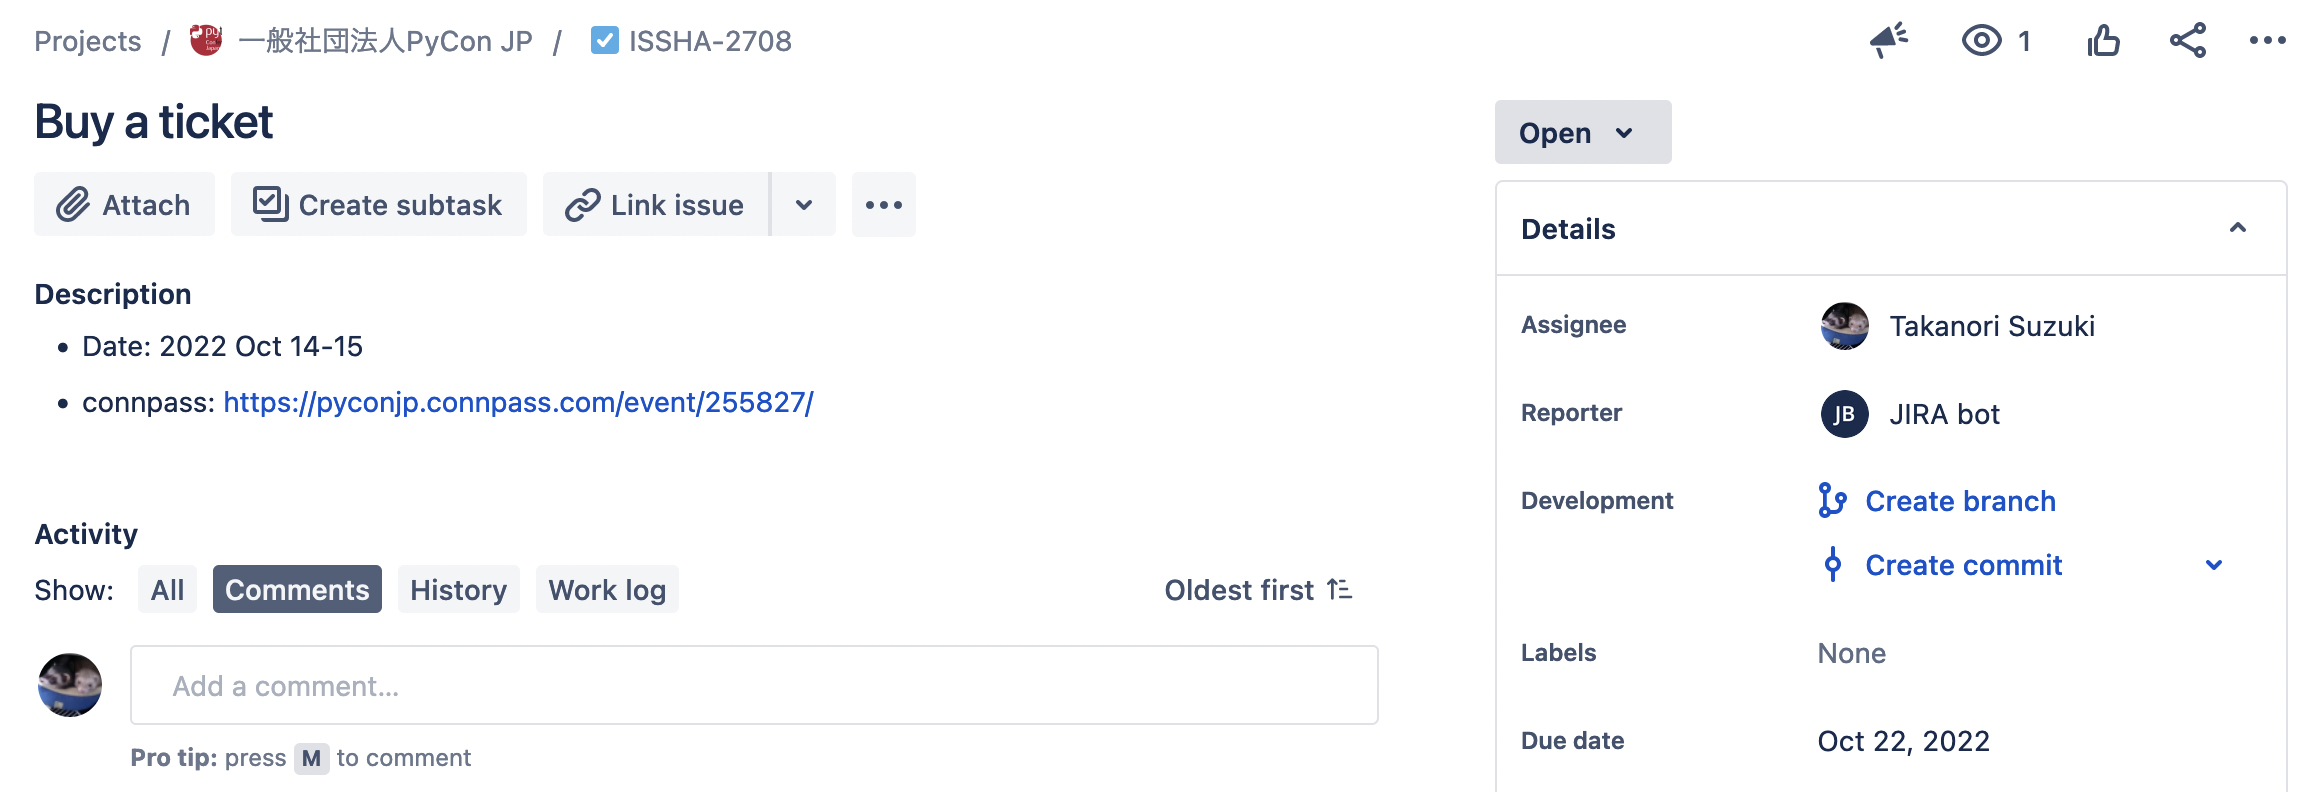
Create multiple issues from a template 📝
テンプレートから 複数の課題 を作成
Create multiple issues from a template
Motivation
In pycamp event, 20+ issues are required for each event
Copying issues by hand is painful
Jira Web is slow (again)
System overview / システム概要
Google Authorization is Complex
Googleの認証は複雑
Create a Google Cloud project
Enable API(in this case: Google Sheets API)
Download
credentials.json
Install Google Client Library
$ pip install google-api-python-client \
  google-auth-httplib2 google-auth-oauthlib
Download quickstart.py from GitHub
Google Authorization is Complex
Run
quickstart.pySelect your Google account in Web browser
Click “Accept” button
Get
token.json(finish!!)
$ python quickstart.py
Please visit this URL to authorize this application: https://accounts.google.com/o/oauth2/auth?....
Name, Major:
Alexandra, English
:Issue template / 課題テンプレート
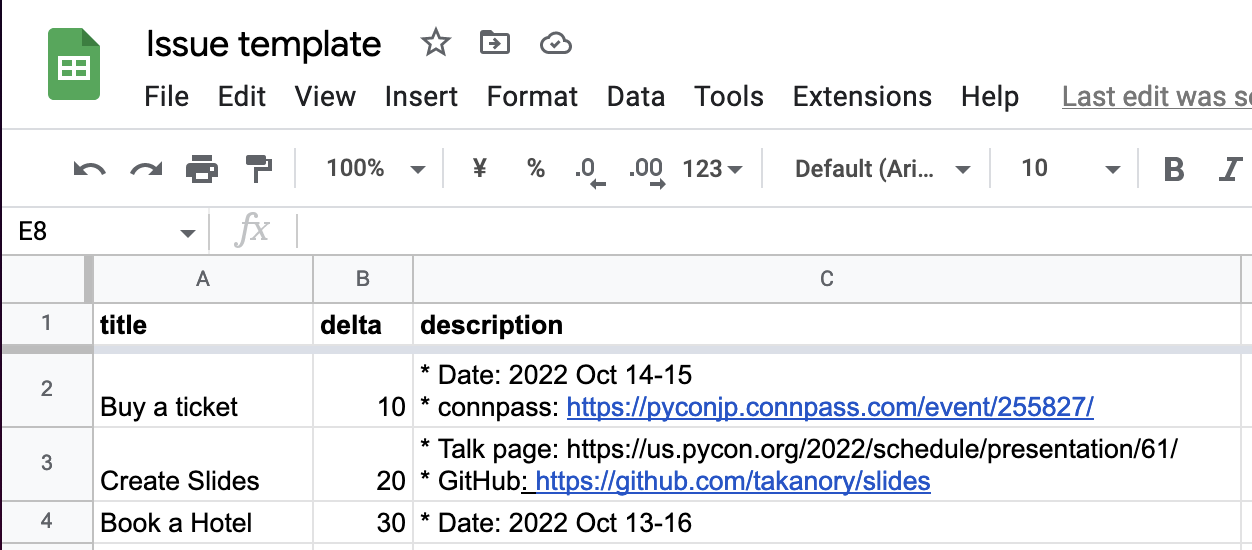
Get Spreadsheet data
スプレッドシートからデータを取得
from google.oauth2.credentials import Credentials
from googleapiclient.discovery import build
SCOPES = ["https://www.googleapis.com/auth/spreadsheets.readonly"]
SHEET = "SHEET_ID..."
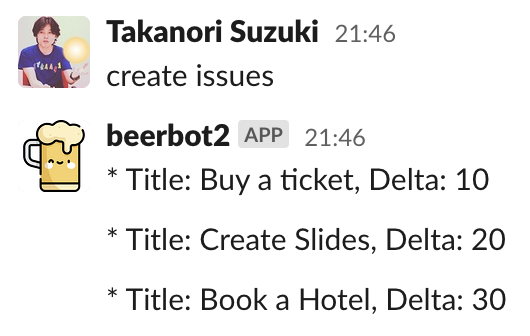
@app.message("create issues")
def create_issues(message, say):
creds = Credentials.from_authorized_user_file('token.json', SCOPES)
service = build('sheets', 'v4', credentials=creds)
sheet = service.spreadsheets()
result = sheet.values().get(spreadsheetId=SHEET, range="A2:C4").execute()
for row in result.get("values", []):
say(f"* Title: {row[0]}, Delta: {row[1]}")
Get Spreadsheet data

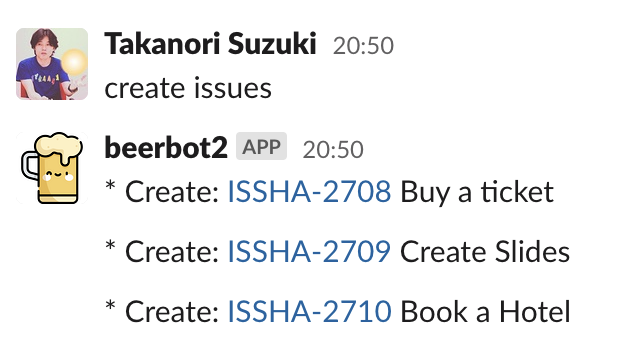
Create Jira issues / 課題を作成
def create_issues(message, say):
    # --snip--
    today = datetime.date.today()
    for row in result.get("values", []):
        duedate = today + datetime.timedelta(days=int(row[1]))
        issue_dict = {"project": {"key": "ISSHA"},
                      "summary": row[0],
                      "description": row[2],
                      "duedate": f"{duedate:%Y-%m-%d}",
                      "issuetype": {"name": "Task"}}
        issue = jira.create_issue(fields=issue_dict)
        url = issue.permalink()
        say(f"* Create: <{url}|{issue.key}> {row[0]}\n")
see: 2.1.4. Issues
Free from copying issues! 🎉
課題のコピーからの 解放!
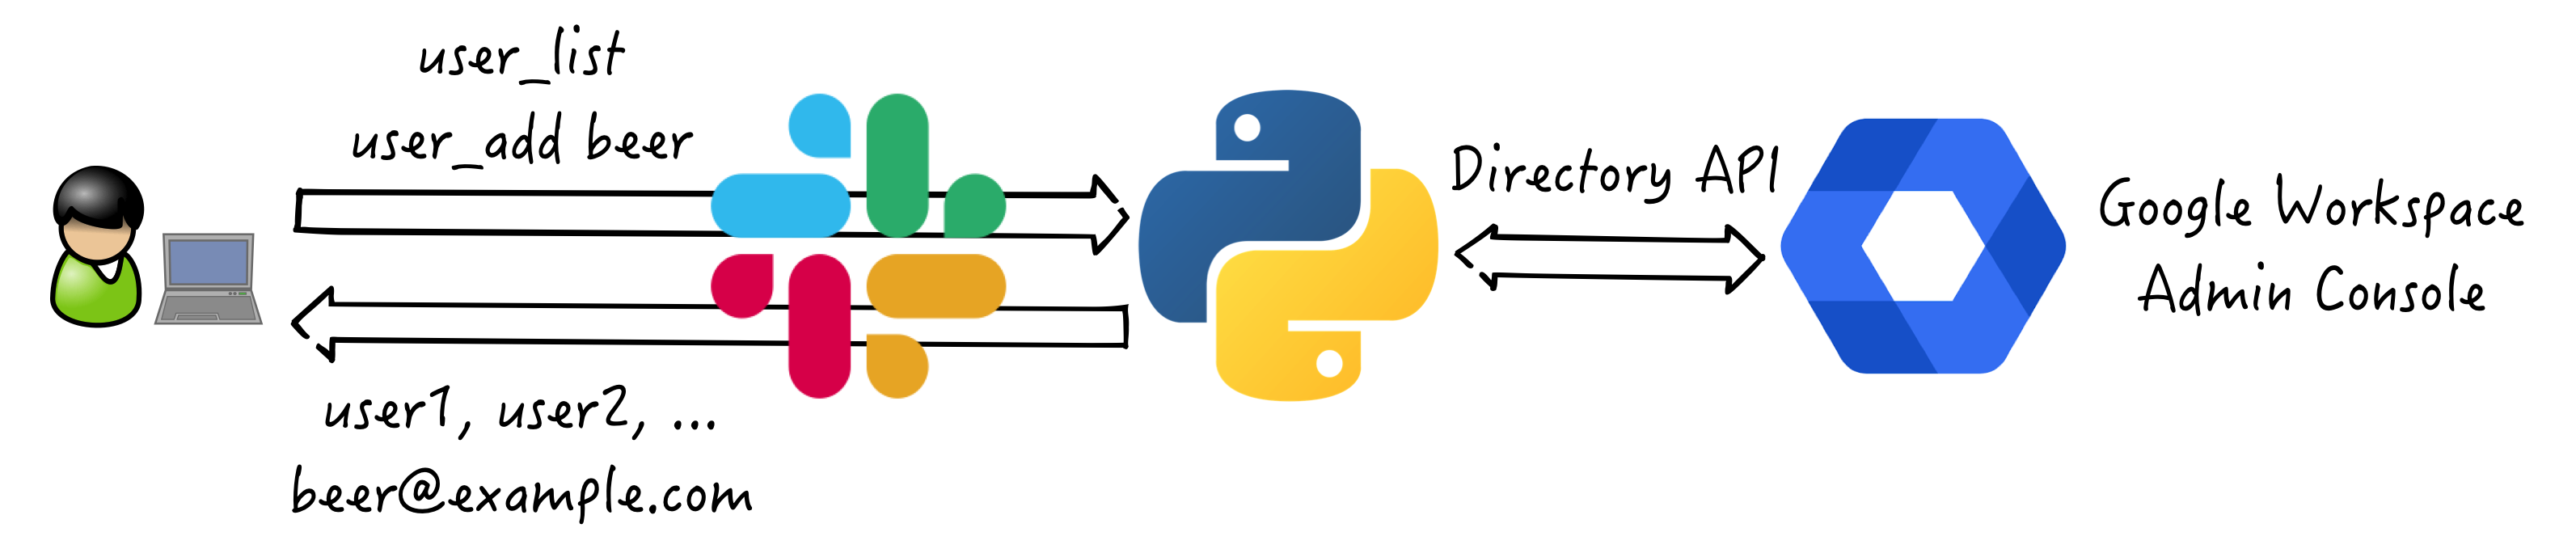
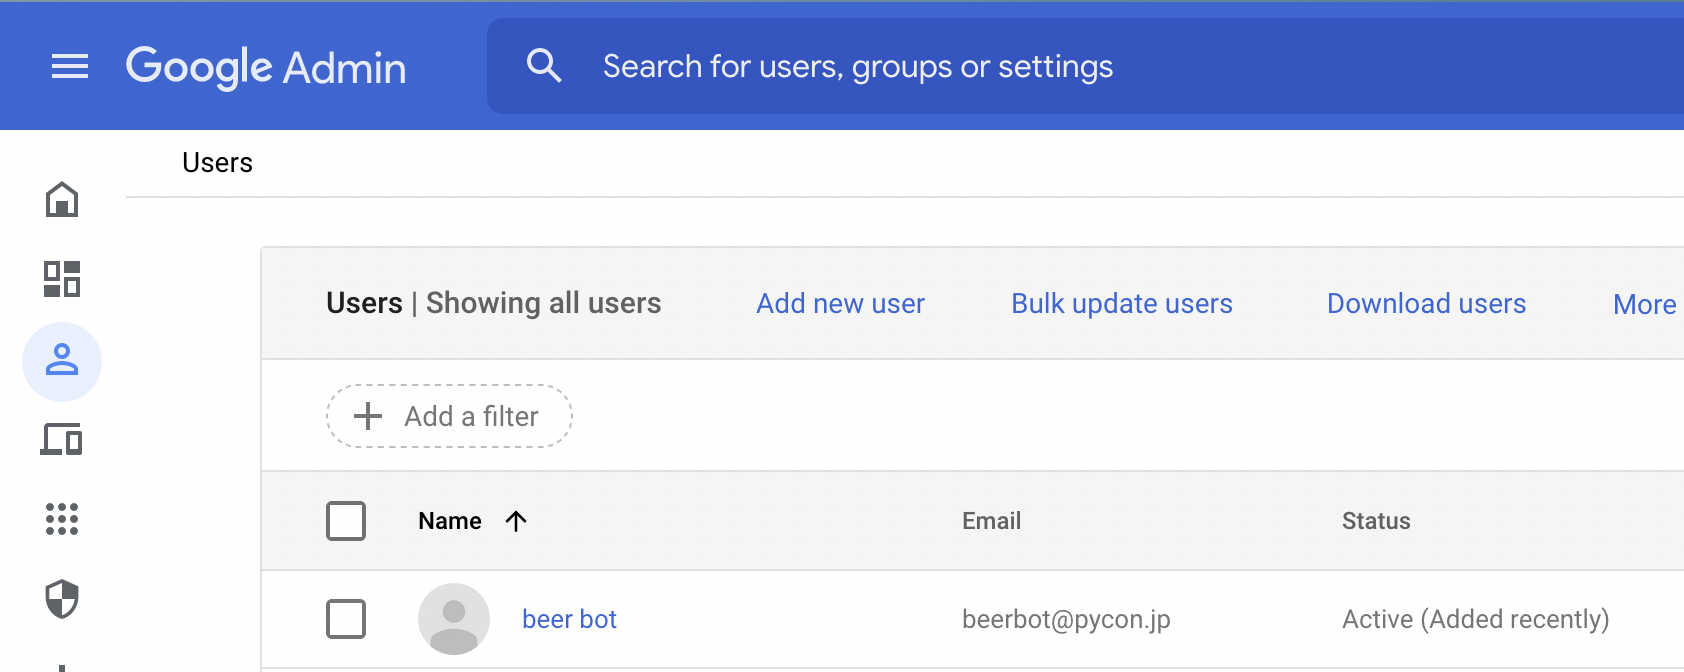
Account management of Google Workspace 👥
Google Workspaceでの アカウント管理
Account management of Google Workspace
Motivation
PyCon JP Association use
pycon.jpdomain with Google WorkspaceI only use Google Admin web occasionally
I forgot to use admin screen
System overview / システム概要
Update Google Authorization
Google 認証を更新
Update a Google Cloud project
add Directory API
re-download
credentials.json
Remove
token.jsonAdd Directory API
quickstart.pyRe-run
quickstart.pyGet new
token.json
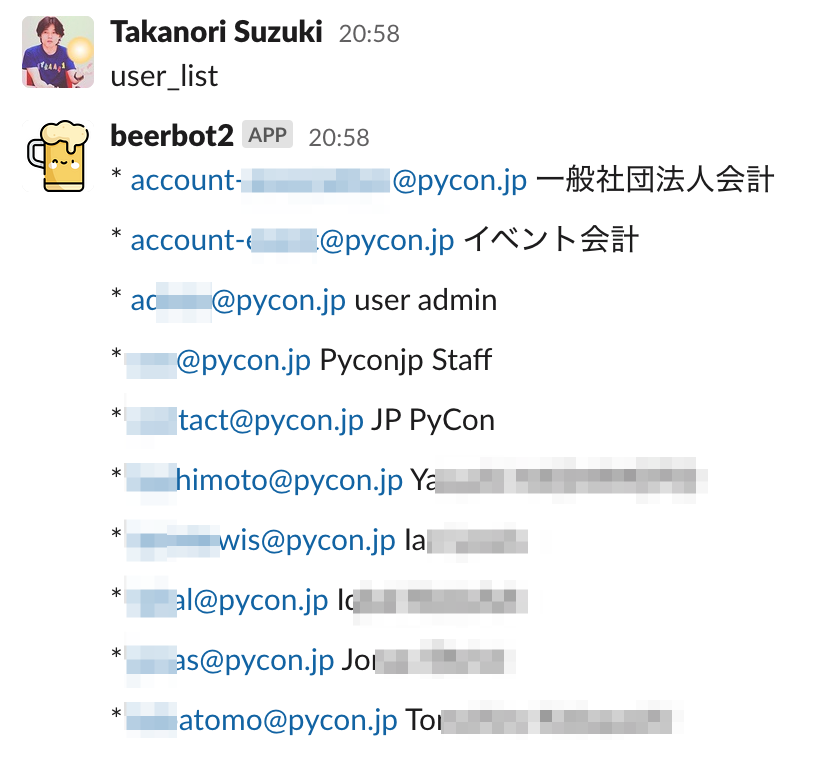
Get user list / ユーザー一覧を取得
SCOPES = ["https://www.googleapis.com/auth/admin.directory.user"]
creds = Credentials.from_authorized_user_file("token.json", SCOPES)
service = build("admin", "directory_v1", credentials=creds)

@app.message("user_list")
def user_list(message, say):
    """get Google Workspace users list"""
    users_list = service.users().list(
        orderBy="email", maxResults=10,
        customer="my_customer").execute()
    for user in users_list.get("users", []):
        email = user["primaryEmail"]
        fullname = user["name"]["fullName"]
        say(f"* {email} {fullname}")
Get user list / ユーザー一覧を取得
Add user / ユーザー追加
# user_add takanory hogehoge Takanori Suzuki
@app.message(re.compile(r"user_add (\w+) (\w+) (\w+) (\w+)"))
def insert_user(message, say, context):
    """insert Google Workspace user"""
    body = {
        "primaryEmail": context["matches"][0] + "@pycon.jp",
        "password": context["matches"][1],
        "name": {
            "givenName": context["matches"][2],
            "familyName": context["matches"][3],
        }
    }
    service.users().insert(body=body).execute()
    say(f"User {body['primaryEmail']} created")
Add user / ユーザー追加
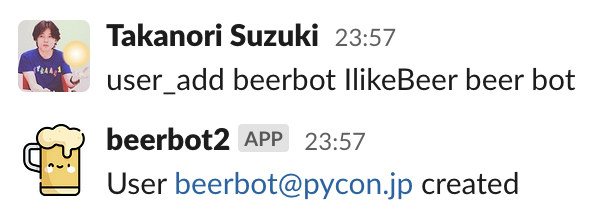
I can forget Google Admin! 🎉
Google Adminを 忘れられる!
Security Issue / セキュリティ課題 🔓
Anyone can run it
Run only Slack Admin 🔒
Only Admin can run / 管理者 のみ実行可
Add
users:readscope, use users.info API
def is_admin(client, user_id):
    # get user info: https://api.slack.com/methods/users.info
    response = client.users_info(user=user_id)
    return response.data["user"]["is_admin"]

@app.message("user_list")
def user_list(message, say, client):
    """get Google Workspace users list"""
    if not is_admin(client, message["user"]):
        say("You are not an admin!")
        return
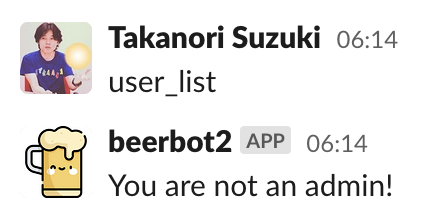
Resolve a security issue 🎊
セキュリティ上の課題も 解決
Summary / まとめ 📋
Simple bot using Incoming Webhooks
Interactive bot using Bolt for Python
Extend bot using libraries and APIs
Next Step / 次のステップ 🪜
Let’s make your Slackbot
Let’s connect with libraries and APIs
Automate your Boring Stuff with Slackbot
Thank you! 🙏
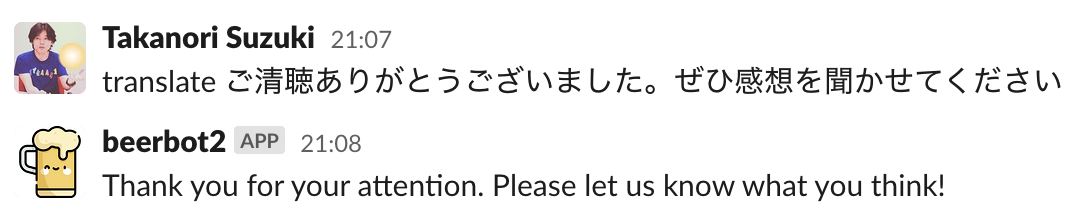
translate command
$ pip install deeplimport deepl
translator = deepl.Translator(os.environ["DEEPL_AUTH_KEY"])
@app.message(re.compile(r"^translate (.*)"))
def translate(message, context, say):
"""translate text into English"""
text = context["matches"][0]
result = translator.translate_text(
text,
target_lang="EN-US",
)
say(result.text)
Thank you! 🙏